Kia Optima: Hood / Hood Latch
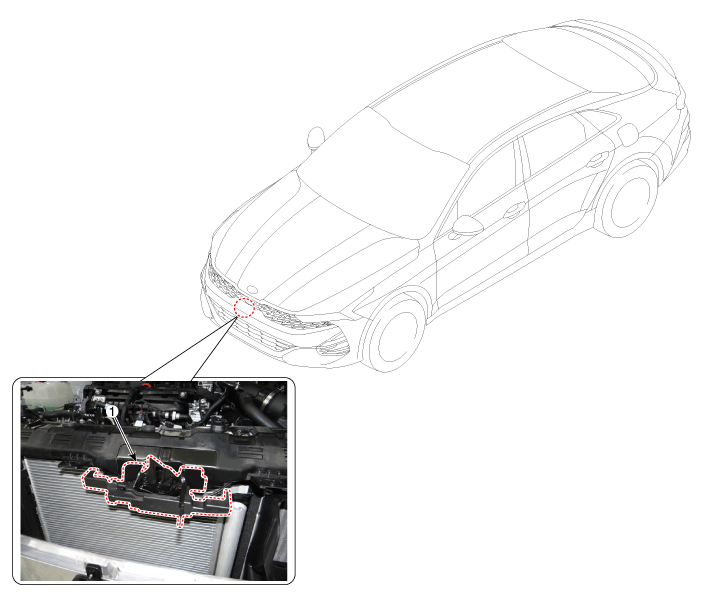
Components and components location
| Component Location |

| 1. Hood latch assembly |
Repair procedures
| Replacement |
| 1. |
Remove the front bumper assembly. (Refer to Front Bumper - "Front Bumper Assembly") |
| 2. |
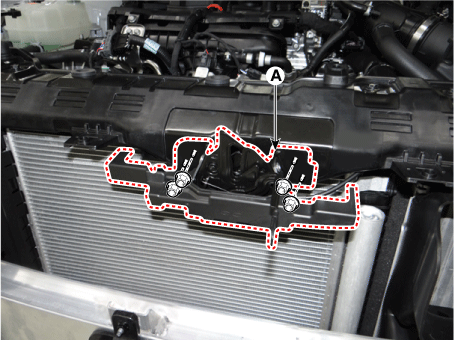
Loosen the mounting nuts and remove the hood latch assembly (A).
|
| 3. |
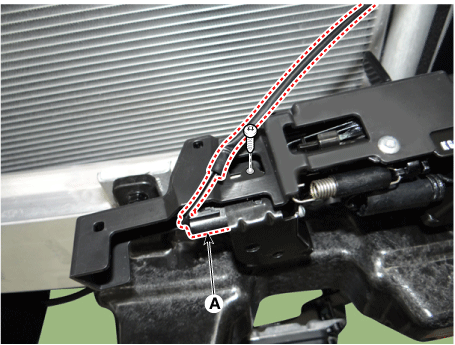
Disconnect the hood latch connector (A) after loosening the screw.
|
| 4. |
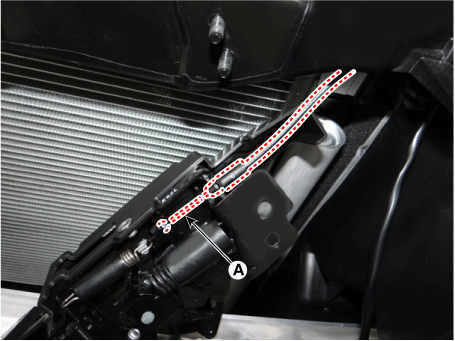
Disconnect the hood latch cable (A) and remove the hood latch assembly.
|
| 5. |
To install, reverse the removal procedure.
|
 Hood Latch Release Handle
Components and components location
Component Location
1. Hood latch release handle
Repair procedures
Replacement
1.
Usin ...
 Trunk Lid
Repair procedures
Adjustment
1.
Place the car on a flat surface and check whether the body and trunk
lid are well-aligned.
2.
After loosening ...
Other information:
Kia Optima DL3 2019-2024 Service and Repair Manual: Auto Defoging Actuator
Components and components location Components Location 1. Auto logging actuator Description and operation Description The auto defogging sensor is installed on front window glass. The sensor judges and sends signal if moisture occurs to ...
Kia Optima DL3 2019-2024 Service and Repair Manual: Surround View Monitor (SVM) Camera
Schematic diagrams Connector and Terminal function Front View Camera Side View Camera Rear View Camera Repair procedures Removal In case of bad quality or poor focus, be sure to check the ...
Copyright © www.kioptima.com 2017-2024


