
Kia Optima DL3: Body Side Molding / Roof Side Molding
Repair procedures
| Replacement |
Put on gloves to prevent hand injuries. |

When removing with a flat-tip screwdriver or remover, wrap protective tape around the tools to prevent damage to components. |

| 1. |
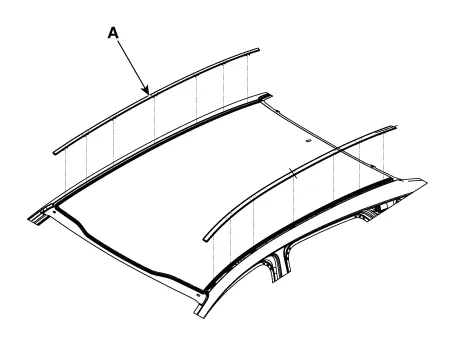
Using a remover and remove the roof side molding (A).
|

| 2. |
To install, reverse the removal procedure.
|
Repair procedures Replacement Put on gloves to prevent hand injuries.
Other information:
Kia Optima DL3 2019-2026 Service and Repair Manual: Walk-in Switch
Components and components location Component Location 1. Walk-in switch Repair procedures Removal When prying with a flat-tip screwdriver or use a prying trim tool, wrap it with protective tape, and apply prote
Kia Optima DL3 2019-2026 Service and Repair Manual: Washer Motor
Repair procedures Inspection Washer Motor 1. With the washer motor connected to the reservoir tank, fill the reservoir tank with water. Before filling the reservoir tank with water, check the filter for foreign mat
Categories
- Manuals Home
- Kia Optima Owners Manual
- Kia Optima Service Manual
- Charging System
- CVVT Oil Control Valve (OCV)
- Lift And Support Points
- New on site
- Most important about car
