Kia Optima DL3: Air Conditioning System / A/C Pressure Transducer
Description and operation
| Description |
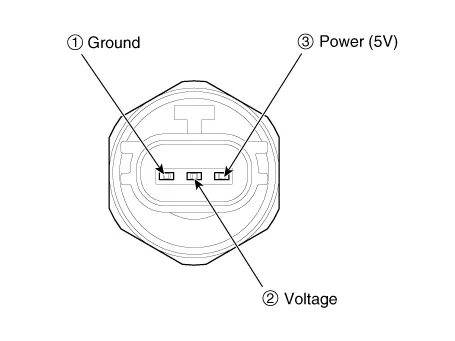
The A/C Pressure Transducer (APT) converts the pressure value of high pressure line into voltage value after measuring it. By converted voltage value, engine ECU controls the cooling fan by operating it high speed or low speed. Engine ECU stops the operation of the compressor when the temperature of refrigerant line is very high or very low irregularly to optimize air conditioning system.
Repair procedures
| Inspection |
| 1. |
Measure the pressure of high pressure line by measuring voltage output between terminal "1" and "2".
|
| 2. |
Inspect the voltage value whether it is sufficient to be regular value or not.
|
| 3. |
If the measured voltage value is not wihtin specification, replace the A/C pressure transducer. |
| Replacement |
| 1. |
Disconnect the negative (-) battery terminal. |
| 2. |
Recover the refrigerant with a recovery / charging station. |
| 3. |
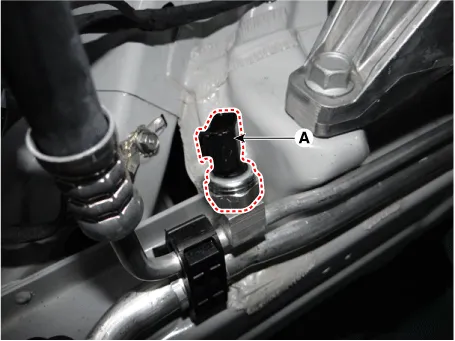
Press the lock pin and separate the A/C Pressure transducer connector (A).
|

| 4. |
Remove the A/C pressure transducer (A).
|

| 5. |
To install, reverse the removal procedure.
|

Repair procedures Replacement 1. Remove the condenser. 2. Remove the cap (A) on the bottom of the condenser with a L wrench.
Description and operation Description The evaporator temperature sensor will detect the evaporator core temperature and interrupt compressor relay power in order to prevent evaporator from freezing by excessive cooling.
Other information:
Kia Optima DL3 2019-2026 Service and Repair Manual: Ventilated and Heated Seat Switch
Schematic diagrams Connector and Terminal Function [Front Seat] [Ventilation+Heater Type / Non-Heater Type] Pin Function Pin Function Ventilation+Heater Type Non-Heater Type Ventilation+Heater Type Non-Heater Type
Kia Optima DL3 2019-2026 Service and Repair Manual: Auto Defoging Actuator
Components and components location Components Location 1. Auto logging actuator Description and operation Description The auto defogging sensor is installed on front window glass. The sensor judges and sends signal if moisture occurs to blow out wind for defogging.
Categories
- Manuals Home
- Kia Optima Owners Manual
- Kia Optima Service Manual
- Motor Driven Power Steering
- Charging System
- Cooling System
- New on site
- Most important about car
