Kia Optima DL3: Air Conditioning System / Receiver-Drier
Repair procedures
| Replacement |
| 1. |
Remove the condenser. |
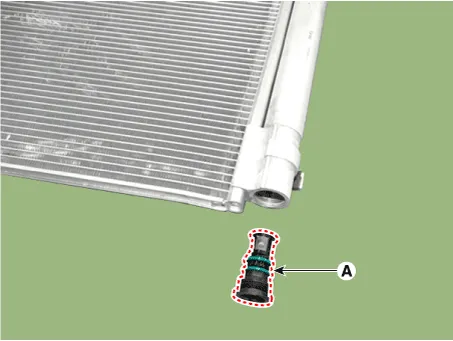
| 2. |
Remove the cap (A) on the bottom of the condenser with a L wrench.
|
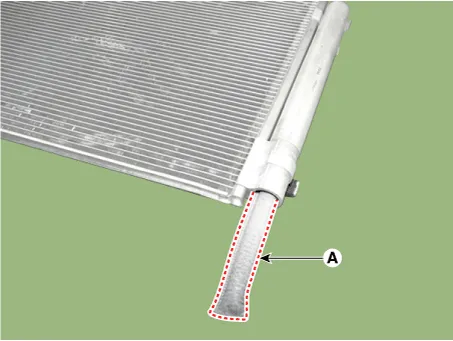
| 3. |
Remove the receiver-drier (A) from condenser using a long nose plier. Check for crumbled receiver-drier and clogged bottom cap filter.
|
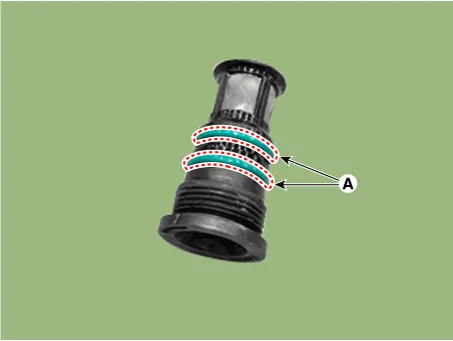
| 4. |
Apply air conditioning compressor oil along the O-rings and threads of the new bottom cap. |
| 5. |
Insert a new receiver-drier into the receiver drier tank. The receiver-drier must be sealed in vacuum before it is exposed to air for use. |
| 6. |
Install a new bottom cap to the condenser.
|

Components and components location Components Location 1. Condenser Repair procedures Inspection 1.
Description and operation Description The A/C Pressure Transducer (APT) converts the pressure value of high pressure line into voltage value after measuring it.
Other information:
Kia Optima DL3 2019-2026 Service and Repair Manual: Rear Combination Lamp
Components and components location Component Location 1. Tail lamp 2. Stop lamp 3. Tail/Stop lamp 4. Back up lamp 5. Turn signal lamp Schematic diagrams Connector and Terminal Function [A Type] Pin Function Center Ou
Kia Optima DL3 2019-2026 Service and Repair Manual: Wiper Motor
Schematic diagrams Connector and Terminal Function Pin Function 1 Ground (-) 2 Parking 3 Power (+) 4 Low 5 High Repair procedures Remova
Categories
- Manuals Home
- Kia Optima Owners Manual
- Kia Optima Service Manual
- Suspension System
- Engine Mechanical System
- Heating, Ventilation and Air Conditioning
- New on site
- Most important about car
