Kia Optima DL3: Drive Belt System / Drive Belt
Repair procedures
| Removal and Installation |
| 1. |
Remove the engine room under cover. (Refer to Engine and Transaxle Assembly - "Engine Room Under Cover") |
| 2. |
Using the wrench, turning the auto tensioner pulley (A) counterclockwise and then remove the drive belt (B).
|
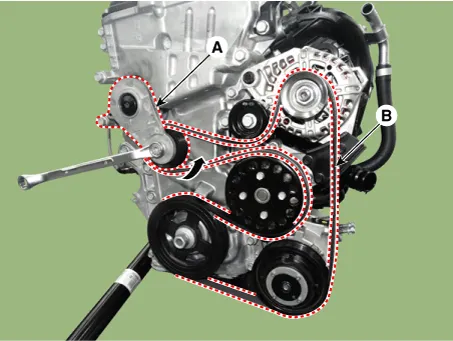
| 3. |
Install in the reverse order of removal. |
| Inspection |
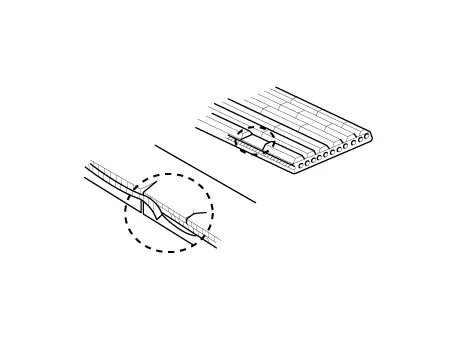
| 1. |
Check belt for maintenance and abnormal wear of V-ribbed part. Replace if necessary.
|

| 2. |
Visually check the belt for excessive wear, frayed cords etc. If any defect has been found, replace the drive belt.
|
Components and components location Components 1. Drive belt tensioner Repair procedures Removal and Installation 1.
Other information:
Kia Optima DL3 2019-2026 Service and Repair Manual: Integrated Body Control Unit (IBU)
Components and components location Component Location 1. Integrated Body Control Unit (IBU) Schematic diagrams Connector and Terminal Function [Non-Smart key] Pin Function Connector A Connector B
Kia Optima DL3 2019-2026 Service and Repair Manual: Compressor
Description and operation Description The compressor is the power unit of the A/C system. It is located on the side of engine block and driven by a V-belt of the engine. The compressor changes low pressure and low temperature refrigerant gas into high pressure and high temperature refrigerant gas.
Categories
- Manuals Home
- Kia Optima Owners Manual
- Kia Optima Service Manual
- Body (Interior and Exterior)
- Cooling System
- Lift And Support Points
- New on site
- Most important about car
