Kia Optima DL3: Hydraulic System / Torque Converter Control Solenoid Valve (T/CON_VFS)
Specifications
| Specification |
|
Control type |
N/L (Normal Low) |
|
Control pressure kpa (kgf/cm², psi) |
0 - 519.75 (0 - 5.3, 0 - 75.38) |
|
Current (mA) |
0 - 850 |
|
Coil resistance (Ω) |
5.1 ± 0.3 |
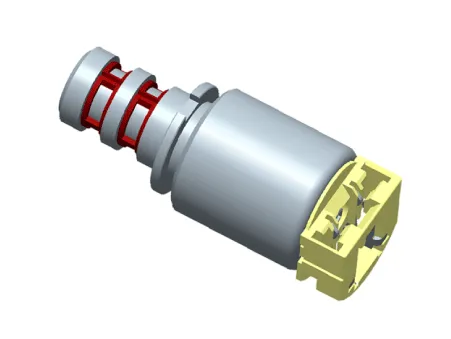
Description and operation
| Description |
| • |
Torque converter control solenoid valve is a Variable Force Solenoid (VFS) type. |
| • |
When TCM supplies variable current to solenoid valve, hydraulic pressure of torque converter clutch is controlled by solenoid valve.
|
Components and components location
| Component Location |
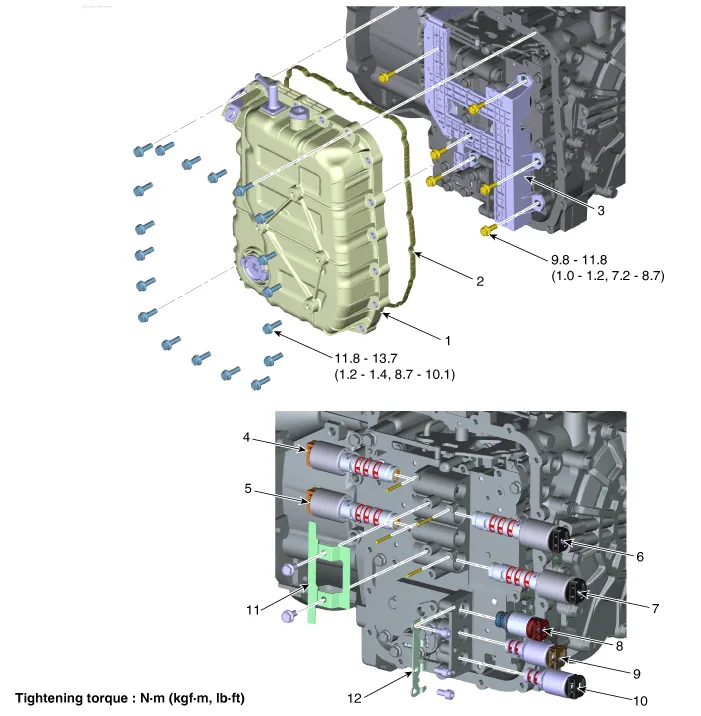
| 1. Valve Body Cover |
8. SS-A ON/OFF Solenoid Valve
|
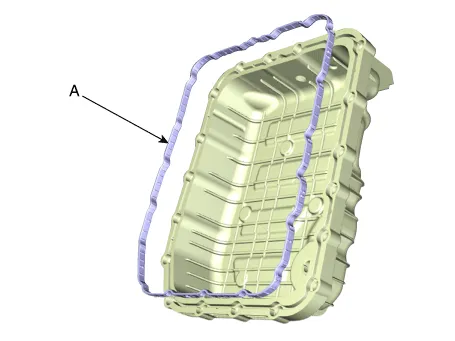
| 2. Valve Body Gasket |
9. Torque Converter Control Solenoid
Valve |
| 3. Main Harness |
10. Line Pressure Control Solenoid
Valve |
| 4. 26 Brake Control Solenoid
Valve |
11. Support Bracket |
| 5. 35R Clutch Control Solenoid
Valve |
12. Support Bracket |
| 6. Underdrive Brake Control Solenoid
Valve |
|
| 7. Overdrive Clutch Control Solenoid
Valve |
Repair procedures
| Inspection |
| 1. |
The automatic transaxle system can be more quickly diagnosed for troubles by using the vehicle diagnostic system (KDS). (Refer to "DTC guide") KDS provides the following information
|
| Component inspection |
| 1. |
Switch "OFF" ignition. |
| 2. |
Remove the air cleaner assembly. (Refer to Engine Mechanical System - "Air cleaner") |
| 3. |
Remove the battery and battery tray. (Refer to Engine Electrical System - "Battery") |
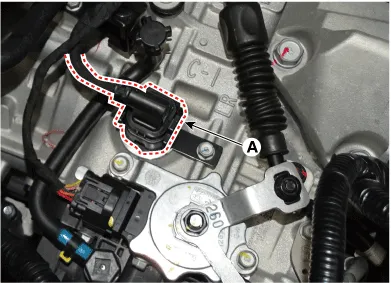
| 4. |
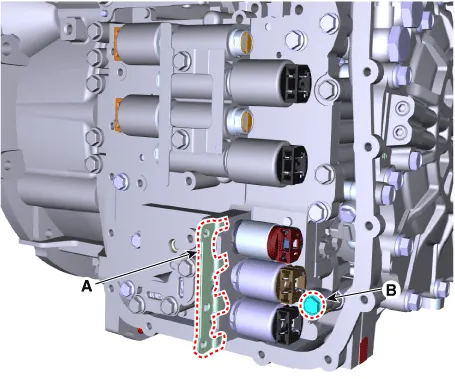
Disconnect the solenoid valve connector (A).
|
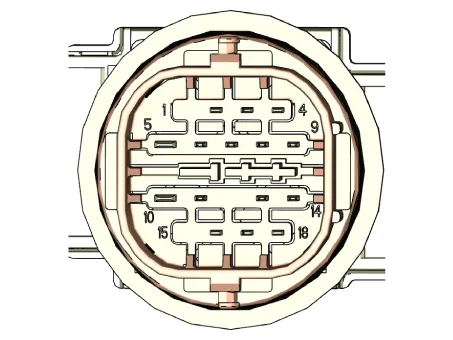
| 5. |
Measure the resistance between power terminal (10) and signal terminal (2).
|
| Removal |
|

| 1. |
Remove the under cover. (Refer to Engine Mechanical System - "Engine Room Under Cover") |
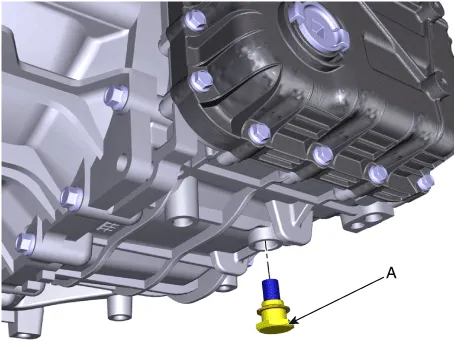
| 2. |
Remove the ATF drain plug (A), allow the fluid to drain out and then reinstall the drain plug.
|
| 3. |
Remove the air duct and air cleaner assembly. (Refer to Engine Mechanical System - "Air cleaner") |
| 4. |
Remove the fixing clip (A) and the air breather hose (B).
|

| 5. |
Separate the ATF cooler hose (A).
|
| 6. |
Lift the vehicle after loosening valve body cover upper bolts. |
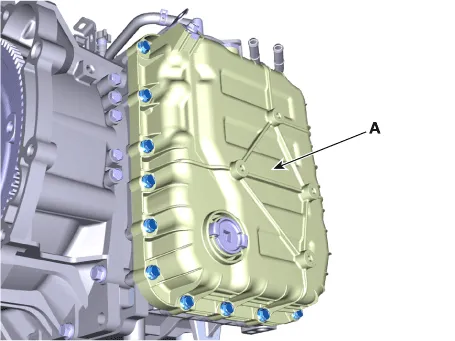
| 7. |
Remove the valve body cover (A) by loosening bolts.
|
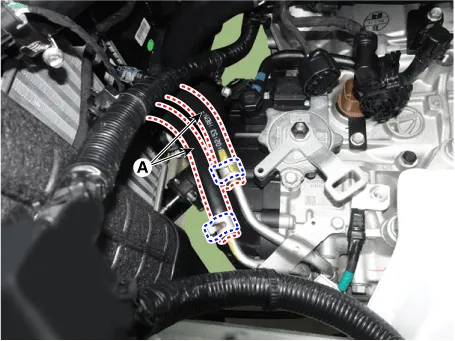
| 8. |
Remove the main harness (A) after removing the bolts.
|
| 9. |
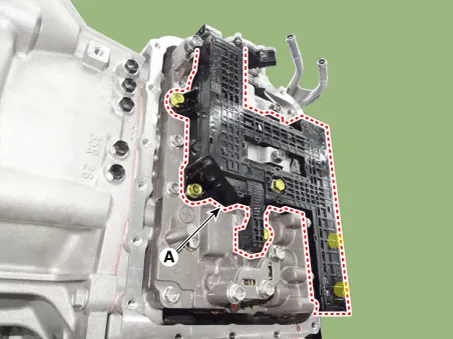
Remove solenoid valve support bracket (A) and then loosen the valve body mounting bolt (B).
|
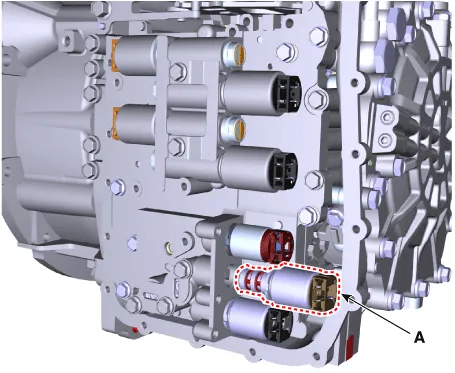
| 10. |
Remove the torque converter control solenoid valve (A).
|
| Installation |
| 1. |
Install in the reverse order of removal.
|
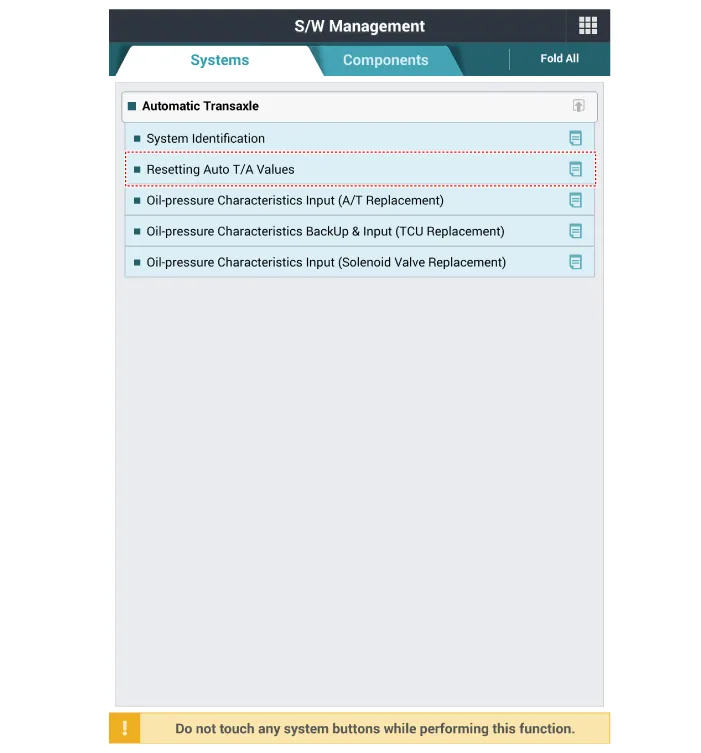
| 2. |
Perform the procedures below after installing.
|
Repair procedures Removal If ATF is leaking due to damage on O-ring, replace O-ring with a new one.
Specifications Specification Item Specification Control type N/L (Normal Low) Control pressure (kpa (kgf/cm², psi)) 0 - 1,569.
Other information:
Kia Optima DL3 2019-2026 Service and Repair Manual: Overhead Console Lamp
Schematic diagrams Connector and Terminal Function [A Type] Connector A Pin E xcept Russia Region Russia only Function Function 1 Battery (+) Battery (+)
Kia Optima DL3 2019-2026 Service and Repair Manual: Receiver-Drier
Repair procedures Replacement 1. Remove the condenser. 2. Remove the cap (A) on the bottom of the condenser with a L wrench. Tightening torque : 9.81 - 14.71 N.
Categories
- Manuals Home
- Kia Optima Owners Manual
- Kia Optima Service Manual
- Heating, Ventilation and Air Conditioning
- Thermostat
- Headlamps
- New on site
- Most important about car
