Kia Optima: Hood / Hood Assembly
Kia Optima DL3 2019-2025 Service and Repair Manual / Body (Interior and Exterior) / Hood / Hood Assembly
Components and components location
| Component Location |
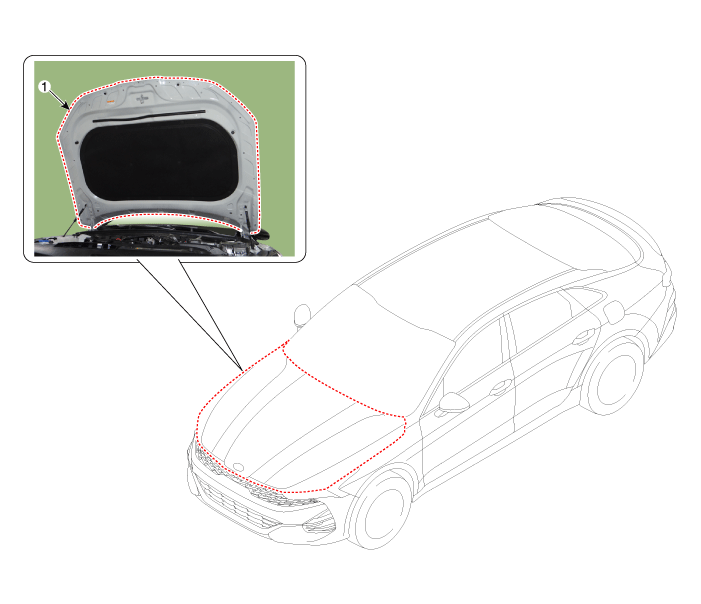
| 1. Hood assembly |
Repair procedures
| Replacement |
When removing the fender, wrap protective tape around a screwdriver or remover not to damage components. |

Removing or installing the hood requires an assistant. |

| 1. |
After loosening the hood hinge (A) mounting bolts, remove the hood assembly (B).
|
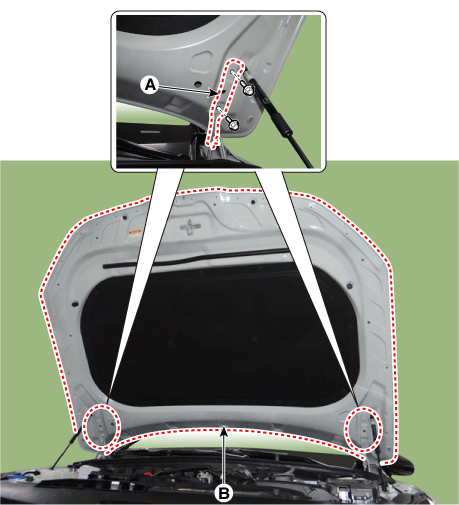
| 2. |
To install, reverse the removal procedure.
|
 Hood
Hood
Repair procedures
Adjustment
1.
After loosening the hinge (A) mounting bolt, adjust the hood (B) by moving
it up and down or from side to side and tighten the bolt.
...
 Hood Insulator Pad
Repair procedures
Replacement
1.
Using a clip remover, remove the clips and then the hood insulator pad
(A).
...
Other information:
Kia Optima DL3 2019-2025 Owner's Manual: Air bag non-inflation conditions
• In certain low-speed collisions the air bags may not deploy. The air bags are designed not to deploy in such cases because they may not provide benefits beyond the protection of the seat belts in such collisions. • Air bags are not designed to inflate in rear collisions, because occup ...
Kia Optima DL3 2019-2025 Service and Repair Manual: MDPS System
Repair procedures Inspection 1. MDPS power pack assembly failure can be quickly diagnosed using the vehicle diagnostic system (KDS). (1) Self-diagnosis: Checking failure and providing DTC code. (2) Curre ...
Copyright © www.kioptima.com 2017-2025
