Kia Optima DL3: Body (Interior and Exterior) / Hood
Repair procedures
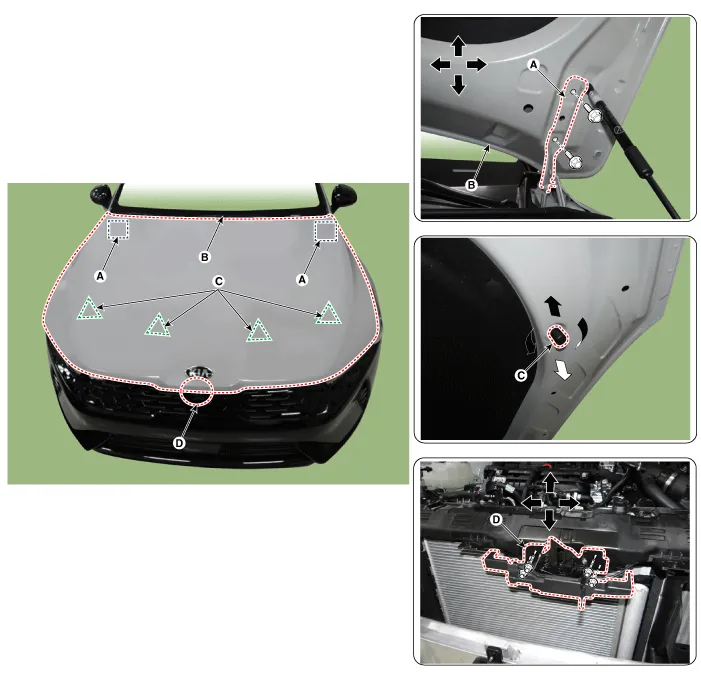
| Adjustment |
| 1. |
After loosening the hinge (A) mounting bolt, adjust the hood (B) by moving it up and down or from side to side and tighten the bolt. |
| 2. |
Adjust the hood height by moving the hood overslam bumpers (C) up and down. |
| 3. |
After loosening the hood latch (D) mounting bolts, adjust the latch by moving it up and down or from side to side.
|
Components and components location Component Location 1. Fender assembly Repair procedures Replacement • When removing the fender, wrap protective tape around a screwdriver or remover not to damage components.
Components and components location Component Location 1. Hood assembly Repair procedures Replacement When removing the fender, wrap protective tape around a screwdriver or remover not to damage components.
Other information:
Kia Optima DL3 2019-2026 Service and Repair Manual: Power Window Motor
Schematic diagrams Circuit Diagram [Safety Window Motor] [Standard Window Motor] Repair procedures Inspection Front Power Window Motor 1. Disconnect the negative battery terminal. 2.
Kia Optima DL3 2019-2026 Service and Repair Manual: Heater & A/C Control Unit (Manual)
Components and components location Components Connector Pin Function [Connector A] Pin NO Funtion Pin NO Funtion 1 Battery (+) 21 IGN2 2 ILL+ (TAIL) 22 IGN1
Categories
- Manuals Home
- Kia Optima Owners Manual
- Kia Optima Service Manual
- Air bag collision sensors
- Engine Mechanical System
- Automatic Transaxle System
- New on site
- Most important about car
