Kia Optima DL3: Hydraulic System / Fluid
Repair procedures
| Inspection |
Automatic Transaxle Fluid (ATF) Level Check
When checking the ATF level, be careful not to allow foreign substance (like dust) to enter through the filler hole. |

| 1. |
Remove the inhibitor switch. (Refer to Automatic Transaxle Control System - "Inhibitor Switch") |
| 2. |
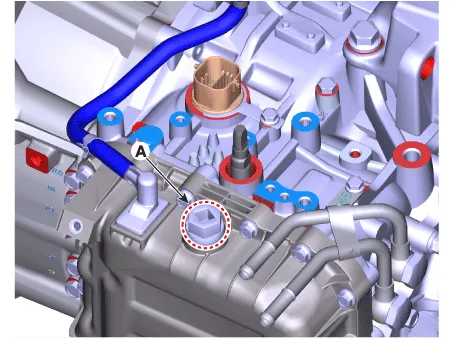
Add 0.7 liters of ATF SP-IV through the ATF filler hole after removing the eyebolt (A).
|
| 3. |
Start the engine to warm up the ATF.
|
| 4. |
Check by using KDS that the temperature of the ATF is between 50°C and 60°C (122 - 140°F). |
| 5. |
Move the shift lever slowly from "P" to "D", then back to "P". Repeat this sequence two times and then move the shift lever to "P" range.
|
| 6. |
Remove the under cover. (Refer to Engine Mechanical System - "Engine Room Under Cover") |
| 7. |
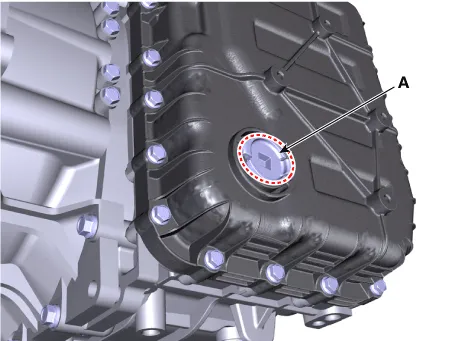
Lift the vehicle and remove the ATF level plug (A) from the valve body cover.
|
| 8. |
Check the ATF level.
|
| 9. |
Install the ATF level plug (A).
|
| 10. |
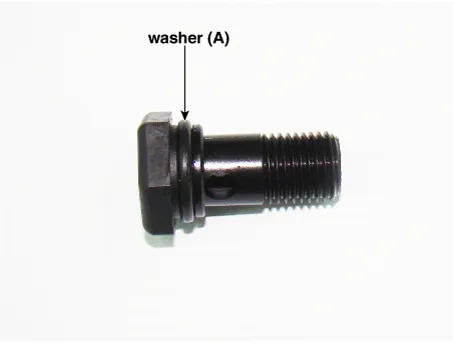
Lower the vehicle and install the eyebolt (A).
|
| 11. |
Install the inhibitor switch. (Refer to Automatic Transaxle Control System - "Inhibitor Switch") |
| Replacement |
| 1. |
Remove the under cover. (Refer to Engine Mechanical System - "Engine Room Under Cover") |
| 2. |
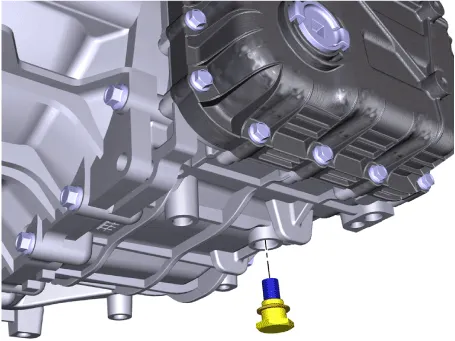
Remove the ATF drain plug (A), allow the fluid to drain out and then reinstall the drain plug.
|
| 3. |
Remove the inhibitor switch. (Refer to Automatic Transaxle Control System - "Inhibitor Switch") |
| 4. |
Remove the eyebolt (A).
|
| 5. |
Fill the automatic transaxle with about 5.0 liters of ATF SP-IV through the ATF filler hole. |
| 6. |
Perform the ATF level check procedure. (Refer to Fluid - "Inspection") |
Components and components location Components Location 1. Automatic transaxle 2. Oil filter 3. Mechanical oil pump 4.
Repair procedures Replacement It is not recommended to replace the valve body .
Other information:
Kia Optima DL3 2019-2026 Service and Repair Manual: Ventilated and Heated Seat
Schematic diagrams Connector and Terminal Function Pin Function Connector A Connector B 1 Driver heater ground (-) Driver blower speed (+) 2 Passenger heater ground (-) - 3
Kia Optima DL3 2019-2026 Service and Repair Manual: Relaxion Comfort Seat
Components and components location Component Location 1. Relaxion comfort switch 2. Walk-in switch 3. Relaxion comfort seat unit (RCSU) Schematic diagrams Connector and Terminal Function Pin Function Connector A Co
Categories
- Manuals Home
- Kia Optima Owners Manual
- Kia Optima Service Manual
- Instrument panel overview
- Charging System
- Restraint
- New on site
- Most important about car
