
Kia Optima DL3: Intake And Exhaust System / Exhaust Manifold
Components and components location
| Components |
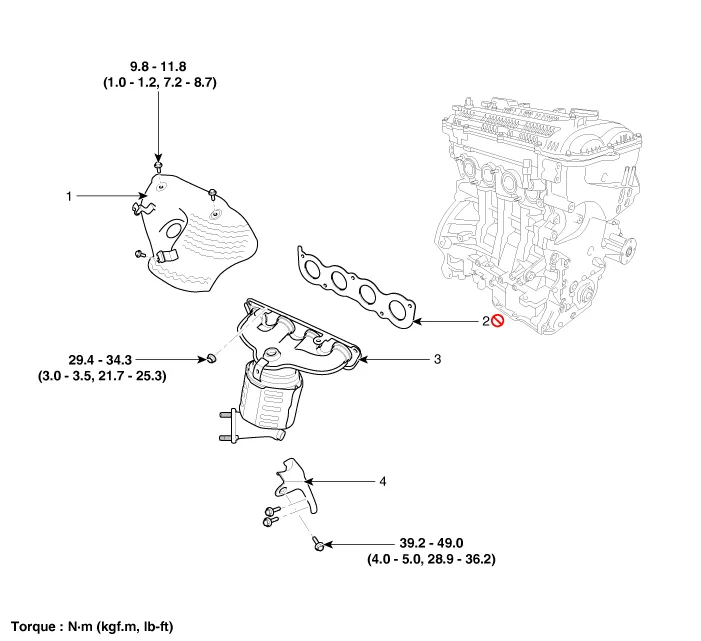
| 1. Heat protector 2. Exhaust manifold gasket |
3. Exhaust manifold 4. Exhaust manifold stay |
Repair procedures
| Removal and Installation |
| 1. |
Remove the engine cover. (Refer to Engine and Transaxle Assembly - “Engine Cover”) |
| 2. |
Disconnect the battery negative terminal. |
| 3. |
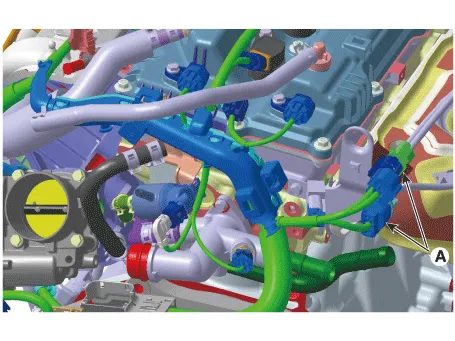
Disconnect the front and heated oxygen sensor connect (A) and remove them from the bracket.
|
| 4. |
Remove the engine room under cover. (Refer to Engine and Transaxle Assembly - “Engine Room Under Cover”) |
| 5. |
Remove the front muffler. (Refer to Intake and Exhaust System - "Muffler") |
| 6. |
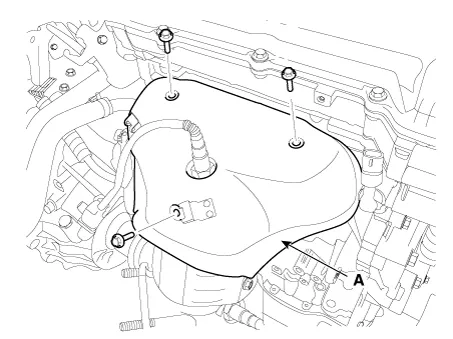
Remove the exhaust manifold heat protector (A).
|
| 7. |
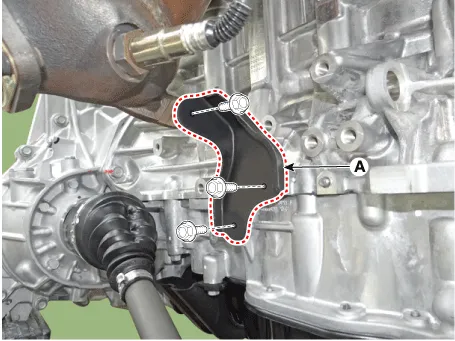
Remove the exhaust manifold stay (A).
|
| 8. |
Remove the exhaust manifold (A).
|
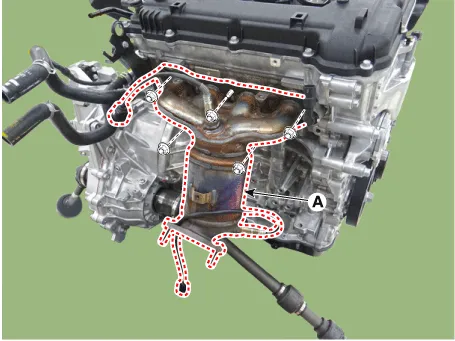

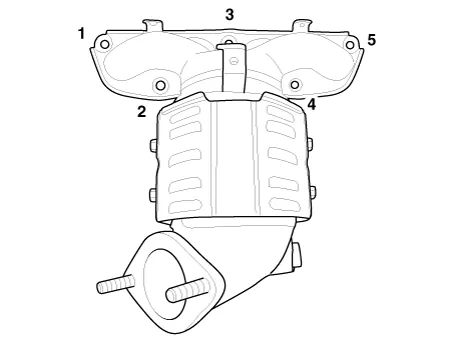
| 9. |
Remove the exhaust manifold gasket (A).
|
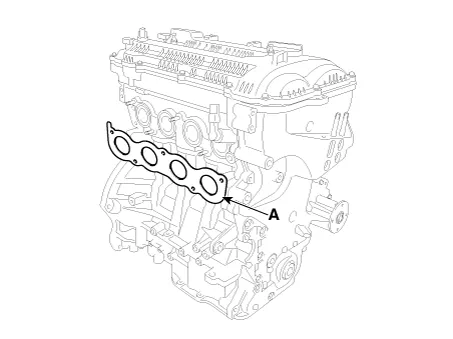
| 10. |
Install in the reverse order of removal. |
Repair procedures Removal and Installation 1. Disconnect the vacuum hose (A). 2. Remove the variable Intake solenoid (VIS) actuator (B) Tightening torque : 9.
Components and components location Components 1. Front muffler 2. Catalytic converter & Center muffler assembly 3.
Other information:
Kia Optima DL3 2019-2026 Service and Repair Manual: Trunk Room Lamp
Repair procedures Removal 1. Disconnect the negative battery terminal. 2. Remove the trunk room lamp (A) by pressing the hook. 3. Disconnect the trunk room lamp connector (A).
Kia Optima DL3 2019-2026 Service and Repair Manual: Smart Key Unit
Schematic diagrams Connector and Terminal Function Pin Function Connector A Connector B Connector C Connector D 1 - Front washer switch (Output) - Driver outside handle switch (Input)
Categories
- Manuals Home
- Kia Optima Owners Manual
- Kia Optima Service Manual
- Floor Console Assembly
- CVVT Oil Control Valve (OCV)
- Timing Chain
- New on site
- Most important about car
