
Kia Optima DL3: Body (Interior and Exterior) / Rear Window Glass
Components and components location
| Component Location |
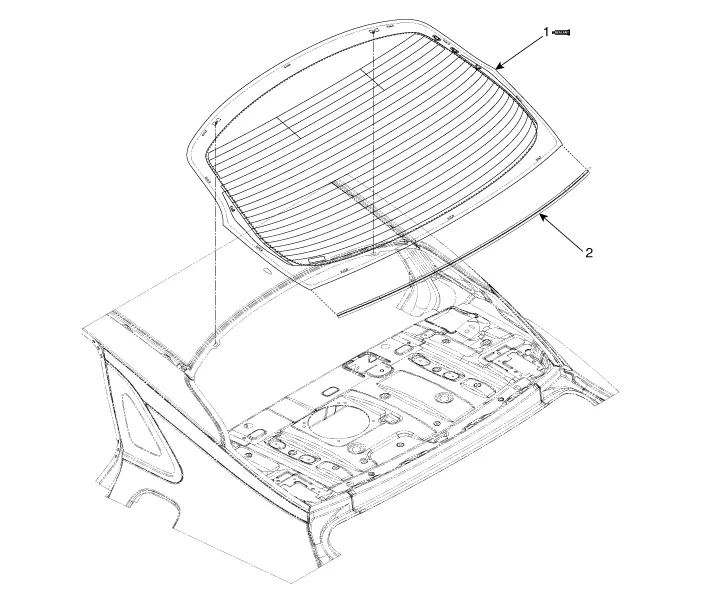
| 1. Rear window glass |
2. Rear window glass molding
|
Repair procedures
| Removal |
Put on gloves to prevent hand injuries. |

Be careful not to damage the paintwork. |

| 1. |
Remove the roof side molding. (Refer to Body side molding - "Roof Side Molding") |
| 2. |
Remove the rear package tray trim. (Refer to Trunk Trim - "Rear Package Tray Trim") |
| 3. |
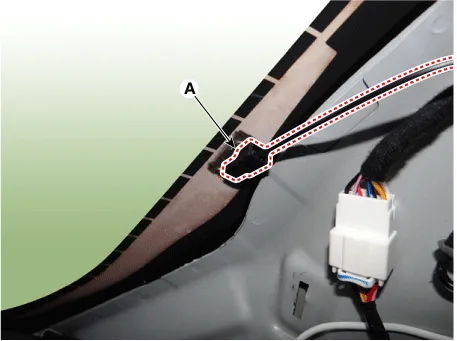
Using a cutting knife, remove the rear window glass molding (A).
|

| 4. |
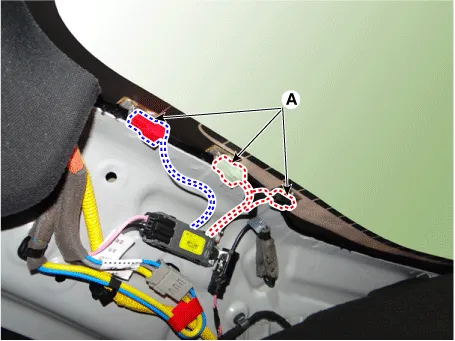
Separate the hot wire connectors (A). [LH]
[RH]
|
| 5. |
Spread WD-40 on the outer edges of rear window glass. |
| 6. |
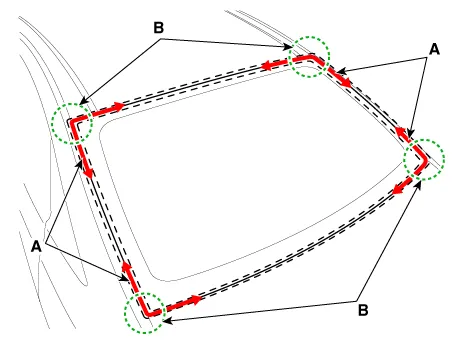
Cut off the sealant on the edge (B) while pulling the piano wire (A) to the left and right.
|
| 7. |
Put in a piano wire (A) through the corner of the windshield glass and insert wire grips into both ends of the wire.
|
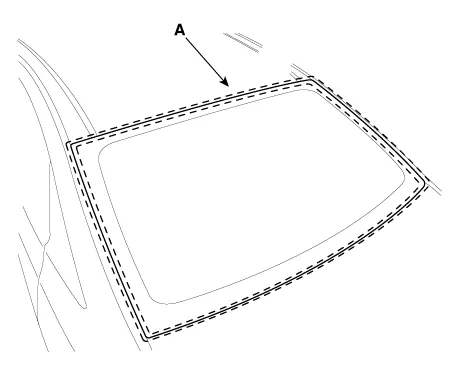
| 8. |
Cut off the sealant on (A-A), (B-B), (C-C), while pulling a piano wire (A) to the left and right.
|
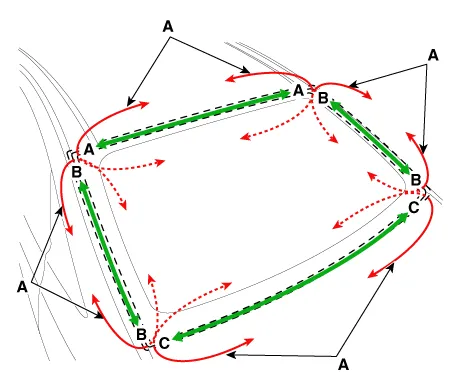
| 9. |
Carefully remove the rear window glass (A).
|
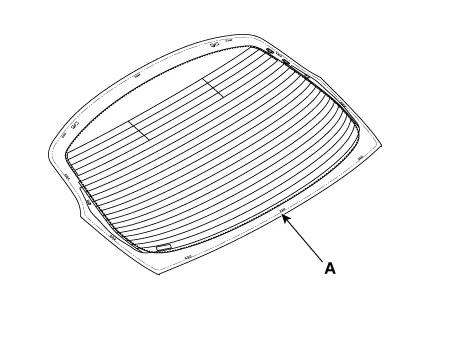
| Installation |
Put on gloves to prevent hand injuries. |
| 1. |
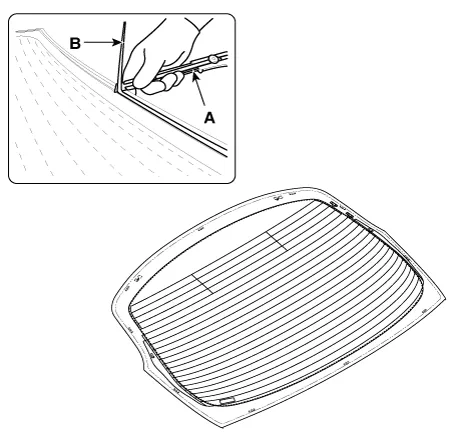
Using a cutting knife (A), remove the remaining sealant (B) on the body panel.
|
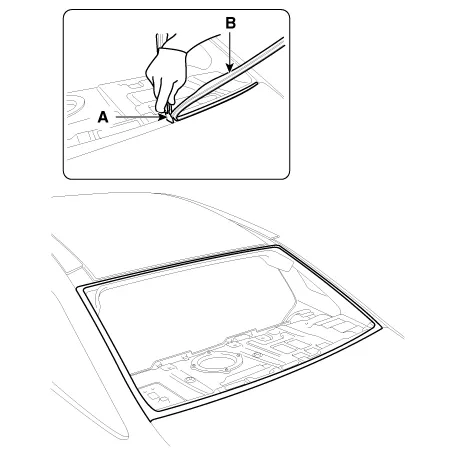
| 2. |
Using a cutting knife (A), remove the remaining sealant (B) on the rear window glass.
|
| 3. |
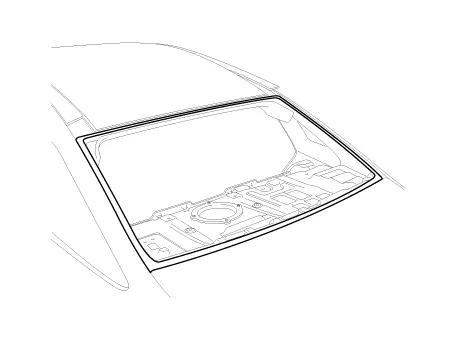
Apply a body primer to the edge of the body panel.
|

| 4. |
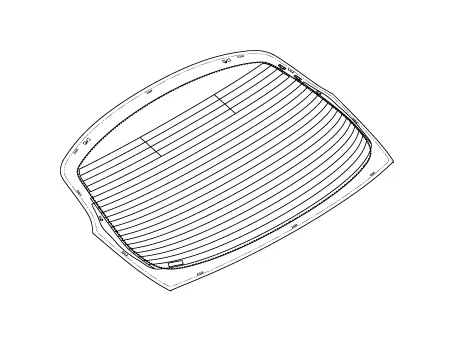
Apply the glass primer to the outer edge of rear window glass.
|
| 5. |
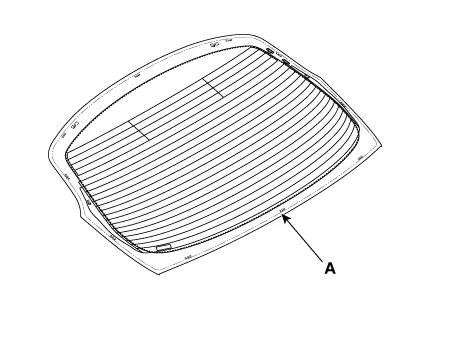
Install the rear window glass molding (A).
|
| 6. |
Using a sealant gun, apply the sealant (B) to the edge of rear window glass (A).
|
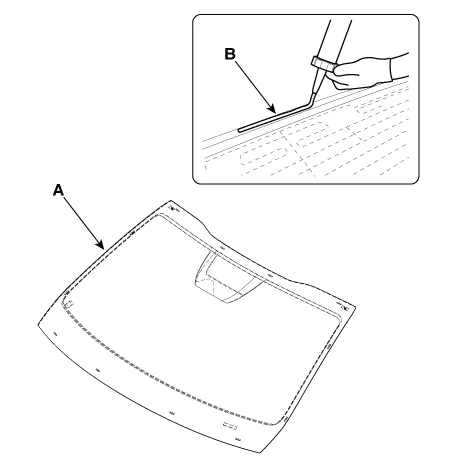
| 7. |
Using the glass holder (A), adjust the rear window glass (B) to fit the alignment marks (C) on the body and lightly push the windshield glass to make the edges fully seated on the bonding surface of body
|
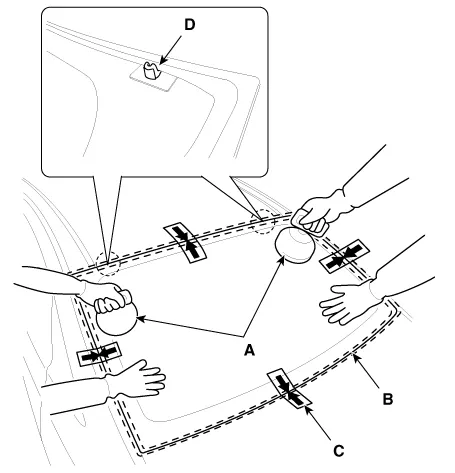
| 8. |
Conduct a leak testing.
|
| 9. |
If a leak occurs, apply the sealant to the area where the leak occurs. |
| 10. |
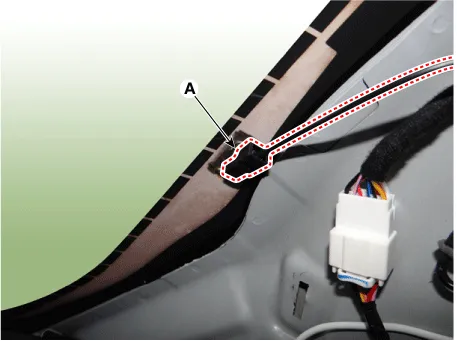
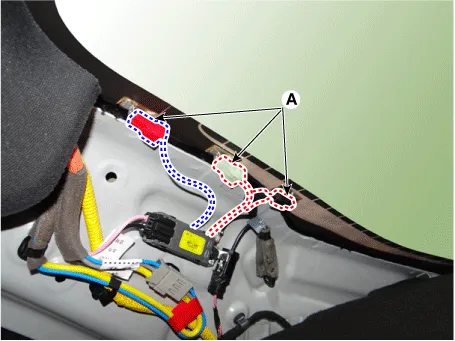
Install the hot wire connectors (A). [LH]
[RH]
|
| 11. |
Install the roof side molding. (Refer to Body side molding - "Roof Side Molding") |
| 12. |
Install the rear package tray trim. (Refer to Trunk Trim - "Rear Package Tray Trim") |
Components and components location Components 1. Windshield glass 2. Windshield glass upper molding Repair procedures Removal Put on gloves to prevent hand injuries.
Components and components location Component Location 1. Quarter fixed glass Repair procedures Removal • When removing with a flat-tip screwdriver or remover, wrap protective tape around the tools to prevent damage to components.
Other information:
Kia Optima DL3 2019-2026 Service and Repair Manual: Power Window Switch
Schematic diagrams Connector and Terminal Function Power Window Main Switch Pin Function 1 B-CAN (Low) 2 B-CAN (High) 3 Ground (Assist safety) 4 Assist safety 5
Kia Optima DL3 2019-2026 Service and Repair Manual: Intake Actuator
Components and components location Components Location 1. Intake actuator Description and operation Description The intake actuator is located at the blower unit. It regulates the intake door by a signal from the control unit.
Categories
- Manuals Home
- Kia Optima Owners Manual
- Kia Optima Service Manual
- Instrument panel overview
- Brake System
- Heating, Ventilation and Air Conditioning
- New on site
- Most important about car
