Kia Optima DL3: Advanced Driver Assistance System (ADAS) / Rear View Monitor (RVM)
Components and components location
| Components Location |
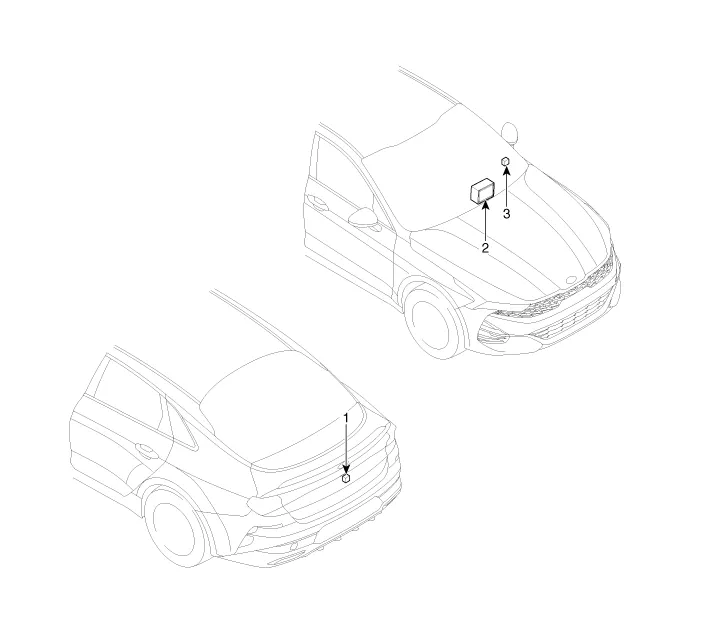
| 1. Rear view camera 2. Display audio/AVN head unit |
3. Steering angle sensor |
Description and operation
| Description |
| • |
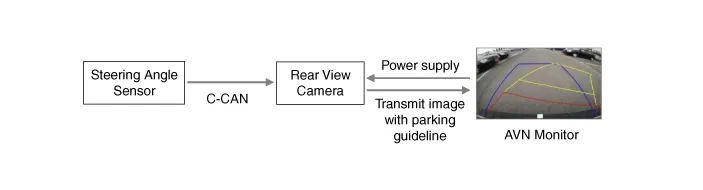
The system displays the rear of the vehicle to assist the driver of potential hazards, it receives vehicle rear side image signal from the rear view monitor and displays it on monitor. |
| • |
Rear view monitor is a supplementary device that displays dead zone on monitor screen that automatically operates when the gear stays in "R". |
| • |
It displays the estimated trajectory with parking guideline in accordance with the operating angle of steering wheel. |
System Structure (Rear view monitor operated by steering)
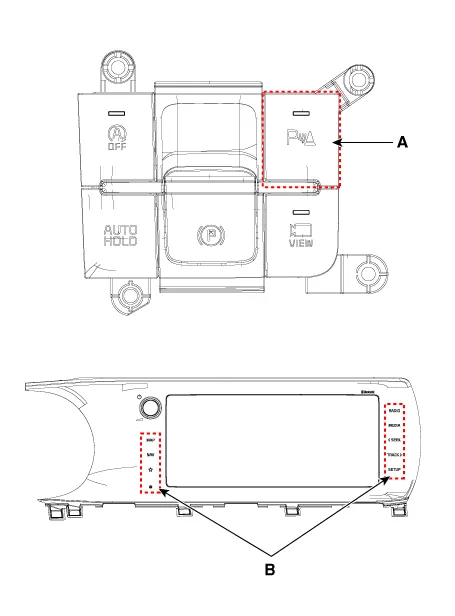
Driving Rear View Monitor (DRVM)
Driving Rear View Monitor (DRVM) : DVRM function is used to switch on Rear View Monitor when driving forward.
DVRM ON :
1) Start 「ON」
2) Press button (A) when in "D" (drive) or "N" (neutral) shift position.
DVRM OFF :
1) Press button (A) again.
2) Press the infotainment system operating button (B).
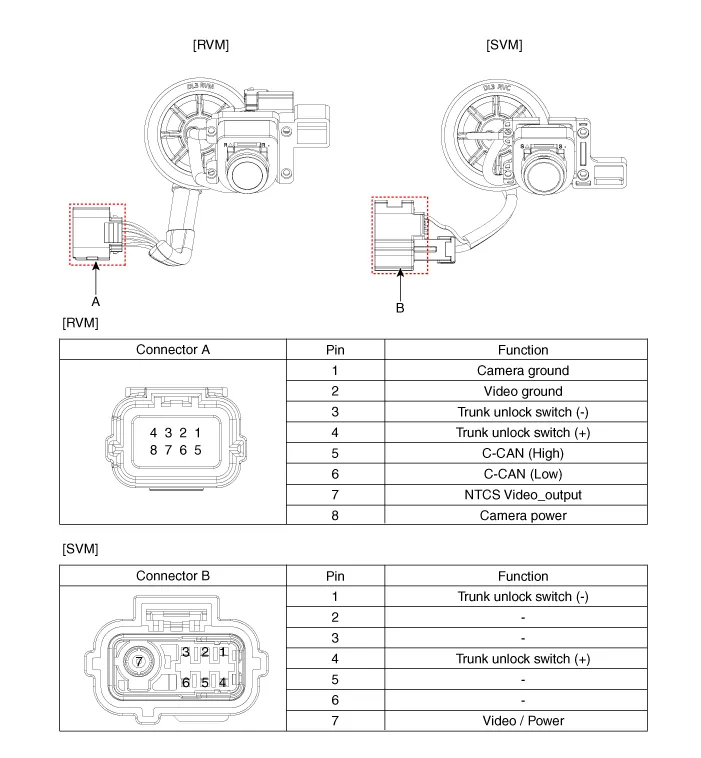
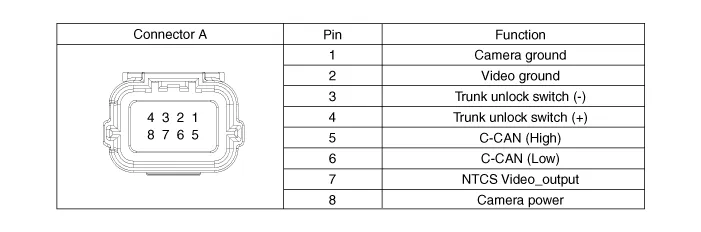
Schematic diagrams
| Connector and Terminal Function |
Repair procedures
| Removal |
| 1. |
Disconnect the negative battery terminal. |
| 2. |
Remove the center rear combination lamp. (Refer to Body Electrical System - "Rear Combination Lamp") |
| 3. |
Disconnect the trunk switch connector (A).
|
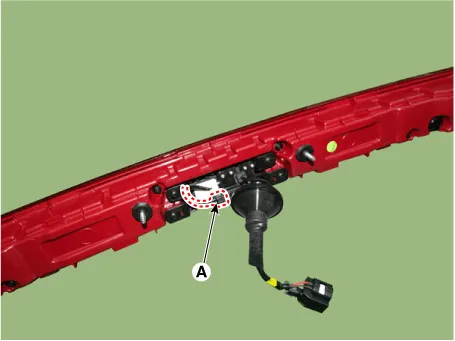
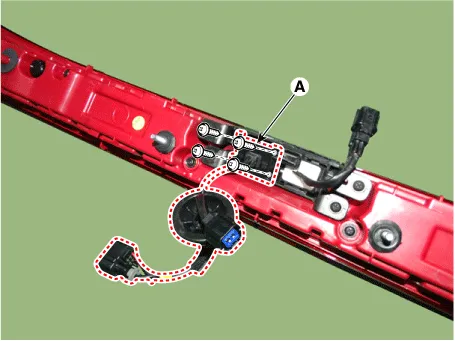
| 4. |
Remove the rear view camera (A) after loosening the screws.
|
| Installation |
| 1. |
Install in the reverse order of removal. |
Troubleshooting
| Troubleshooting |
| Diagnosis procedure of each symptom |
|
No. |
Symptom |
Repair |
|
1 |
AVN monitor turns to black/blue |
R-1, R-2 |
|
Parking guide line and notification word have not shown |
||
|
2 |
Vehicle has been slanted/leaned during parking |
R-3, R-4 |
|
Trouble on the shown angle |
||
|
Difference of right/left bumper visible sight |
||
|
Parking guidence lines has been learned (left/right deviation occured)
|
||
|
Vehicle has been slanted during parking |
||
|
3 |
Inflow of water in lens |
R-5 |
|
Blurred video |
||
|
Damaged of lens coating |
||
|
Showed red colored video |
R-1. Inspect in following order when black screen has been occurred(camera - AVN direct connection specification)
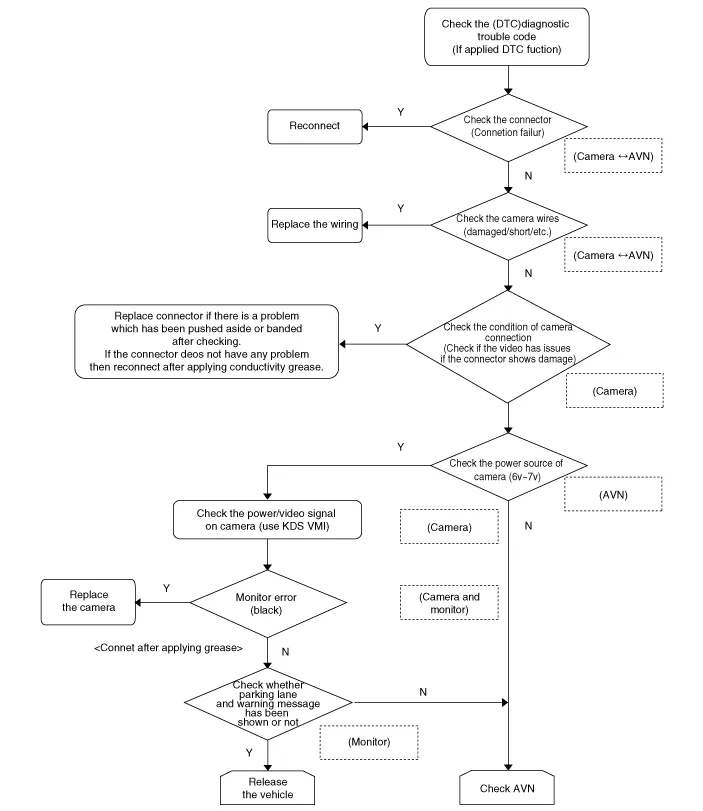
R-2. Check the camera
| 1. |
Measure the video display waveform and output voltage of rear camera (using KDS and VMI). Connect VMI probes to pin 2 and pin 7.
|

| 2. |
Measure the output voltage of rear camera power source. Connect to pin 1 and pin 8.
|
R-3. Check the symptom related to placement of camera after installation.
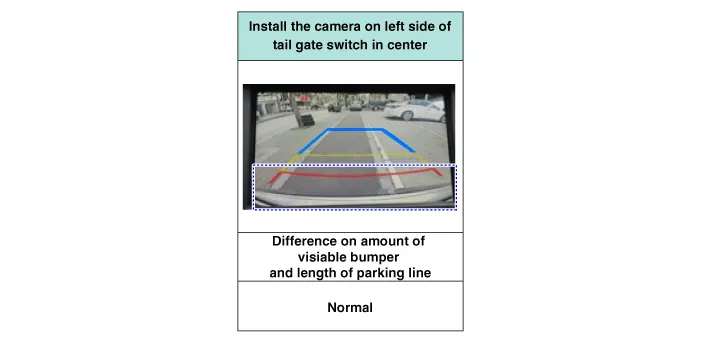
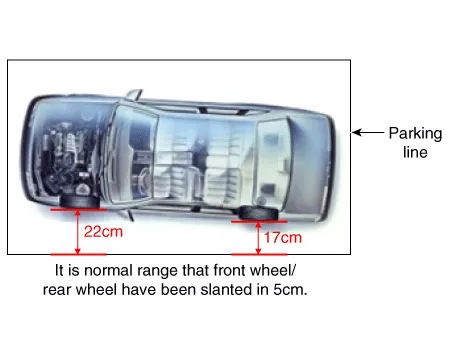
R-4. Slanted/leaned during parking
| 1. |
Check the camera installation condition.
|
| 2. |
Measure the deviation of slanted/leaned during parking.
|

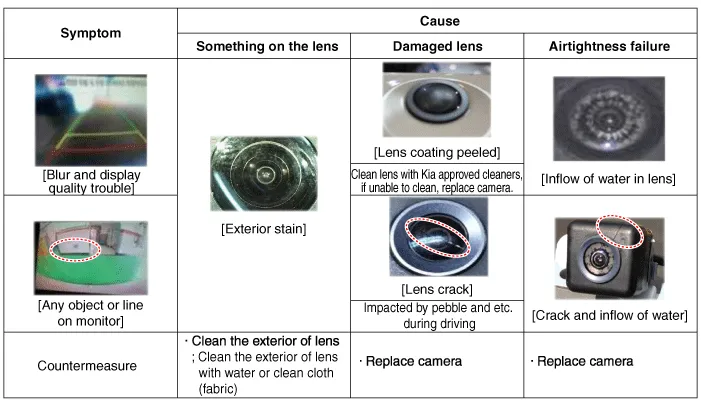
R-5. Check monitor quality
|

|
|
Components and components location Components 1. Left remote control switch (Audio + Bluetooth + Voice) 2. Right remote control switch (Trip + SCC + LFA) Schematic diagrams Circuit Diagram Repair procedures Removal 1.
Components and components location Component Location Surround View Monitor (SVM) 1) SVM unit basically transmits data via C-CAN only.
Other information:
Kia Optima DL3 2019-2025 Service and Repair Manual: Power Seat Control Switch
Repair procedures Removal 1. Remove the front seat shield outer cover. (Refer to Body - "Front Seat Shield Outer Cover") 2. Remove the power seat control switch (A) by loosening the mounting screws.
Kia Optima DL3 2019-2025 Service and Repair Manual: Blower Resistor
Repair procedures Inspection 1. Measure the resistance between the terminals. 2. measured resistance is not within specification, the blower resistor must be replaced. (After removing the resistor) (1) Pin No 1.
Categories
- Manuals Home
- Kia Optima Owners Manual
- Kia Optima Service Manual
- Charging System
- Body Electrical System
- Timing Chain
- New on site
- Most important about car
