Kia Optima: Brake System / Brake Pad
Repair procedures
| Replacement |
Front Brake Pad
| 1. |
Disconnect the (-) battery terminal. |
| 2. |
Remove the front wheel and tire. (Refer to Suspension System - "Wheel") |
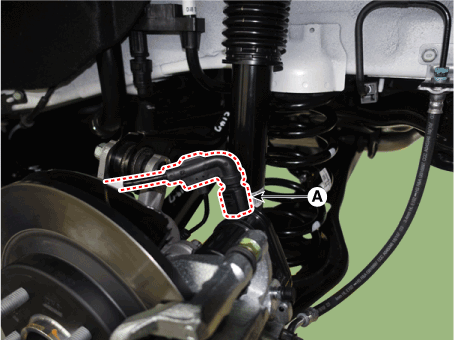
| 3. |
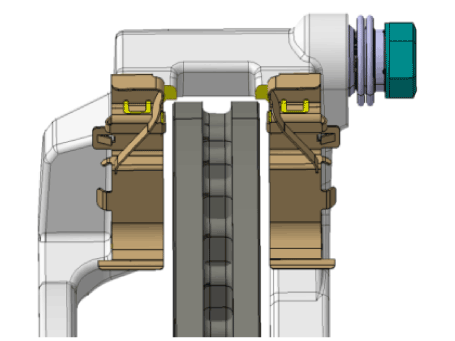
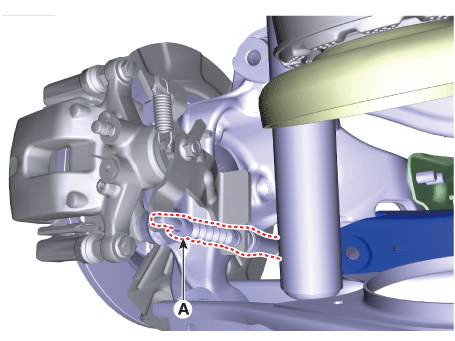
Loosen the guide rod bolt and then pivot the caliper body (A) up out of the way.
|
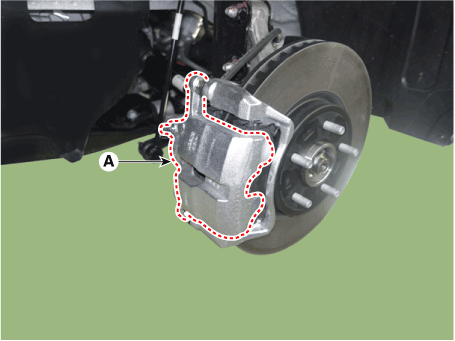
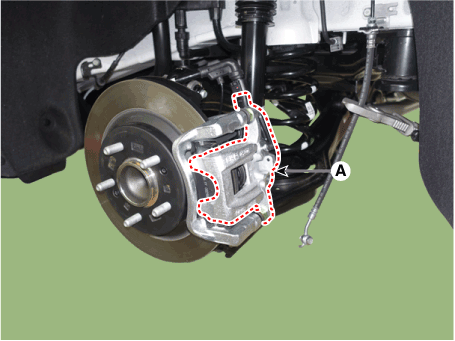
| 4. |
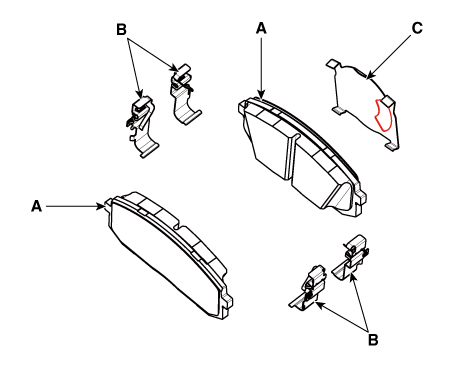
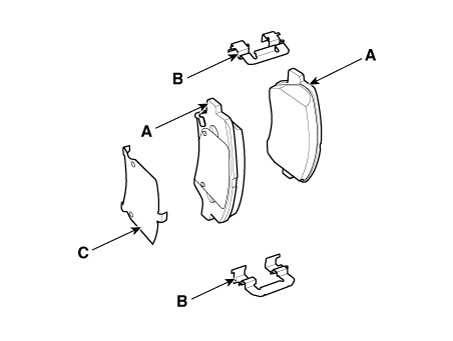
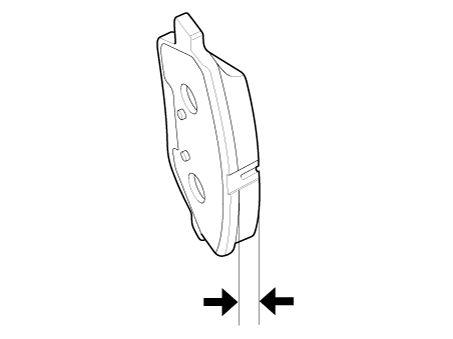
Remove the brake pad (A).
|
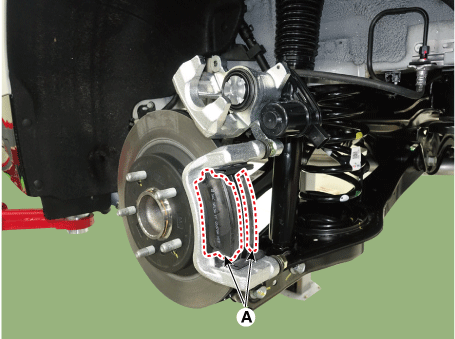
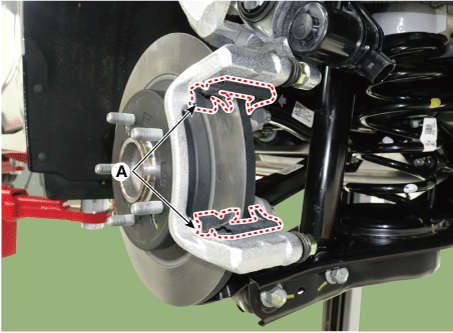
| 5. |
Remove the pad retainer (A).
|

Rear Brake Pad
| [EPB Apply] |
| 1. |
Release the parking brake. |
| 2. |
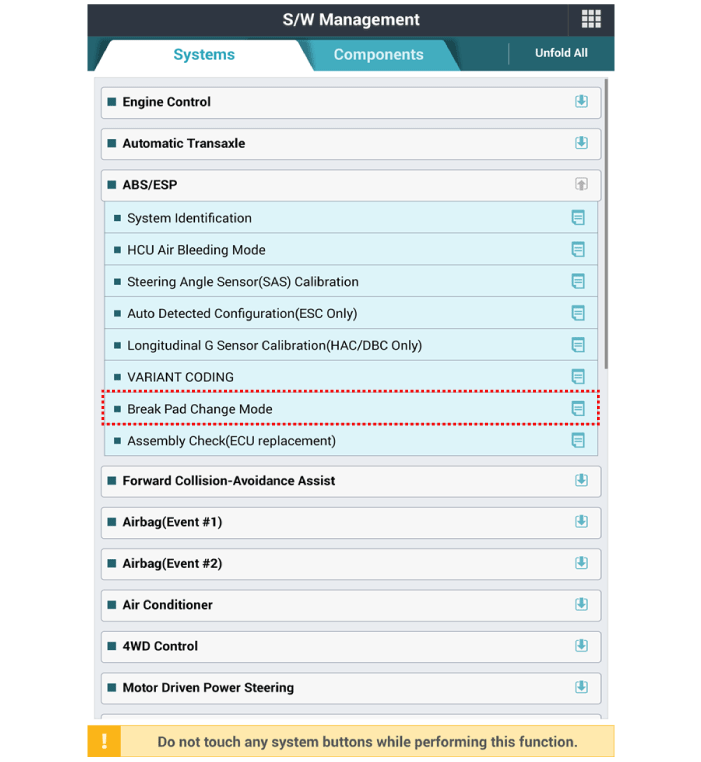
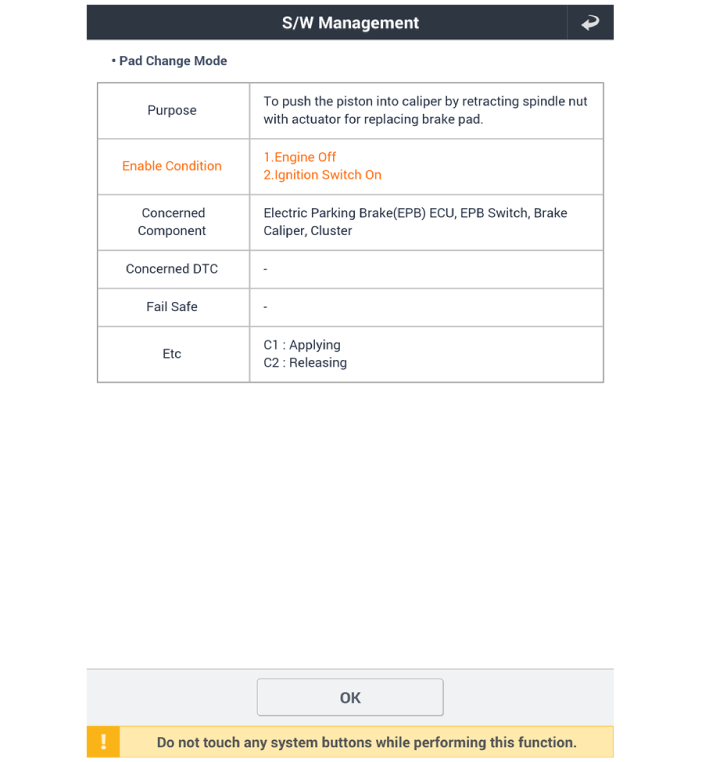
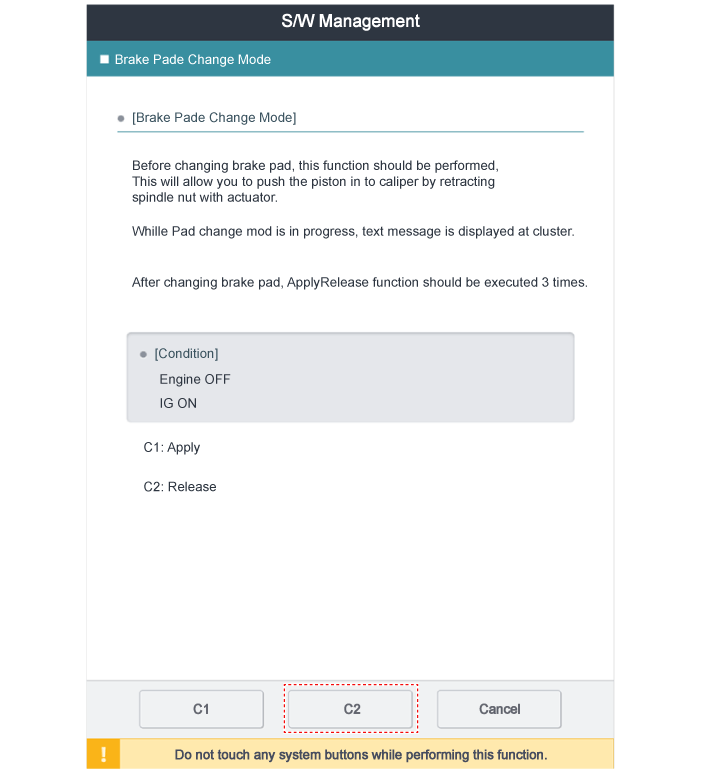
Before removing the rear caliper, perform “Brake Pad Replacement Mode” using the KDS.
|
| 3. |
Select C2 (Release) on the screen below.
|
| 4. |
Disconnect the (-) battery terminal. |
| 5. |
Remove the rear wheel and tire. (Refer to Suspension System - "Wheel") |
| 6. |
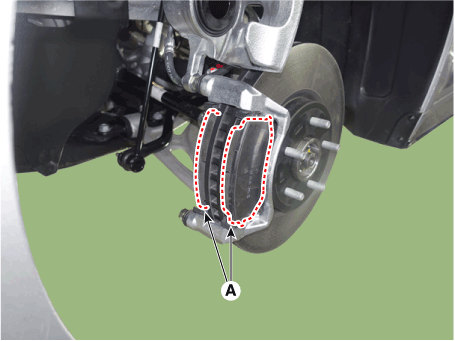
Disconnect the EPB actuator connector (A).
|
| 7. |
Loosen the guide rod bolt and then pivot the caliper body (A) up out of the way.
|
| 8. |
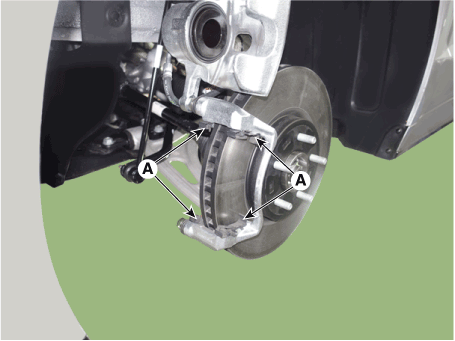
Remove the brake pad (A).
|
| 9. |
Remove the pad retainer (A).
|
| [EPB None Apply] |
| 1. |
Release the parking brake. |
| 2. |
Disconnect the (-) battery terminal. |
| 3. |
Remove the rear wheel and tire. (Refer to Suspension System - "Wheel") |
| 4. |
Disconnect the parking cable (A) after remove the parking brake cable fixing clip.
|
| 5. |
Loosen the guide rod bolt and then pivot the caliper body (A) up out of the way.
|
| 6. |
Remove the brake pad (A).
|
| 7. |
Remove the pad retainer (A).
|
| Installation |
[Front Brake Pad]
| 1. |
Install in the reverse order of removal. |
| 2. |
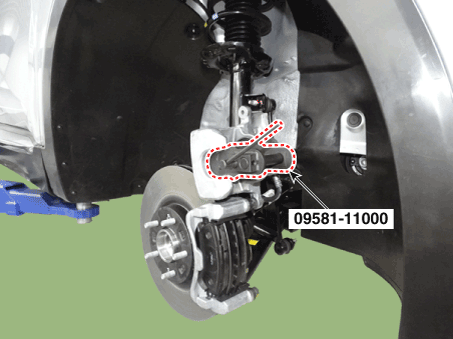
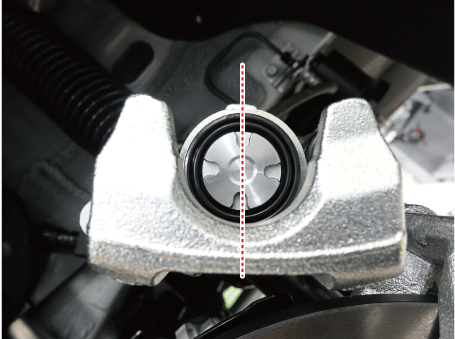
Use a SST (09581-11000) when installing the brake caliper assembly.
|
| 3. |
After installation, bleed the brake system. (Refer to Brake System - "Brake Bleeding Prcoedures") |
| 4. |
Check the brake oil leakage and pedal operating condition. |
[Rear Brake Pad]
| 1. |
Install in the reverse order of removal. |
| 2. |
Use a SST (09580-0U000) when installing the brake caliper assembly.
|
| 3. |
After installation, bleed the brake system. (Refer to Brake System - "Brake Bleeding Prcoedures") |
| 4. |
Apply the parking brake several times and check for normal operation.
|
| 5. |
Check the spilled brake oil. |
| 6. |
Apply the parking brake several times and check for normal operation. |
| Inspection |
Brake Pad Check
| 1. |
Check the pad wear. Measure the pad thickness and replace it, if it is less than the specified value.
|
| 2. |
Check that grease is applied to sliding contact points and check the pad and backing metal for damage. |
 Rear Brake Disc
Components and components location
Components
1. Rear brake disc
2. Hub bearing assembly
3. Dust cover
4. Rear carrier
Repai ...
 Parking Brake System
Components and components location
Components
1. Parking brake pedal assembly
2. Front parking brake cable
3. Equalizer assembly
4. Rear parking brake cab ...
Other information:
Kia Optima DL3 2019-2025 Owner's Manual: Checking the amount of air conditioner refrigerant and compressor lubricant
When the amount of refrigerant is low, the performance of the air conditioning is reduced. Overfilling also has a negative impact on the air conditioning system. Therefore, if abnormal operation is found, have the system inspected by an authorized Kia dealer. WARNING - Vehicles equipped with R ...
Kia Optima DL3 2019-2025 Service and Repair Manual: Evaporator Core
Repair procedures Replacement 1. Disconnect the negative (-) battery terminal. 2. Remove the heater and blower assembly. (Refer to Heater - "Heater Unit") 3. Loosen the mounting screws, lock pin and remove the ...
