Kia Optima DL3: Brake System / Rear Brake Disc
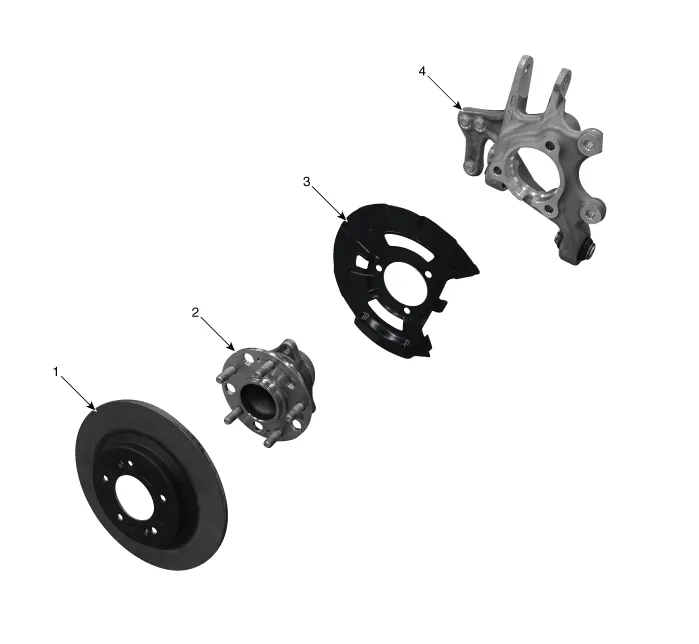
Components and components location
| Components |

| 1. Rear brake disc 2. Hub bearing assembly |
3. Dust cover 4. Rear carrier |
Repair procedures
| Removal |
[EPB Apply]
| 1. |
Release the parking brake. |
| 2. |
Before removing the rear caliper, perform “Brake Pad Replacement Mode” using the KDS.
|
| 3. |
Select C2 (Release) on the screen below.
|
| 4. |
Disconnect the (-) battery terminal. |
| 5. |
Remove the rear wheel and tire. (Refer to Suspension System - "Wheel") |
| 6. |
Disconnect the EPB actuator connector (A).
|
| 7. |
Loosen the guide rod bolt and then pivot the caliper body (A) up out of the way.
|
| 8. |
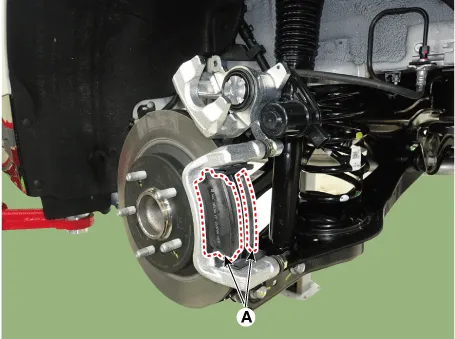
Remove the brake pad (A).
|
| 9. |
Remove the pad retainer (A).
|
| 10. |
Remove the caliper carrier (A) after loosening the caliper mounting bolt.
|
| 11. |
Remove the front brake disc (A) by loosening the screws.
|
[EPB None Apply]
| 1. |
Release the parking brake. |
| 2. |
Disconnect the (-) battery terminal. |
| 3. |
Remove the rear wheel and tire. (Refer to Suspension System - "Wheel") |
| 4. |
Disconnect the parking cable (A) after remove the parking brake cable fixing clip.
|
| 5. |
Loosen the guide rod bolt and then pivot the caliper body (A) up out of the way.
|
| 6. |
Remove the brake pad (A).
|
| 7. |
Remove the pad retainer (A).
|
| 8. |
Remove the caliper carrier (A) after loosening the caliper mounting bolt.
|
| 9. |
Remove the front brake disc (A) by loosening the screws.
|
| Inspection |
Rear Brake Disc Thickness Check
| 1. |
Check the brake disc for damage and cracks. |
| 2. |
Remove all rust and contamination from the surface, and measure the disc thickness at 8 points, at least, of same distance (5mm) from the brake disc outer circle.
|
| 3. |
If wear exceeds the limit, replace the discs and pad assembly left and right of the vehicle. |
Rear Brake Disc Runout Check
| 1. |
Place a dial gauge about 5mm (0.20 in.) from the outer circumference of the brake disc, and measure the runout of the disc.
|
| 2. |
If the runout of the brake disc exceeds the limit specification, replace the disc, and then measure the runout again. |
| 3. |
If the runout cannot be corrected by changing the position of the brake disc, replace the brake disc. |
| Installation |
| 1. |
Install in the reverse order of removal. |
| 2. |
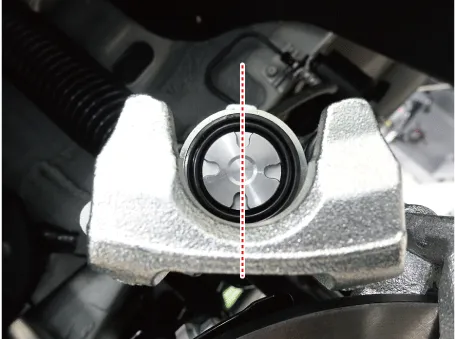
Use a SST (09580-0U000) when installing the brake caliper assembly.
|
| 3. |
After installation, bleed the brake system. (Refer to Brake system - "Brake Bleeding Procedures") |
| 4. |
Apply the parking brake several times and check for normal operation.
|
| 5. |
Check the spilled brake oil. |
| 6. |
Apply the parking brake several times and check for normal operation. |
Components and components location Components [EPB Apply] 1. EPB Actuator 2. Caliper body 3. Caliper carrier 4.
Repair procedures Replacement Front Brake Pad 1. Disconnect the (-) battery terminal. 2. Remove the front wheel and tire.
Other information:
Kia Optima DL3 2019-2026 Service and Repair Manual: Wiper Arm
Repair procedures Removal 1. If necessary, remove the blade by pushing it in the direction arrow after opening the hook (A). • Move the windshield glass wiper blades to the servic
Kia Optima DL3 2019-2026 Service and Repair Manual: In-car Sensor
Description and operation Description The In-car air temperature sensor is built in the heater & A/C control unit. The sensor contains a thermistor which measures the temperature of the inside. The signal decided by the resistance value which changes in accordance with perceived inside temperature, is delivered to heater co
Categories
- Manuals Home
- Kia Optima Owners Manual
- Kia Optima Service Manual
- Engine Mechanical System
- External Amp
- Battery
- New on site
- Most important about car


