Kia Optima DL3: Interior Trim / Door Scuff Trim
Repair procedures
| Replacement |
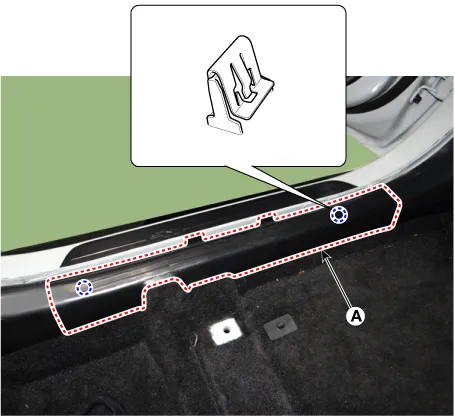
[Front door scuff trim]
|

| 1. |
Remove the front door body side weatherstrip. (Refer to Front Door - "Front Door Side Weatherstrip") |
| 2. |
Using a remover and remove the front door scuff trim (A).
|
| 3. |
To install, reverse the removal procedure.
|

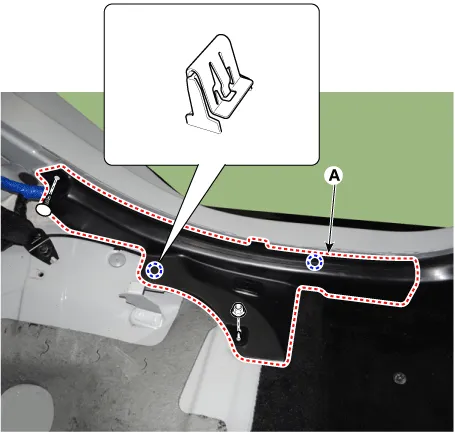
[Rear door scuff trim]
|
| 1. |
Remove the rear seat cushion assembly. (Refer to Rear Seat - "Rear Seat Assembly") |
| 2. |
Remove the rear door body side weatherstrip. (Refer to Rear Door - "Rear Door Side Weatherstrip") |
| 3. |
Loosen the mounting screw and nuts, remove the rear door scuff trim (A).
|
| 4. |
To install, reverse the removal procedure.
|
Components and components location Components 1. Front pillar trim 2. Cowl side trim 3. Center pillar lower trim 4.
Repair procedures Replacement Put on gloves to prevent hand injuries.
Other information:
Kia Optima DL3 2019-2026 Service and Repair Manual: Smart Key
Repair procedures Adjustment Smart Key Code Saving 1. Connect the VCI II in driver side crash pad lower panel, turn the power on KDS. 2. Select the vehicle model and then do "Smart key code saving".
Kia Optima DL3 2019-2026 Service and Repair Manual: Compressor oil
Repair procedures Oil Specification 1. The HFC-134a system requires synthetic (PAG) compressor oil whereas the R-12 system requires mineral compressor oil. The two oils must never be mixed. 2. Compressor (PAG) oil varies according to compressor model.
Categories
- Manuals Home
- Kia Optima Owners Manual
- Kia Optima Service Manual
- Brake System
- Lift And Support Points
- Engine Control Module (ECM)
- New on site
- Most important about car
