Kia Optima DL3: Cylinder Block / Drive plate
Components and components location
| Components |
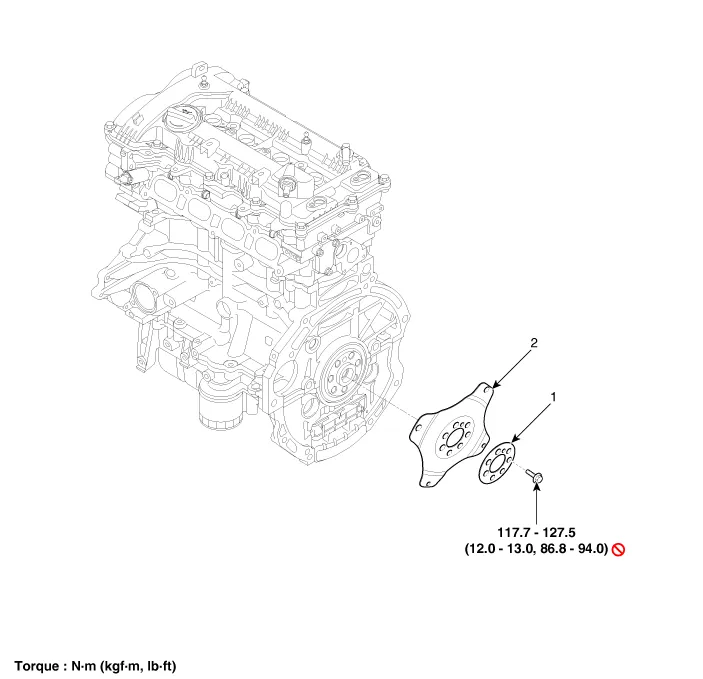
| 1. Adapter plate |
2. Drive plate |
Repair procedures
| Removal and Installation |
| 1. |
Remove the automatic transaxle. (Refer to Automatic Transaxle System - "Automatic Transaxle") |
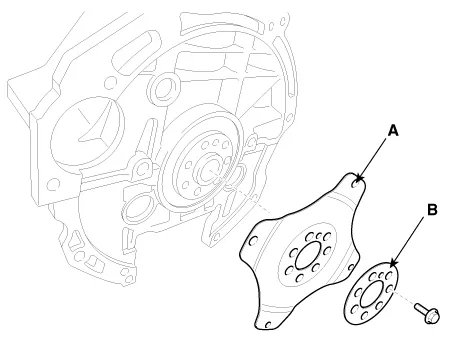
| 2. |
Remove the drive plate (A) and the adapter plate (B).
|

| 3. |
Install in the reverse order of removal. |
Components and components location Components 1. Piston ring 2. Snap ring 3. Piston pin 4.
Components and components location Components 1. Rear Oil Seal Repair procedures Replacement 1.
Other information:
Kia Optima DL3 2019-2026 Service and Repair Manual: Power Door Mirrors
C
Kia Optima DL3 2019-2026 Service and Repair Manual: Heated Seats Only
Components and components location Components Front Seat Heater 1. Front seat back heater 2. Front seat cushion heater 3. Front seat heater unit / ventilation unit Rear Seat Heater 1.
Categories
- Manuals Home
- Kia Optima Owners Manual
- Kia Optima Service Manual
- Instrument panel overview
- Body Electrical System
- Headlamps
- New on site
- Most important about car
