Kia Optima DL3: Front Seat / Front Seat Assembly
Components and components location
| Component Location |

| 1. Front seat assembly |
Repair procedures
| Replacement |
|
| 1. |
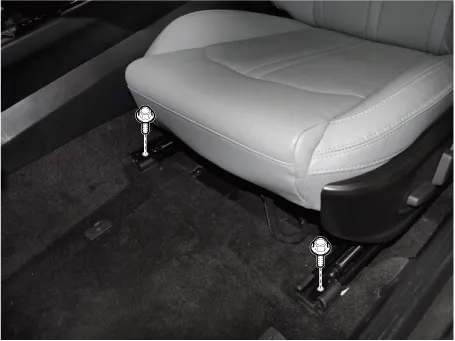
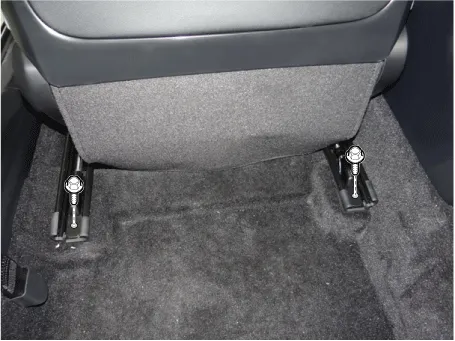
Loosen the front seat assembly mounting bolts.
[Front]
[Rear]
|
| 2. |
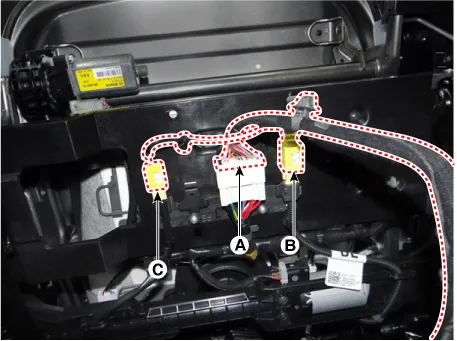
Press the lock pin and separate the main connector (A), side airbag connector (B) and front seat belt buckle connector (C).
|
| 3. |
To install, reverse the removal procedure.
|
Components and components location Component Location 1. Front seat outer shield cover Repair procedures Replacement • When removing with a flat-tip screwdriver or remover, wrap protective tape around the tools to prevent damage to components.
Other information:
Kia Optima DL3 2019-2026 Service and Repair Manual: Walk-in Switch
Components and components location Component Location 1. Walk-in switch Repair procedures Removal When prying with a flat-tip screwdriver or use a prying trim tool, wrap it with protective tape, and apply prote
Kia Optima DL3 2019-2026 Service and Repair Manual: Refrigerant Line
Components and components location Components Location 1. Suction & Liquid tube assembly 2. Discharge hose Repair procedures Replacement 1. If the compressor is marginally operable, run the engine at idle speed, and let the air conditioning work for a few minute
Categories
- Manuals Home
- Kia Optima Owners Manual
- Kia Optima Service Manual
- Features of your vehicle
- Thermostat
- Steering System
- New on site
- Most important about car


