
Kia Optima DL3: Drive Belt System / Drive Belt
Repair procedures
| Removal and Installation |
| 1. |
Remove the engine room under cover. (Refer to Engine and Transaxle Assembly - "Engine Room Under Cover") |
| 2. |
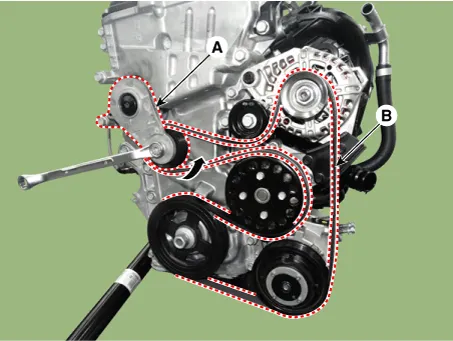
Using the wrench, turning the auto tensioner pulley (A) counterclockwise and then remove the drive belt (B).
|
| 3. |
Install in the reverse order of removal. |
| Inspection |
| 1. |
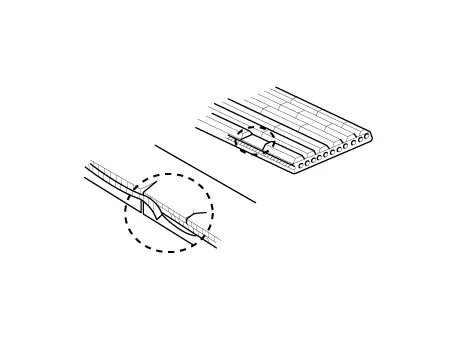
Check belt for maintenance and abnormal wear of V-ribbed part. Replace if necessary.
|

| 2. |
Visually check the belt for excessive wear, frayed cords etc. If any defect has been found, replace the drive belt.
|
Components and components location Components 1. Drive belt tensioner Repair procedures Removal and Installation 1.
Other information:
Kia Optima DL3 2019-2026 Service and Repair Manual: Vanity Lamp
Repair procedures Removal When removing with a flat-tip screwdriver or remover, wrap protective tape around the tools to prevent damage to components. 1.
Kia Optima DL3 2019-2026 Service and Repair Manual: Heater Core
Repair procedures Replacement 1. Disconnect the negative (-) battery terminal. 2. Remove the heater and blower assembly. (Refer to Heater - "Heater Unit") 3. Loosen the mounting screws and remove the heater core cover (A).
Categories
- Manuals Home
- Kia Optima Owners Manual
- Kia Optima Service Manual
- Floor Console Assembly
- Motor Driven Power Steering
- Emergency trunk safety release
- New on site
- Most important about car
