
Kia Optima DL3: Brake System / Front Brake Caliper
Components and components location
| Components |
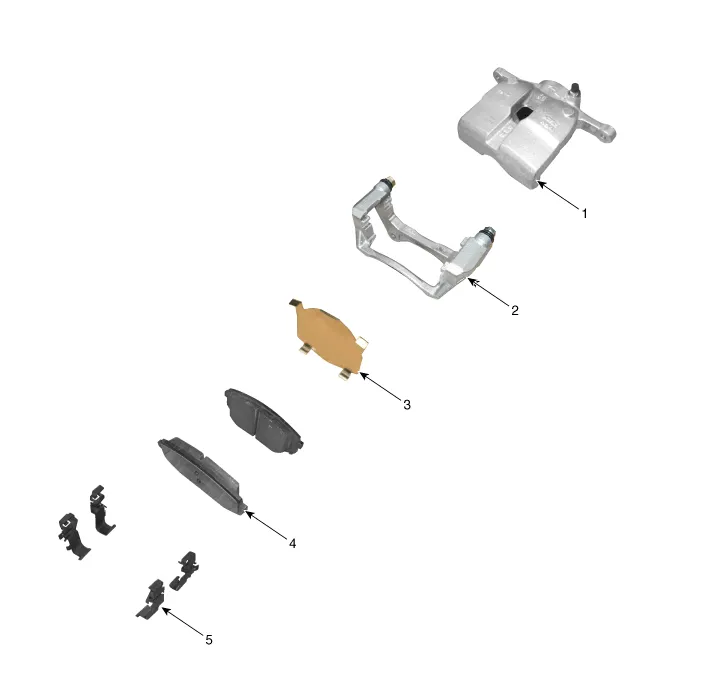
| 1. Caliper body 2. Caliper carrier 3. Pad inner shim |
4. Brake pad 5. Pad retainer |
Repair procedures
| Removal |
| 1. |
Disconnect the (-) battery terminal. |
| 2. |
Remove the front wheel and tire. (Refer to Suspension System - "Wheel") |
| 3. |
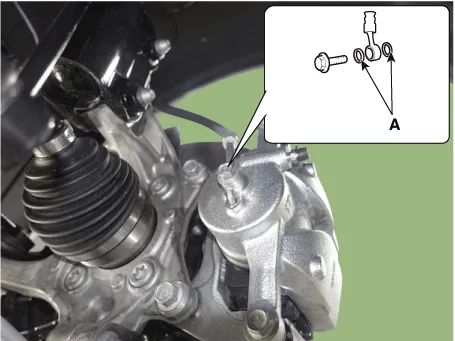
Remove the hose after loosening the brake hose bolt (A) from the caliper.
|


| 4. |
Remove the caliper body (A) by loosening the guide rod bolt.
|
| 5. |
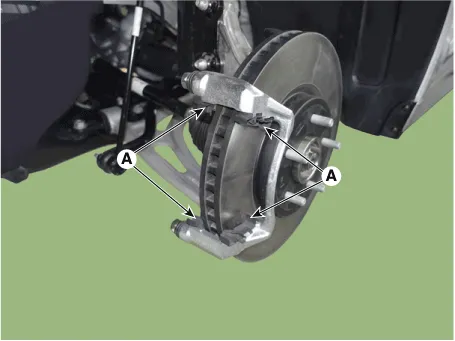
Remove the pad retainer (A).
|
| 6. |
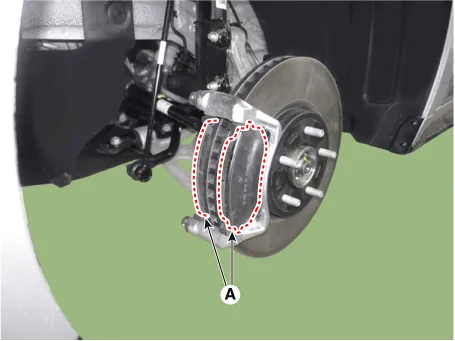
Remove the caliper carrier (A) by loosening the caliper mouniting bolts.
|
| 7. |
Remove the caliper carrier (A) by loosening the caliper mouniting bolts.
|

| Installation |
| 1. |
Install in the reverse order of removal. |
| 2. |
Use a SST (09581-11000) when installing the brake caliper assembly.
|
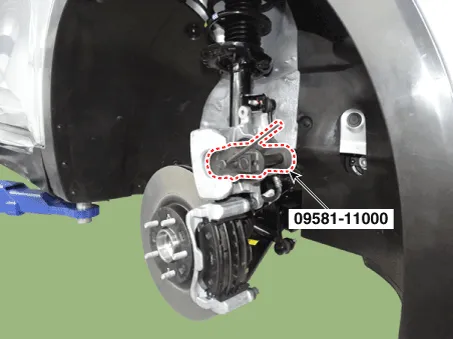
| 3. |
After installation, bleed the brake system. (Refer to Brake system - "Brake Bleeding Procedures") |
| 4. |
Check the brake oil leakage and pedal operating condition. |
Components and components location Components 1. Brake member assembly 2. Stop lamp switch 3. Brake pedal arm assembly 4.
Components and components location Components 1. Front Brake Caliper 2. Front Brake Disc 3. Front Axle Repair procedures Removal 1.
Other information:
Kia Optima DL3 2019-2026 Service and Repair Manual: Rear Glass Defogger Switch
Repair procedures Inspection 1. In the body electrical system, failure can be quickly diagnosed by using the vehicle diagnostic system (KDS). The diagnostic system (KDS) provides the following information. (1) Self diagnosis : Checking failure and code number (DTC).
Kia Optima DL3 2019-2026 Service and Repair Manual: Compressor oil
Repair procedures Oil Specification 1. The HFC-134a system requires synthetic (PAG) compressor oil whereas the R-12 system requires mineral compressor oil. The two oils must never be mixed. 2. Compressor (PAG) oil varies according to compressor model.
Categories
- Manuals Home
- Kia Optima Owners Manual
- Kia Optima Service Manual
- Motor Driven Power Steering
- Cooling System
- Suspension System
- New on site
- Most important about car
