
Kia Optima DL3: Front Door / Front Door Latch
Components and components location
| Component Location |
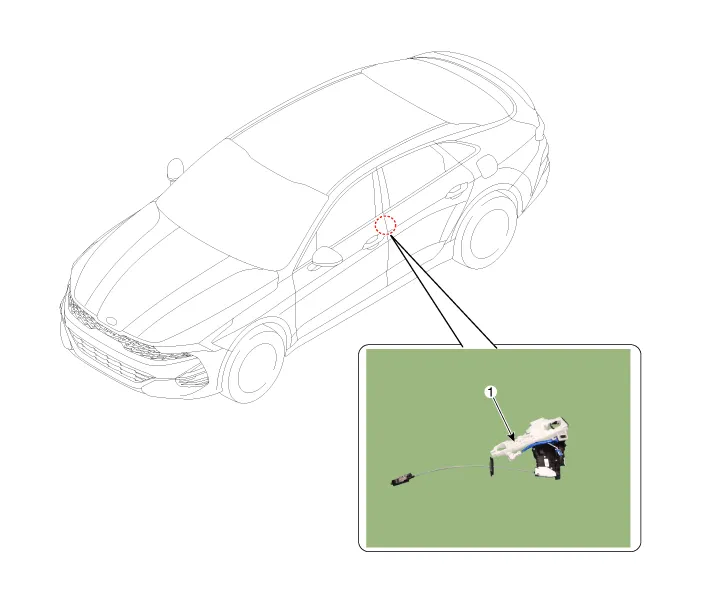
| 1. Front door latch |
Repair procedures
| Replacement |
|

| 1. |
Remove the front door module. (Refer to Front Door - "Front Door Module") |
| 2. |
Remove the front door outside handle. (Refer to Front Door - "Front Door Outside Handle") |
| 3. |
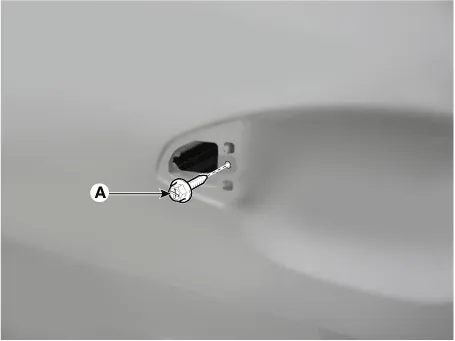
Loosen the front door outside handle base mounting bolt.
|
| 4. |
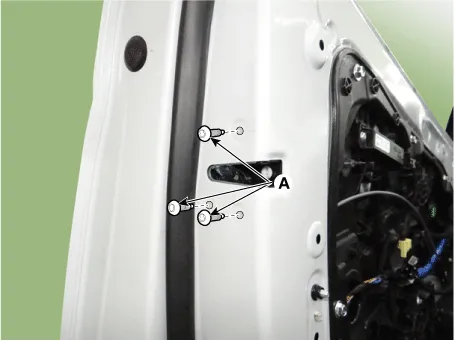
Loosen the front door latch mounting screws (A).
|
| 5. |
Remove the front door latch assembly (A).
|
| 6. |
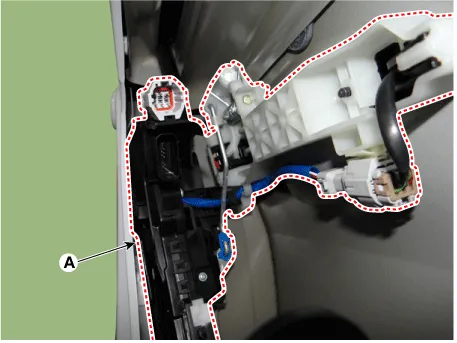
Open the cover to remove the front door outside handle base by pressing the locking pin (A).
|
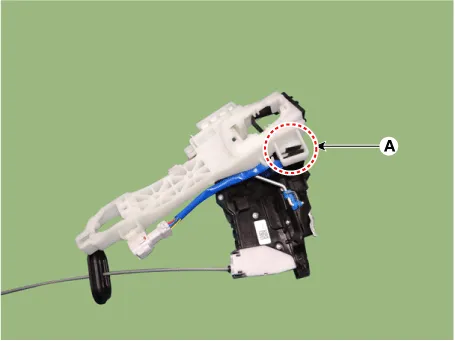
| 7. |
Loosen the front door latch connector clip and remove the front door outside handle base (A).
|
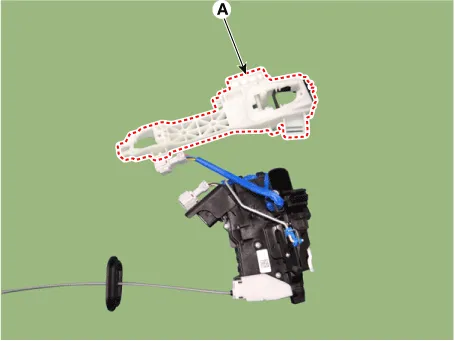
| 8. |
To install, reverse the removal procedure.
|

Repair procedures Replacement [Front door side weatherstrip] 1. Loosen the front door checker (B) mounting bolt.
Components and components location Components 1. Rear door trim 2. Rear door delta inner cover 3. Rear door belt inside weatherstrip 4.
Other information:
Kia Optima DL3 2019-2026 Service and Repair Manual: Rear Glass Defogger Switch
Repair procedures Inspection 1. In the body electrical system, failure can be quickly diagnosed by using the vehicle diagnostic system (KDS). The diagnostic system (KDS) provides the following information. (1) Self diagnosis : Checking failure and code number (DTC).
Kia Optima DL3 2019-2026 Service and Repair Manual: Evaporator Temperature Sensor
Description and operation Description The evaporator temperature sensor will detect the evaporator core temperature and interrupt compressor relay power in order to prevent evaporator from freezing by excessive cooling. The evaporator temperature sensor has the Negative Temperature Coefficient (NTC).
Categories
- Manuals Home
- Kia Optima Owners Manual
- Kia Optima Service Manual
- Headlamps
- Body Electrical System
- Motor Driven Power Steering
- New on site
- Most important about car
