Kia Optima DL3: Front Seat / Front Seat Cushion Cover
Components and components location
| Component Location |
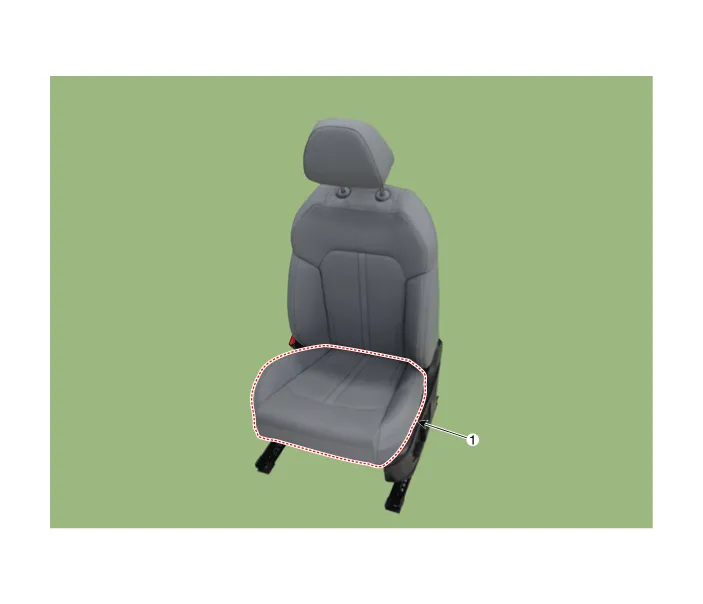
| 1. Front seat cushion cover
|
Repair procedures
| Replacement |
|

| 1. |
Remove the front seat assembly. (Refer to Front Seat - "Front Seat Assembly") |
| 2. |
Remove the front seat outer shield cover. (Refer to Front Seat - "Front Seat Outer Shield Cover") |
| 3. |
Remove the front seat inner shield cover. (Refer to Front Seat - "Front Seat Inner Shield Cover") |
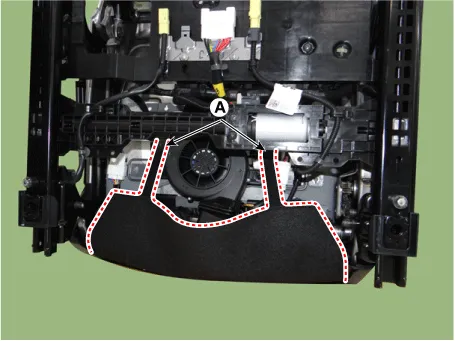
| 4. |
Remove the front seat lower protector (A).
|
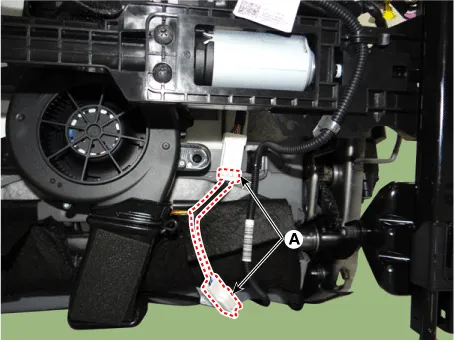
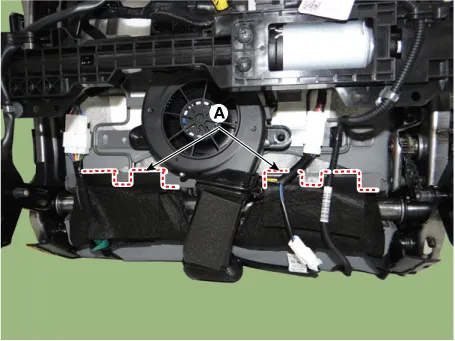
| 5. |
Disconnect the front seat cushion connectors (A).
|
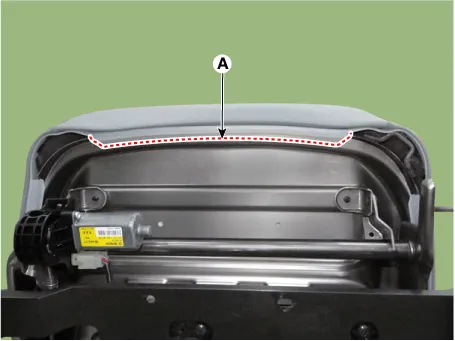
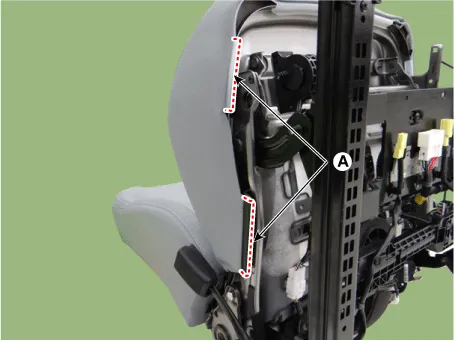
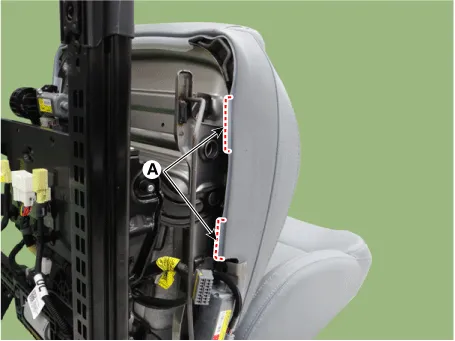
| 6. |
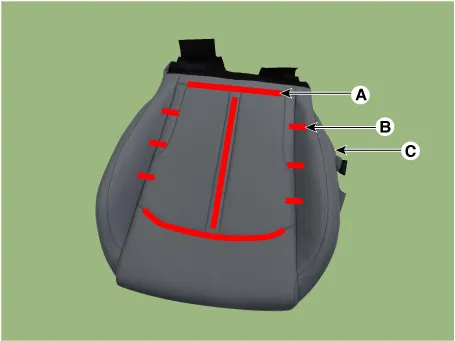
Unclip the protector (A) on the side of the front seat cushion cover using a remover and remove the front seat cushion cover. [Upper]
[RH]
[LH]
[Lower]
|
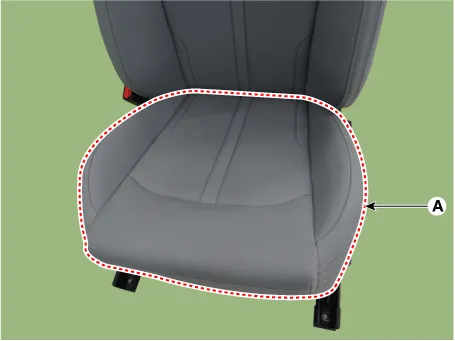
| 7. |
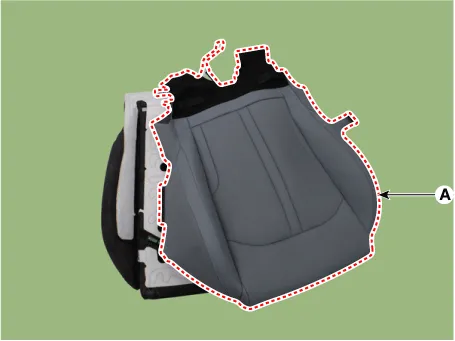
Remove the front seat cushion assembly (A) from the front seat cushion frame.
|
| 8. |
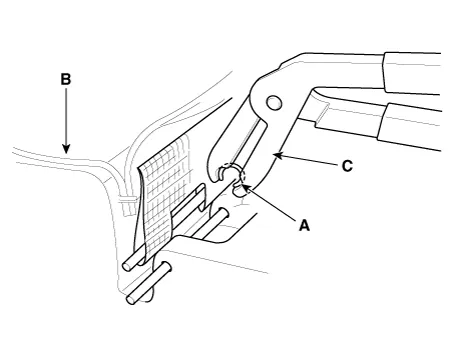
After removing the velcro tape (A) and hog-ring clips (B) inside the front seat cushion cover, remove the seat cushion cover (C).
|
| 9. |
Remove the front seat cushion cover (A) from the front seat cushion pad.
|
| 10. |
To install, reverse the removal procedure.
|

Components and components location Component Location 1. Front seat back cover Repair procedures Replacement • When removing with a flat-tip screwdriver or remover, wrap protective tape around the tools to prevent damage to components.
Components and components location Component Location 1. Front seat back frame assembly 2. Front seat cushion frame assembly Repair procedures Replacement • When removing with a flat-tip screwdriver or remover, wrap protective tape around the tools to prevent damage to components.
Other information:
Kia Optima DL3 2019-2026 Service and Repair Manual: Overhead Console Lamp
Schematic diagrams Connector and Terminal Function [A Type] Connector A Pin E xcept Russia Region Russia only Function Function 1 Battery (+) Battery (+)
Kia Optima DL3 2019-2026 Service and Repair Manual: Power Window Switch
Schematic diagrams Connector and Terminal Function Power Window Main Switch Pin Function 1 B-CAN (Low) 2 B-CAN (High) 3 Ground (Assist safety) 4 Assist safety 5
Categories
- Manuals Home
- Kia Optima Owners Manual
- Kia Optima Service Manual
- Heating, Ventilation and Air Conditioning
- Steering System
- Motor Driven Power Steering
- New on site
- Most important about car
