
Kia Optima DL3: Rear Door / Rear Door Curtain Assembly
Repair procedures
| Replacement |
Put on gloves to protect your hands. |

|

| 1. |
Remove the rear door trim. (Refer to Rear Door - "Rear Door Trim") |
| 2. |
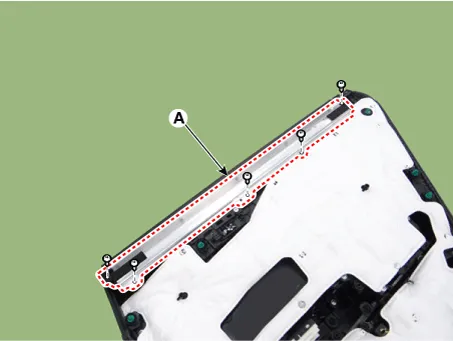
After loosening the mounting screws, remove the rear door curtain assembly (A).
|
| 3. |
Install in the reverse order of removal.
|
Components and components location Component Location 1. Rear door module Repair procedures Replacement • When removing with a flat-tip screwdriver or remover, wrap protective tape around the tools to prevent damage to components.
Repair procedures Replacement 1. Remove the rear door trim. (Refer to Rear Door - "Rear Door Trim") 2.
Other information:
Kia Optima DL3 2019-2026 Service and Repair Manual: Refrigerant Line
Components and components location Components Location 1. Suction & Liquid tube assembly 2. Discharge hose Repair procedures Replacement 1. If the compressor is marginally operable, run the engine at idle speed, and let the air conditioning work for a few minute
Kia Optima DL3 2019-2026 Service and Repair Manual: Evaporator Temperature Sensor
Description and operation Description The evaporator temperature sensor will detect the evaporator core temperature and interrupt compressor relay power in order to prevent evaporator from freezing by excessive cooling. The evaporator temperature sensor has the Negative Temperature Coefficient (NTC).
Categories
- Manuals Home
- Kia Optima Owners Manual
- Kia Optima Service Manual
- Air bag collision sensors
- Battery
- Lift And Support Points
- New on site
- Most important about car
