Kia Optima DL3: Driver Attention Warning (DAW) / System malfunction
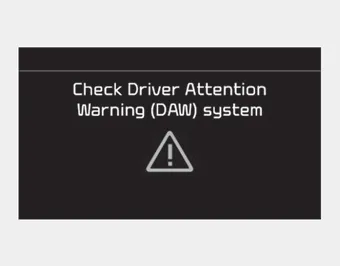
When the “Check System” warning message appears, the system is not working properly. In this case, take your vehicle to an authorized Kia dealer and have the system checked.
WARNING
- The Driver Attention Warning system is not a substitute for safe driving practices. It is the responsibility of the driver to always drive cautiously to prevent unexpected and sudden situations from occurring. Pay attention to the road conditions at all times.
- It may suggest a break according to the driver’s driving pattern or habits even if the driver doesn’t feel fatigued.
- The driver, who feels fatigued, should take a break, even though there is no break suggestion by the Driver Attention Warning system.
✽ NOTICE
The Driver Attention Warning system utilizes the camera sensor on the front windshield for its operation. To keep the camera sensor in the best condition, you should observe the followings:
- Do not disassemble camera temporarily for tinted window or attaching any
types of coatings and accessories. If you disassemble a camera and assemble it again,
take your vehicle to an authorized Kia dealer and have the system checked.
- Do not locate any reflective objects (i.e. white paper, mirror) over the dashboard.
Any light reflection may cause a mal-function of the Driver Attention Warning (DAW)
system.
- Pay extreme caution to keep the camera sensor out of water.
- Do not arbitrarily disassemble the camera assembly, nor apply any impact on the
camera assembly.
• Playing the vehicle audio system at high volume may offset the Driver Attention Warning system warning sounds.
CAUTION
The Driver Attention Warning system may not properly operate with limited alerting in the following situations:
- The lane detection performance is limited. (For more information, refer to “Lane Keeping Assist (LKA) system” in this chapter.)
- The vehicle is violently driven or is abruptly turned for obstacle avoidance (e.g. construction area, other vehicles, fallen objects, bumpy road).
- Forward drivability of the vehicle is severely undermined (possibly due to wide variation in tire pressures, uneven tire wear-out, toe-in/toe-out alignment).
- The vehicle drives on a curvy road.
- The vehicle drives on a bumpy road.
- The vehicle drives through a windy area.
- The vehicle is controlled by the following driver assistance systems:
- Lane Keeping Assist (LKA) system
- forward collision-avoidance assist (FCA) System.
✽ NOTICE
The Driver Attention Warning system does not detect actual driver fatigue or drowsiness. The system monitors driving and provides a warning if it detects inattentive driving practices.
The last break time is set to 00:00 and the driver's attention level is set to 5 (very attentive) when the driver resets the Driver Attention Warning system.
Your vehicle's fuel economy depends mainly on your style of driving, where you drive and when you drive. Each of these factors affects how many kilometers (miles) you can get from a liter (gallon) of fuel.
Other information:
Kia Optima DL3 2019-2026 Service and Repair Manual: Fog Lamp
Repair procedures Removal Front Fog Lamp 1. Disconnect the negative battery terminal. 2. Remove the front bumper assembly. (Refer to Body - "Front Bumper Assembly") 3.
Kia Optima DL3 2019-2026 Service and Repair Manual: Wiper Arm
Repair procedures Removal 1. If necessary, remove the blade by pushing it in the direction arrow after opening the hook (A). • Move the windshield glass wiper blades to the servic
Categories
- Manuals Home
- Kia Optima Owners Manual
- Kia Optima Service Manual
- Brake System
- Battery
- Headlamps
- New on site
- Most important about car
