Kia Optima DL3: Trunk Lid / Trunk Lid Assembly
Components and components location
| Component Location |
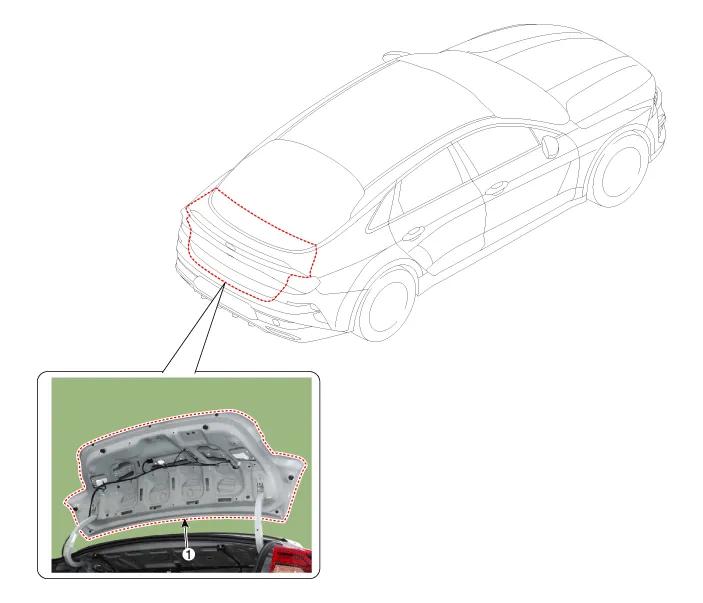
| 1. Trunk lid assembly |
Repair procedures
| Replacement |
Wear gloves to protect hands from injury. |

When removing and installing the trunk lid, an assistant is needed. |

| 1. |
Remove the trunk lid trim. (Refer to Trunk Lid - "Trunk Lid Trim") |
| 2. |
Remove the rear combination lamp. (Refer to Body Electrical System - "Rear Combination Lamp") |
| 3. |
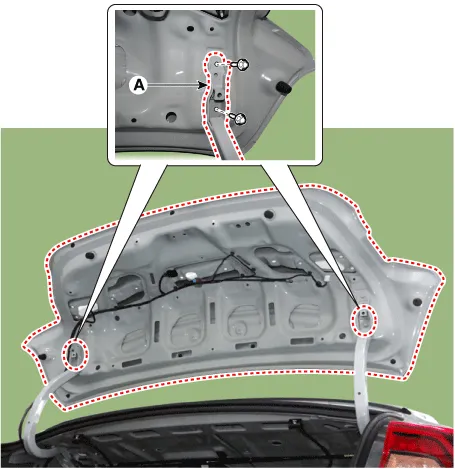
Disconnect the connectors and trunk lid wiring harness. |
| 4. |
After loosening the mounting bolts, then remove the trunk lid assembly (A).
|
| 5. |
To install, reverse the removal procedure.
|

Repair procedures Adjustment 1. Place the car on a flat surface and check whether the body and trunk lid are well-aligned.
Components and components location Component Location 1. Trunk lid trim Repair procedures Replacement • When removing with a flat-tip screwdriver or remover, wrap protective tape around the tools to prevent damage to components.
Other information:
Kia Optima DL3 2019-2026 Service and Repair Manual: Overhead Console Lamp
Schematic diagrams Connector and Terminal Function [A Type] Connector A Pin E xcept Russia Region Russia only Function Function 1 Battery (+) Battery (+)
Kia Optima DL3 2019-2026 Service and Repair Manual: Auto Defogging Sensor
Description and operation Description The auto defogging sensor is installed on the front window glass. The sensor judges and sends signal if moisture occurs to blow out wind for defogging. The air conditioner control module receives signal from the sensor and restrains moisture and eliminate defog by controlling the intake actu
Categories
- Manuals Home
- Kia Optima Owners Manual
- Kia Optima Service Manual
- Heating, Ventilation and Air Conditioning
- Steering System
- Charging System
- New on site
- Most important about car
