Kia Optima DL3: Body (Interior and Exterior) / Trunk Lid
Repair procedures
| Adjustment |
| 1. |
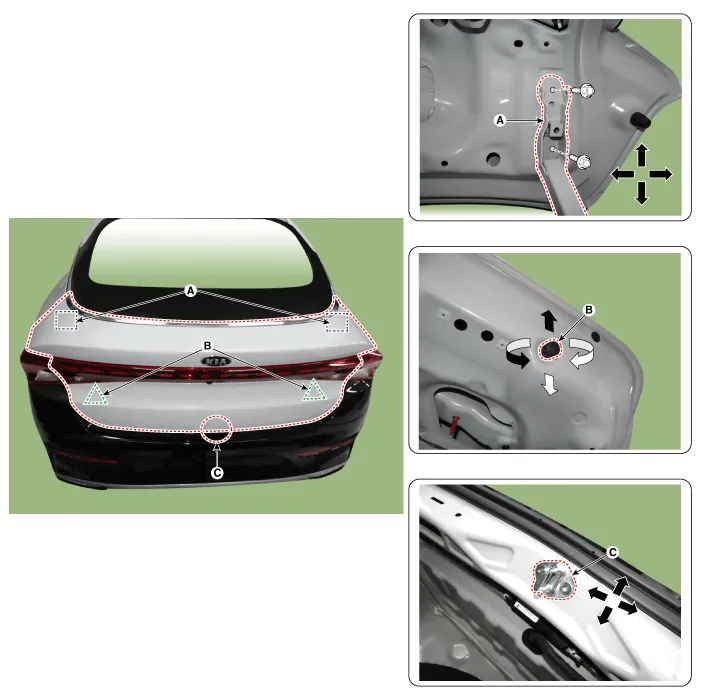
Place the car on a flat surface and check whether the body and trunk lid are well-aligned. |
| 2. |
After loosening the trunk lid hinge (A) mounting bolt, adjust the trunk lid by moving it up and down or from side to side. |
| 3. |
Adjust the gap between the trunk lid and body by turning the trunk lid overslam bumpers (B). |
| 4. |
After loosening the trunk lid striker (C) mounting bolts, adjust the striker by moving it back and forth or from side to side and then tighten the mounting bolts. |
| 5. |
Make sure the trunk lid opens or closes properly.
|
Components and components location Component Location 1. Hood latch assembly Repair procedures Replacement 1.
Components and components location Component Location 1. Trunk lid assembly Repair procedures Replacement Wear gloves to protect hands from injury.
Other information:
Kia Optima DL3 2019-2026 Service and Repair Manual: Power Windows
Components and components location Component Location 1. Power window main switch 2. Rear window main switch 3. Front power window motor 4. Rear power window motor Description and operation Description Power Window Safety Function When the driver or passenger p
Kia Optima DL3 2019-2026 Service and Repair Manual: Photo Sensor
Description and operation Description The photo sensor is located at the center of the defrost nozzles. The photo sensor contains a photovoltaic (sensitive to sunlight) diode. The solar radiation received by its light receiving portion, generates an electromotive force in proportion to the amount of radiation received which is
Categories
- Manuals Home
- Kia Optima Owners Manual
- Kia Optima Service Manual
- Headlamps
- Timing Chain
- Engine Mechanical System
- New on site
- Most important about car
