Kia Optima DL3: Trunk Lid / Trunk Lid Latch
Components and components location
| Component Location |

| 1. Trunk lid latch |
Repair procedures
| Replacement |
|

| 1. |
Remove the trunk lid trim. (Refer to Trunk Lid - "Trunk Lid Trim") |
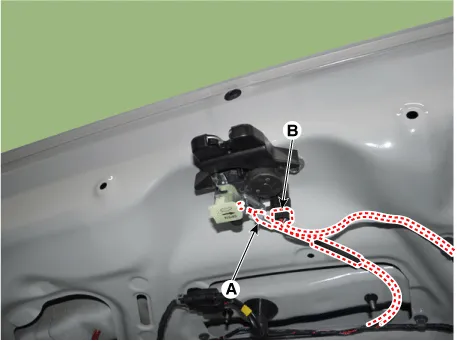
| 2. |
Disconnect the cable (A) and connector (B).
|
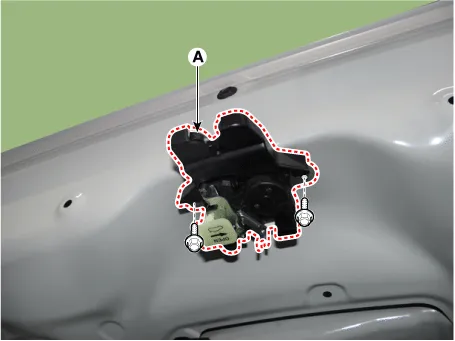
| 3. |
Remove the trunk lid latch (A) after loosening the bolts.
|
| 4. |
To install, reverse the removal procedure.
|

Repair procedures SReplacement 1. Remove the trunk lid weatherstrip (A). Do not apply sealant to the body.
Components and components location Component Location 1. Fuel filler door Repair procedures Replacement • When removing with a flat-tip screwdriver or remover, wrap protective tape around the tools to prevent damage to components.
Other information:
Kia Optima DL3 2019-2026 Service and Repair Manual: Rheostat
Schematic diagrams Connector and Terminal Function Repair procedures Removal 1. Disconnect the negative battery terminal. 2. Remove the crash pad lower panel. (Refer to Body - "Crash Pad Lower Panel") 3.
Kia Optima DL3 2019-2026 Service and Repair Manual: Power Door Lock Module
Repair procedures Inspection When prying with a flat-tip screwdriver or use a prying trim tool, wrap it with protective tape, and apply protective tape around the related parts, to prevent damage.
Categories
- Manuals Home
- Kia Optima Owners Manual
- Kia Optima Service Manual
- Timing Chain
- Steering System
- Cooling System
- New on site
- Most important about car
