Kia Optima DL3: Lighting / Lighting control
The light switch has a Headlight and a Parking light position.
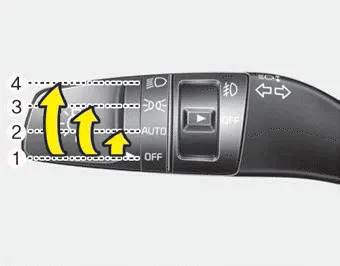
To operate the lights, turn the knob at the end of the control lever to one of the following positions:
(1) OFF position
(2) Auto light position
(3) Parking & Tail light
(4) Headlight position
Parking & Tail light

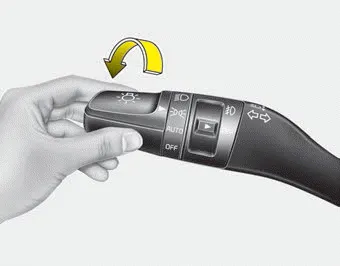
When the light switch is in the parking light position, the tail, license and instrument panel lights will turn ON.
Headlight position

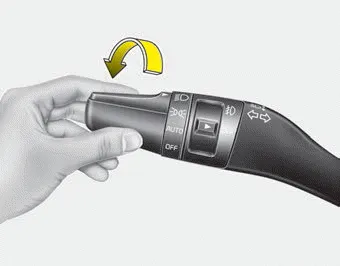
When the light switch is in the headlight position, the head, tail, license lights will turn ON.
✽ NOTICE
The ignition switch must be in the ON position to turn on the headlights.
Auto light position
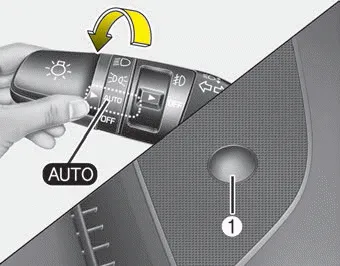
When the light switch is in the AUTO light position, the taillights and headlights will turn ON or OFF automatically depending on the amount of outside light the auto light sensor receives.
CAUTION
- Never put anything over the light sensor (1). This will impede operation of the autolight system control.
- Do not clean the sensor using a window cleaner as the cleaner may leave a light film which could interfere with the sensor's operation.
- If your vehicle has window tint or other types of metallic coating on the front windshield, the Auto light system may not work properly.
Battery saver function The purpose of this feature is to prevent the battery from being discharged if the lights are left in the ON position. The system automatically shuts off the parking lights 30 seconds after the ignition key is removed and the driver’s door is opened and closed.
To turn on the high beam headlamp, push the lever away from you. The lever will return to its original position. To turn off the high beam headlamps, pull the lever towards you.
Other information:
Kia Optima DL3 2019-2026 Service and Repair Manual: Multifunction Switch
Specifications Specifications Items Specifications Rated voltage Front fog lamp switch 5 V Lighting Auto lighting Dimmer & Passing Turn signal lamp Wiper Was
Kia Optima DL3 2019-2026 Service and Repair Manual: Intake Actuator
Components and components location Components Location 1. Intake actuator Description and operation Description The intake actuator is located at the blower unit. It regulates the intake door by a signal from the control unit.
Categories
- Manuals Home
- Kia Optima Owners Manual
- Kia Optima Service Manual
- Headlamps
- Motor Driven Power Steering
- Engine Mechanical System
- New on site
- Most important about car
