Kia Optima: Rear Suspension System / Trailing Arm
Repair procedures
| Removal |
| 1. |
Disconnect the (-) battery terminal. |
| 2. |
Remove the rear wheel and tire. (Refer to Tires/Wheels - "Wheel") |
| 3. |
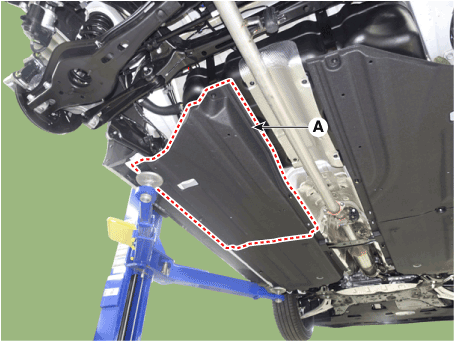
Remove the under cover (A).
|
| 4. |
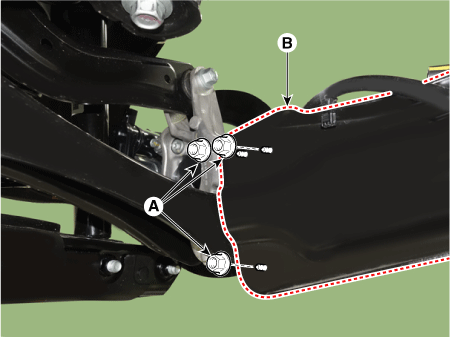
Loosen the nut (A) and remove trailing arm (B) from rear axle.
|
| 5. |
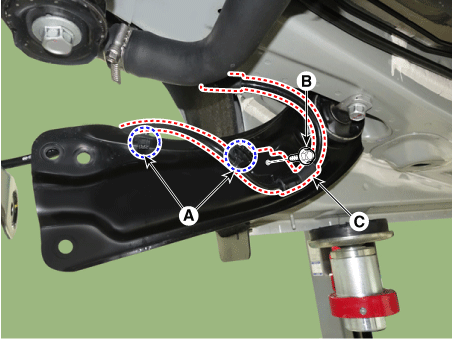
Loosen the fastener (A) and the bracket mounting bolt (B) and remove the rear wheel speed sensor line (C) from the trailing arm.
|
| 6. |
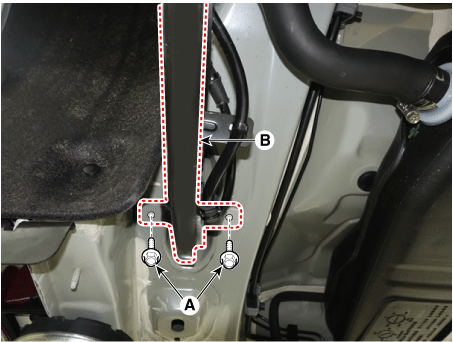
Loosen the mounting bolt (A) and remove the trailing arm (B).
|
| Inspection |
| 1. |
Check the bushing for wear and deterioration. |
| 2. |
Check the trailing arm for deformation. |
| 3. |
Check for all bolts and nuts. |
| Installation |
| 1. |
Install in the reverse order of removal. |
| 2. |
Check the alignment. (Refer to Suspension System - "Alingment") |
 Rear Assist Armature
Repair procedures
Removal
1.
Disconnect the (-) battery terminal.
2.
Remove the rear wheel and tire.
(Refer to Tires/Wheels - "Wheel") ...
 Rear Stabilizer Bar
Repair procedures
Removal
1.
Disconnect the (-) battery terminal.
2.
Loosen the bolt and nut (A) and then disconnect the rear stabilizer link
fr ...
Other information:
Kia Optima DL3 2019-2025 Owner's Manual: Warning
If the vehicle leaves a lane, the lane marker you cross will blink on the LCD display. If the vehicle moves out its lane because steering torque for assistance is not enough, the line indicator will blink. If all the conditions to activate LKA is not satisfied, the system will convert ...
Kia Optima DL3 2019-2025 Owner's Manual: ECO Indicator Light, SPORT Mode Indicator Light
ECO Indicator Light This indicator light illuminates : When the Active ECO system is activated by pressing the DRIVE mode button. The ECO indicator (green) will illuminate to show that the Active ECO is operating. ❈For more details, refer to “Drive Mode Integrated Control System" ...


