Kia Optima DL3: Hood / Hood Latch
Components and components location
| Component Location |
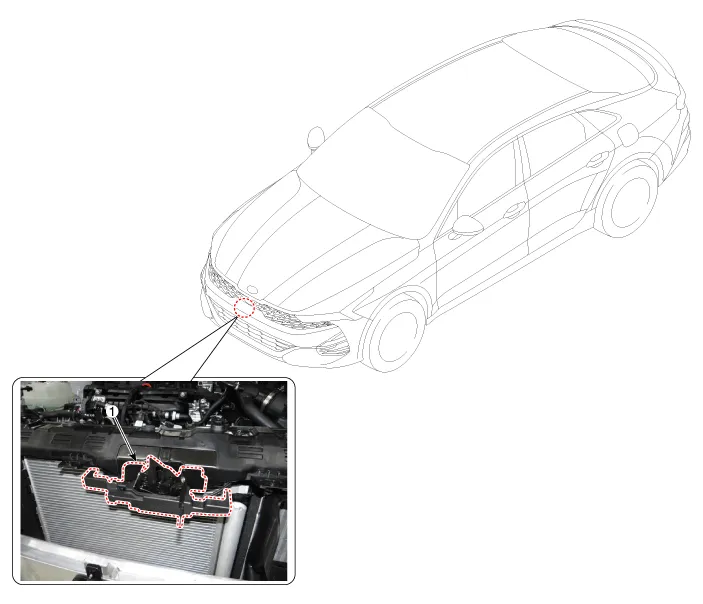
| 1. Hood latch assembly |
Repair procedures
| Replacement |
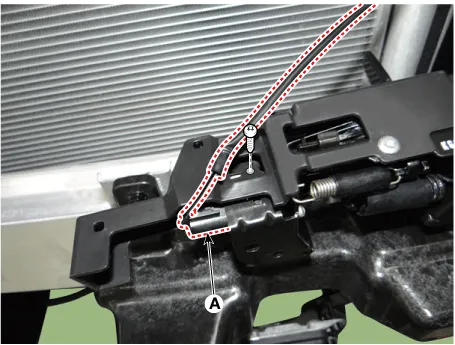
| 1. |
Remove the front bumper assembly. (Refer to Front Bumper - "Front Bumper Assembly") |
| 2. |
Loosen the mounting nuts and remove the hood latch assembly (A).
|

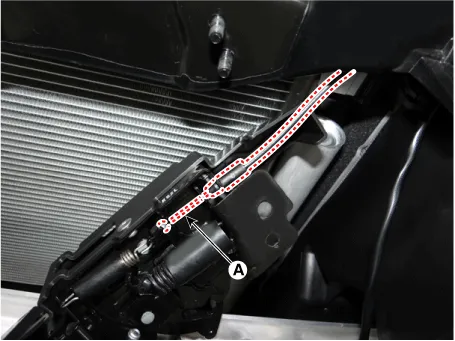
| 3. |
Disconnect the hood latch connector (A) after loosening the screw.
|
| 4. |
Disconnect the hood latch cable (A) and remove the hood latch assembly.
|
| 5. |
To install, reverse the removal procedure.
|

Components and components location Component Location 1. Hood latch release handle Repair procedures Replacement 1.
Repair procedures Adjustment 1. Place the car on a flat surface and check whether the body and trunk lid are well-aligned.
Other information:
Kia Optima DL3 2019-2026 Service and Repair Manual: Lighting System
Specifications Specification Item Tyep Watt (W) Front Headlamp A Type High beam LED - Low beam LED - Position/DRL LED -
Kia Optima DL3 2019-2026 Service and Repair Manual: Overhead Console Lamp
Schematic diagrams Connector and Terminal Function [A Type] Connector A Pin E xcept Russia Region Russia only Function Function 1 Battery (+) Battery (+)
Categories
- Manuals Home
- Kia Optima Owners Manual
- Kia Optima Service Manual
- Restraint
- Floor Console Assembly
- Automatic Transaxle System
- New on site
- Most important about car
