Kia Optima DL3: Body (Interior and Exterior) / Hood
Repair procedures
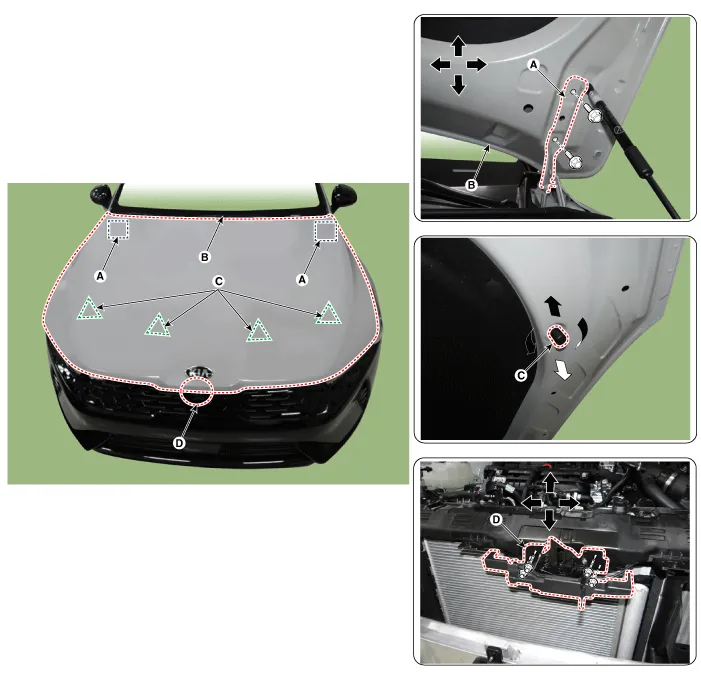
| Adjustment |
| 1. |
After loosening the hinge (A) mounting bolt, adjust the hood (B) by moving it up and down or from side to side and tighten the bolt. |
| 2. |
Adjust the hood height by moving the hood overslam bumpers (C) up and down. |
| 3. |
After loosening the hood latch (D) mounting bolts, adjust the latch by moving it up and down or from side to side.
|
Components and components location Component Location 1. Fender assembly Repair procedures Replacement • When removing the fender, wrap protective tape around a screwdriver or remover not to damage components.
Components and components location Component Location 1. Hood assembly Repair procedures Replacement When removing the fender, wrap protective tape around a screwdriver or remover not to damage components.
Other information:
Kia Optima DL3 2019-2026 Service and Repair Manual: Evaporator Temperature Sensor
Description and operation Description The evaporator temperature sensor will detect the evaporator core temperature and interrupt compressor relay power in order to prevent evaporator from freezing by excessive cooling. The evaporator temperature sensor has the Negative Temperature Coefficient (NTC).
Kia Optima DL3 2019-2026 Service and Repair Manual: Heater Control Unit
Components and components location Components Connector Pin Function [Connector A] Pin NO Funtion Pin NO Funtion 1 Ground 11 Ground 2 Clean signal 12 -
Categories
- Manuals Home
- Kia Optima Owners Manual
- Kia Optima Service Manual
- Timing Chain
- Cooling System
- Heating, Ventilation and Air Conditioning
- New on site
- Most important about car
