Kia Optima DL3: Body (Interior and Exterior) / Outside Rear View Mirror
Components and components location
| Component Location |
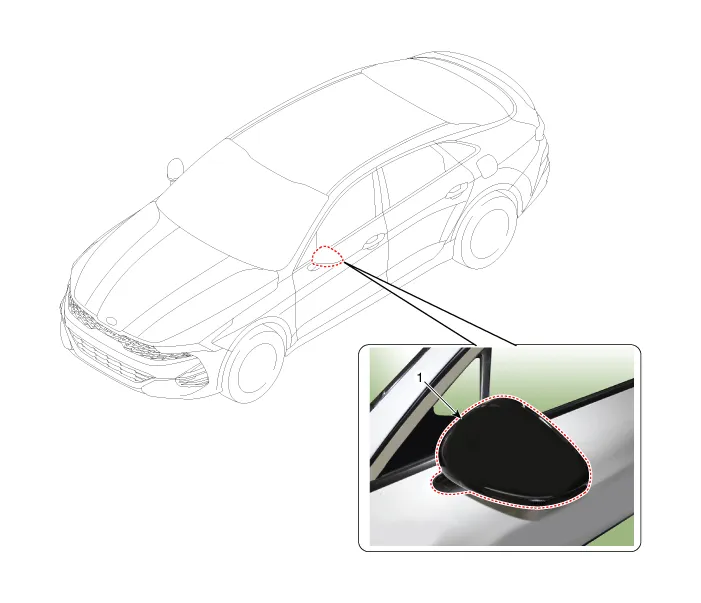
| 1. Outside rear view mirror
|
Repair procedures
| Replacement |
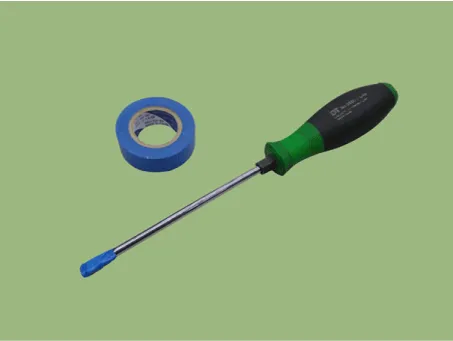
Put on gloves to prevent hand injuries. |

|

| 1. |
Remove the front door trim. (Refer to Front Door - "Front Door Trim") |
| 2. |
Using a screwdriver or remover, remove the outside rear view mirror cover (A).
|
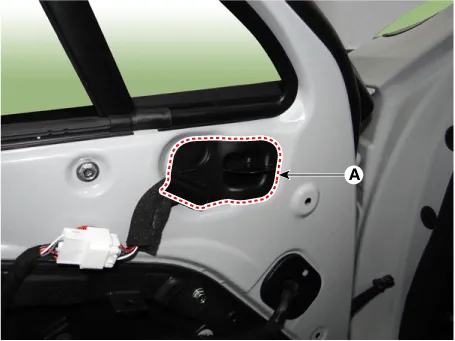
| 3. |
Disconnect the outside rear view mirror connector (A).
|
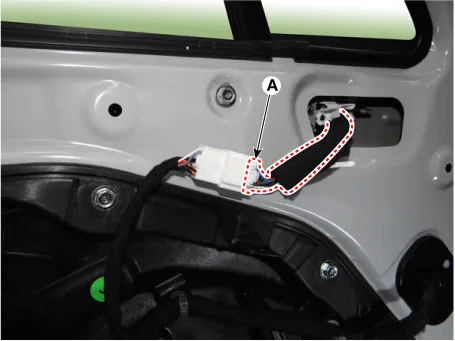
| 4. |
After loosening the mounting nuts, remove the outside rear view mirror (A).
|
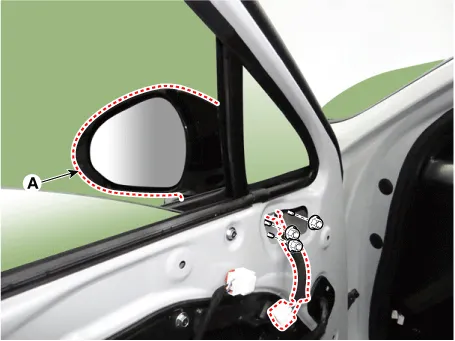
| 5. |
To install, reverse the removal procedure.
|

| Disassembly |
[Scalp]
|
| 1. |
Remove outside rear view mirror assembly. (Refer to Body - "Outside View Mirror") |
| 2. |
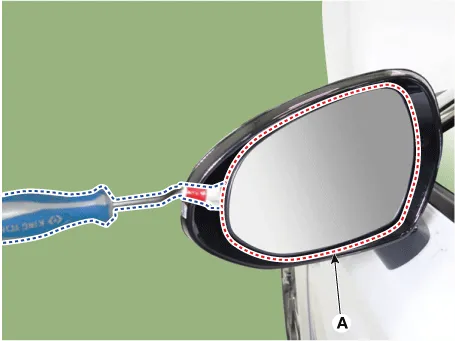
After inserting the flat-bladed screwdriver as shown in the illustration below, remove the mirror (A) by applying slight force.
|
| 3. |
Disconnect the heater connectors (A) and rear corner radar indicator connectors (B).
|

| 4. |
Remove the scalp.
|


| 5. |
Reassemble in the reverse order of disassembly. (Refer to Body - "Outside View Mirror") |
[Housing cover]
|
| 1. |
Remove outside rear view mirror assembly. (Refer to Body - "Outside View Mirror") |
| 2. |
After inserting the flat-bladed screwdriver as shown in the illustration below, remove the mirror (A) by applying a momentary force.
|
| 3. |
Disconnect the heater connectors (A) and rear corner radar indicator connectors (B).
|
| 4. |
Remove the housing cover mounting screw. |
| 5. |
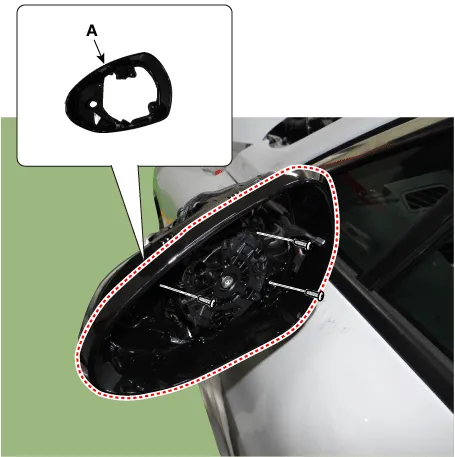
Using a remover and remove the housing cover (A).
|
| 6. |
Reassemble in the reverse order of disassembly. |
Repair procedures Replacement 1. Remove the roof trim. 2. Remove the roller blind. (Refer to Panorama sunroof - "Roller Blind") 3.
Components and components location Component Location 1. Inside rear view mirror Repair procedures Replacement Put on gloves to prevent hand injuries.
Other information:
Kia Optima DL3 2019-2026 Service and Repair Manual: Power Door Mirrors
C
Kia Optima DL3 2019-2026 Service and Repair Manual: Rear Glass Defogger Printed Heater
Repair procedures Inspection • Wrap tin foil around the end of the voltmeter test lead to prevent damaging the heater line. Apply pressure on the tin foil with hand and move the tin foil along the grid line to check for open circ
Categories
- Manuals Home
- Kia Optima Owners Manual
- Kia Optima Service Manual
- Motor Driven Power Steering
- Engine Mechanical System
- Rear Brake Disc
- New on site
- Most important about car
