Kia Optima: Trunk Trim / Luggage Side Trim
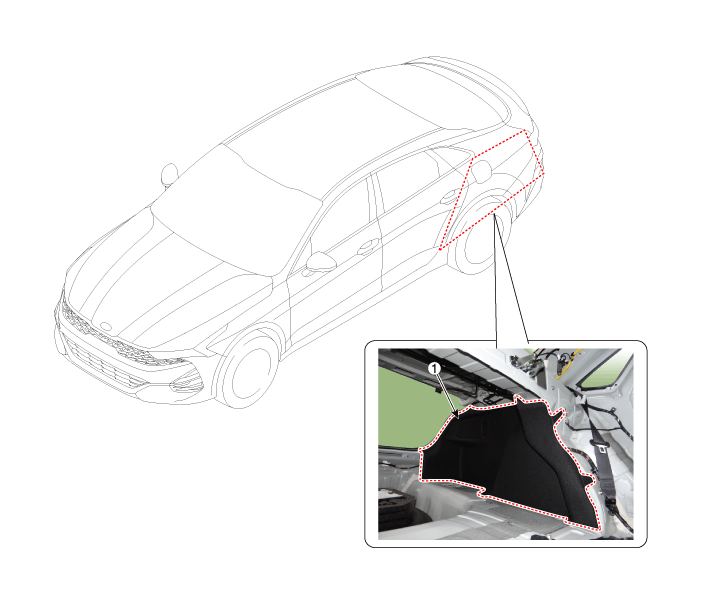
Components and components location
| Component Location |

| 1. Luggage side trim |
Repair procedures
| Replacement |
|
| 1. |
Remove the rear seat cushion assembly. (Refer to Rear Seat - "Rear Seat Assembly") |
| 2. |
Remove the rear seat back assembly. (Refer to Rear Seat - "Rear Seat Assembly") |
| 3. |
Remove the rear door pillar trim. (Refer to Interior Trim - "Rear Pillar Trim") |
| 4. |
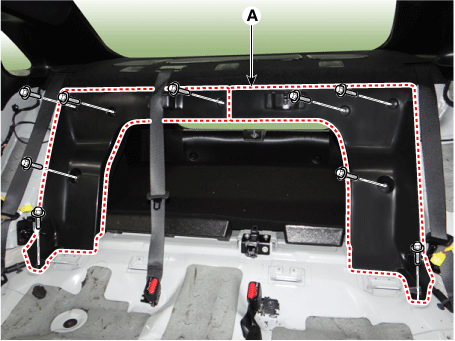
Loosen the mounting bolts and remove the luggage partition center trim cover (A).
|
| 5. |
Remove the rear transverse trim. (Refer to Interior Trim - "Rear Transverse Trim") |
| 6. |
Remove the trunk lid weatherstrip. (Refer to Trunk Lid - "Trunk Lid Weatherstrip") |
| 7. |
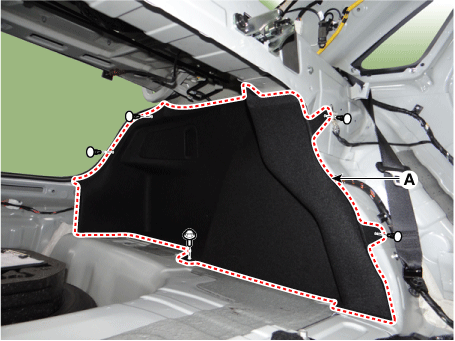
Loosen the mounting bolt and clips, remove the luggage side trim (A).
|
| 8. |
To install, reverse the removal procedure.
|
 Rear Package Tray Trim
Components and components location
Component Location
1. Rear package tray trim
Repair procedures
Replacement
Rear package tray trim
...
 Rear Transverse Trim
Components and components location
Component Location
1. Rear transverse trim
Repair procedures
Replacement
& ...
Other information:
Kia Optima DL3 2019-2025 Service and Repair Manual: SRSCM
Components and components location Components 1. Supplemental Restraint System Control Module (SRSCM) 2. Gravity Side Impact Sensor (G-SIS) 3. Front Impact Sensor (FIS) 4. Front Impact Sensor (FIS) 5. Pressure Side Impact Sensor (P-SIS) ...
Kia Optima DL3 2019-2025 Owner's Manual: Transmitter precautions
The transmitter will not work if any of following occur: - The ignition key is in the ignition switch. - You exceed the operating distance limit (about 10 m [30 feet]). - The battery in the transmitter is weak. - Other vehicles or objects may be blocking the signal. - The weather is ext ...


