Kia Optima DL3: Trunk Trim / Rear Transverse Trim
Components and components location
| Component Location |
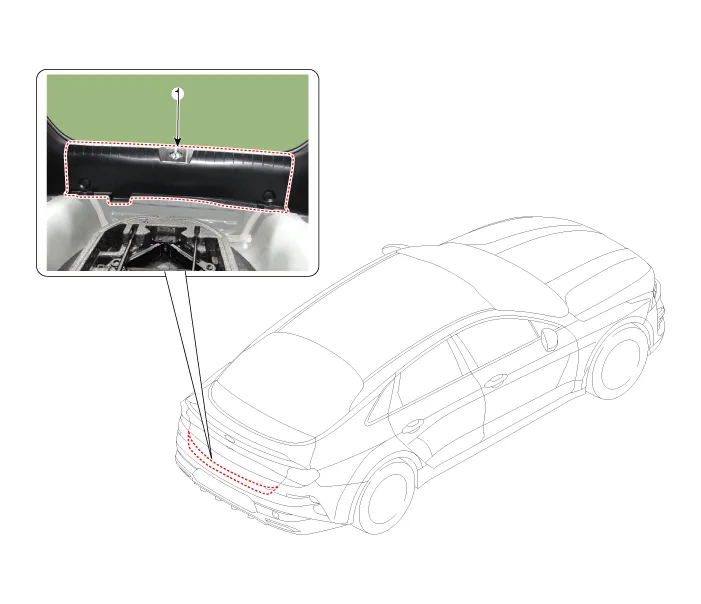
| 1. Rear transverse trim |
Repair procedures
| Replacement |
|

| 1. |
Remove the trunk lid weatherstrip. (Refer to Trunk Lid - "Trunk Lid Weatherstrip") |
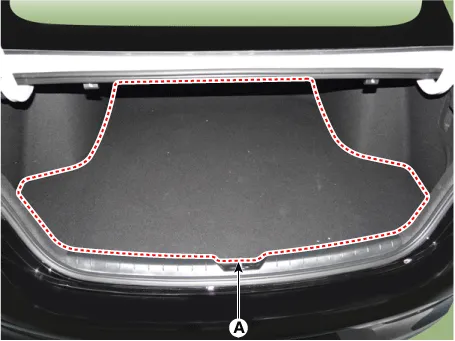
| 2. |
Remove the luggage covering mat (A).
|
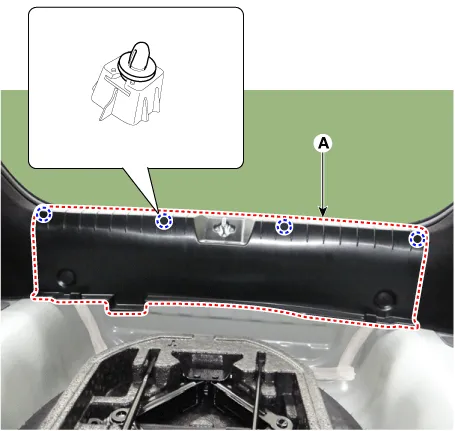
| 3. |
Loosen the mounting clips and remove the rear transverse trim (A).
|
| 4. |
To install, reverse the removal procedure.
|

Components and components location Component Location 1. Luggage side trim Repair procedures Replacement • When removing with a flat-tip screwdriver or remover, wrap protective tape around the tools to prevent damage to components.
Components and components location Components 1. Windshield glass 2. Windshield glass upper molding Repair procedures Removal Put on gloves to prevent hand injuries.
Other information:
Kia Optima DL3 2019-2026 Service and Repair Manual: Rear Glass Defogger Switch
Repair procedures Inspection 1. In the body electrical system, failure can be quickly diagnosed by using the vehicle diagnostic system (KDS). The diagnostic system (KDS) provides the following information. (1) Self diagnosis : Checking failure and code number (DTC).
Kia Optima DL3 2019-2026 Service and Repair Manual: Receiver-Drier
Repair procedures Replacement 1. Remove the condenser. 2. Remove the cap (A) on the bottom of the condenser with a L wrench. Tightening torque : 9.81 - 14.71 N.
Categories
- Manuals Home
- Kia Optima Owners Manual
- Kia Optima Service Manual
- Battery
- Instrument panel overview
- Charging System
- New on site
- Most important about car
