Kia Optima DL3: Body (Interior and Exterior) / Outside Rear View Mirror
Components and components location
| Component Location |
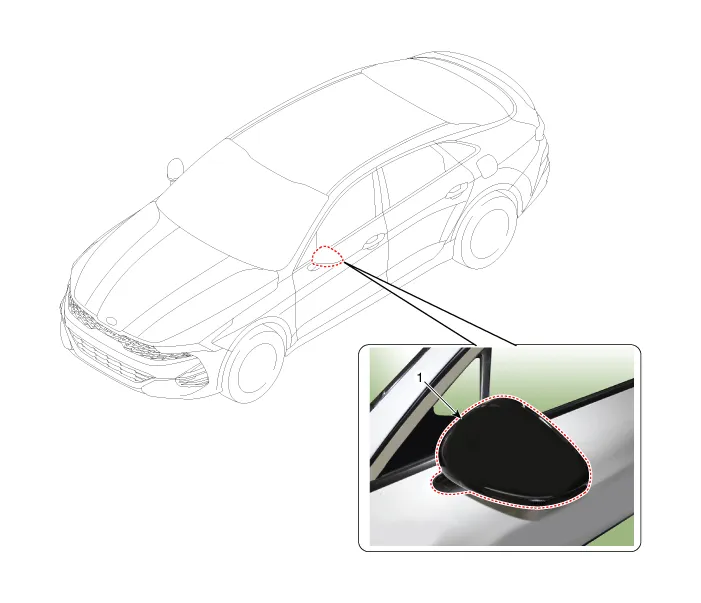
| 1. Outside rear view mirror
|
Repair procedures
| Replacement |
Put on gloves to prevent hand injuries. |

|

| 1. |
Remove the front door trim. (Refer to Front Door - "Front Door Trim") |
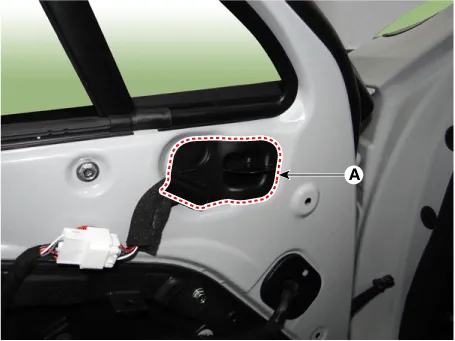
| 2. |
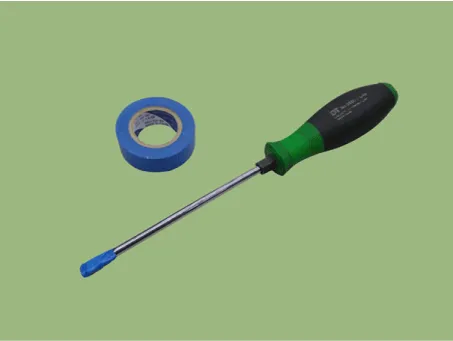
Using a screwdriver or remover, remove the outside rear view mirror cover (A).
|
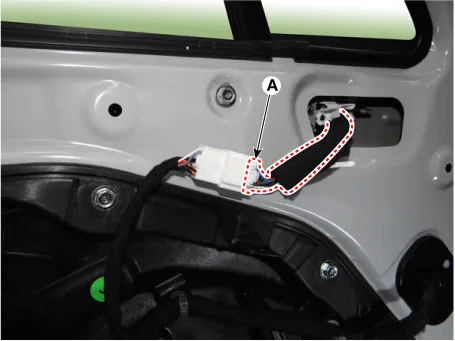
| 3. |
Disconnect the outside rear view mirror connector (A).
|
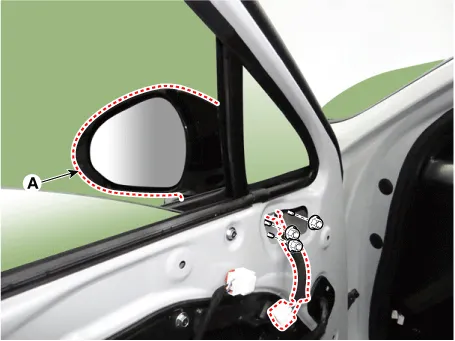
| 4. |
After loosening the mounting nuts, remove the outside rear view mirror (A).
|
| 5. |
To install, reverse the removal procedure.
|

| Disassembly |
[Scalp]
|
| 1. |
Remove outside rear view mirror assembly. (Refer to Body - "Outside View Mirror") |
| 2. |
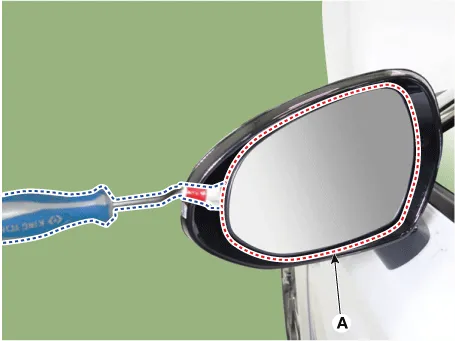
After inserting the flat-bladed screwdriver as shown in the illustration below, remove the mirror (A) by applying slight force.
|
| 3. |
Disconnect the heater connectors (A) and rear corner radar indicator connectors (B).
|

| 4. |
Remove the scalp.
|


| 5. |
Reassemble in the reverse order of disassembly. (Refer to Body - "Outside View Mirror") |
[Housing cover]
|
| 1. |
Remove outside rear view mirror assembly. (Refer to Body - "Outside View Mirror") |
| 2. |
After inserting the flat-bladed screwdriver as shown in the illustration below, remove the mirror (A) by applying a momentary force.
|
| 3. |
Disconnect the heater connectors (A) and rear corner radar indicator connectors (B).
|
| 4. |
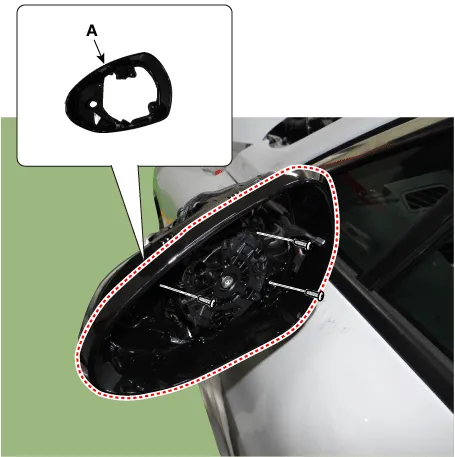
Remove the housing cover mounting screw. |
| 5. |
Using a remover and remove the housing cover (A).
|
| 6. |
Reassemble in the reverse order of disassembly. |
Repair procedures Replacement 1. Remove the roof trim. 2. Remove the roller blind. (Refer to Panorama sunroof - "Roller Blind") 3.
Components and components location Component Location 1. Inside rear view mirror Repair procedures Replacement Put on gloves to prevent hand injuries.
Other information:
Kia Optima DL3 2019-2026 Service and Repair Manual: Power Window Motor
Schematic diagrams Circuit Diagram [Safety Window Motor] [Standard Window Motor] Repair procedures Inspection Front Power Window Motor 1. Disconnect the negative battery terminal. 2.
Kia Optima DL3 2019-2026 Service and Repair Manual: Air Conditioning System
General safety information and caution Instructions (R-134a) When Handling Refrigerant 1. R-134a liquid refrigerant is highly volatile. A drop on the skin of your hand could result in localized frostbite. When handling the refrigerant, be sure to wear gloves.
Categories
- Manuals Home
- Kia Optima Owners Manual
- Kia Optima Service Manual
- Headlamps
- Rear Brake Disc
- Charging System
- New on site
- Most important about car
