Kia Optima DL3: Panorama Sunroof / Panorama Sunroof Assembly
Components and components location
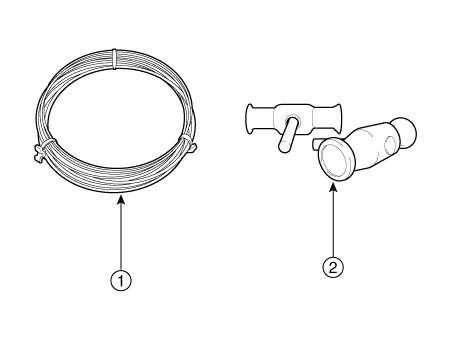
| Components Location |

| 1. Panorama sunroof assembly
|
Repair procedures
| Removal |
|

| 1. |
Remove the roof side molding. (Refer to Body Side Molding - "Roof Side Molding") |
| 2. |
Remove the front glass. (Refer to Panorama Sunroof - "Front Glass") |
| 3. |
Remove the roof trim. (Refer to Roof Trim - "Roof Trim Assembly") |
| 4. |
Remove the rear window glass. (Refer to Rear Window Glass - "Repair procedures") |
| 5. |
Completely close the movable glass using the panorama sunroof switch. |
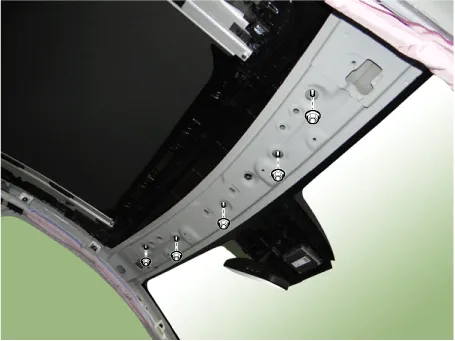
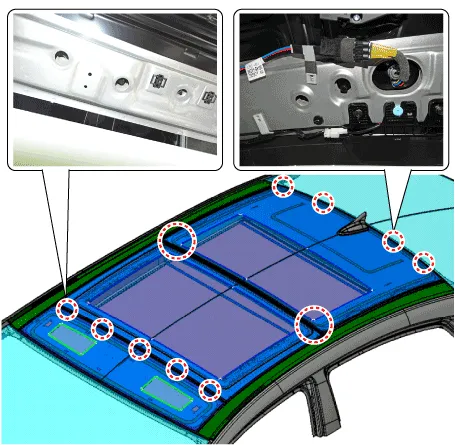
| 6. |
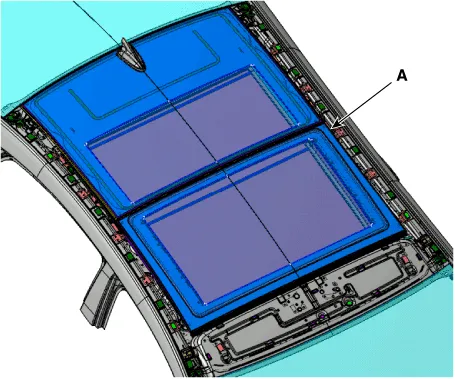
Loosen the bolts on the side of the panorama sunroof.
|
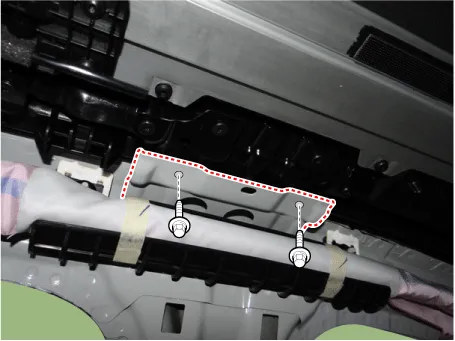
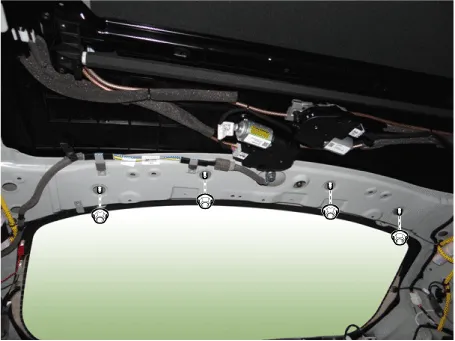
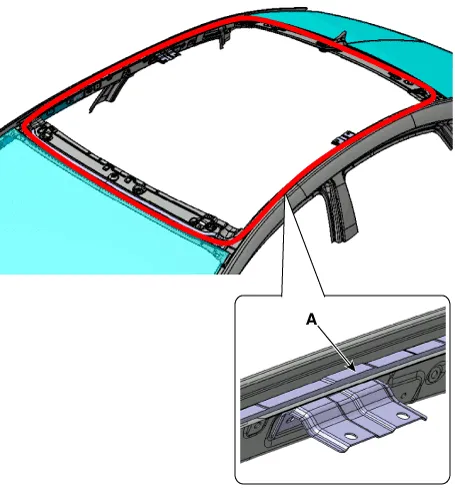
| 7. |
Loosen the panorama sunroof mounting nuts (A). [Front]
[Rear]
|
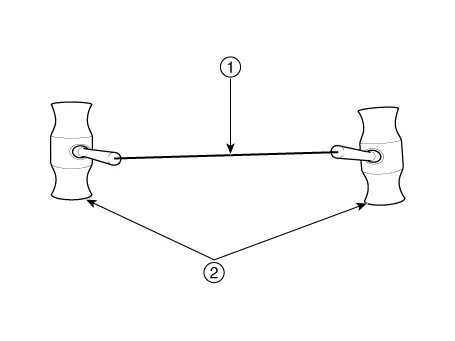
| 8. |
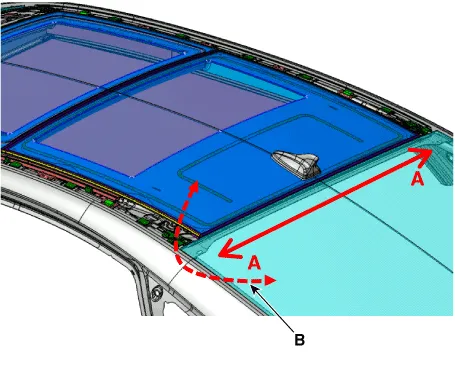
Cut sealant in edge side front (A) pulling wire (B) from left to right.
|


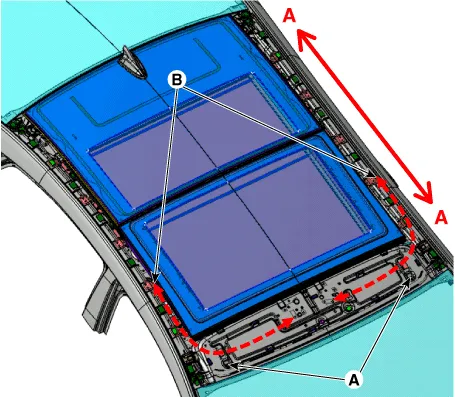
| 9. |
Cut sealant between edge side front (A-A) pulling wire (B) from left to right.
|
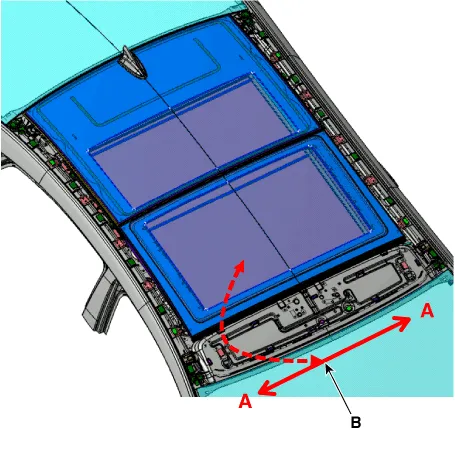
| 10. |
Cut sealant between edge side (A-A) pulling wire (B) from left to right.
|
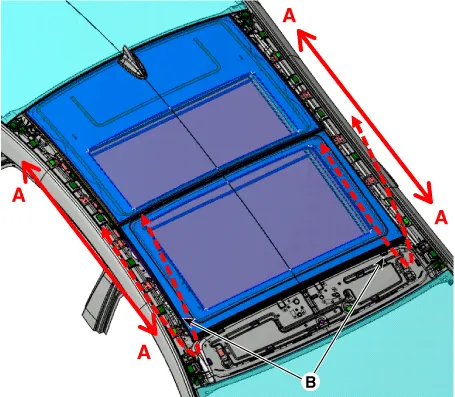
| 11. |
Cut sealant between edge side rear (A-A) pulling wire (B) from left to right.
|
| 12. |
After every edge side sealant is cut, remove panorama sunroof assembly (A).
|
| 13. |
Use a blade to cut off residual sealant (A) around body panel.
|
| Installation |
|
| 1. |
Use alcohol or an air gun to clean up the edges of the body panel and the panorama sunroof. |
| 2. |
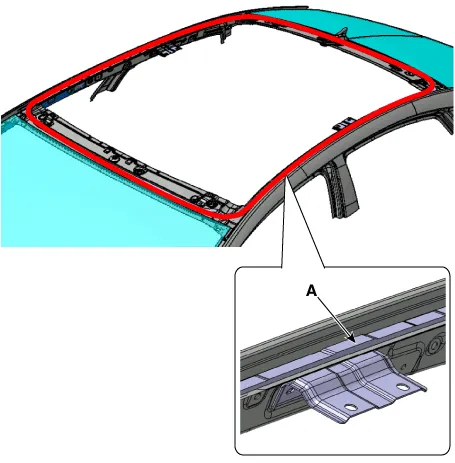
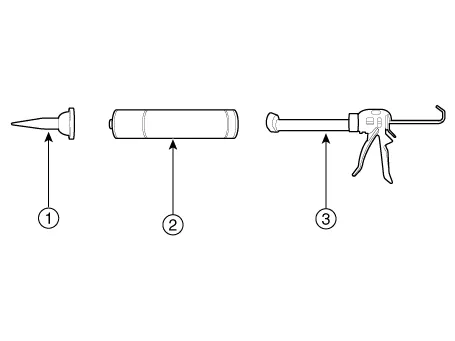
Use a sealant gun to apply sealant (B) around body panel (A).
|
| 3. |
Carefully install panorama sunroof on body flange set by centering device hole (A).
|

| 4. |
Check steps and gaps for every side.
|
| 5. |
Tighten panorama sunroof fixing nuts.
|
| 6. |
Perform water leak test.
|
| 7. |
If water leak occurs, apply sealant on leakage spot.
|
| 8. |
Install the rear window glass. (Refer to Rear Window Glass - "Repair procedures") |
| 9. |
Install the roof trim. (Refer to Roof Trim - "Roof Trim Assembly") |
| 10. |
Install the front glass. (Refer to Panorama Sunroof - "Front Glass") |
| 11. |
Install the roof side molding. (Refer to Body Side Molding - "Roof Side Molding") |
Repair procedures Replacement 1. Remove the roof trim. (Refer to Roof Trim - "Roof Trim Assembly") 2.
Repair procedures Replacement 1. Remove the roof trim. 2. Remove the roller blind. (Refer to Panorama sunroof - "Roller Blind") 3.
Other information:
Kia Optima DL3 2019-2026 Service and Repair Manual: Vanity Lamp
Repair procedures Removal When removing with a flat-tip screwdriver or remover, wrap protective tape around the tools to prevent damage to components. 1.
Kia Optima DL3 2019-2026 Service and Repair Manual: Heater Unit
Components and components location Component Location 1. Heater unit assembly Compoents 1. Mode control actuator 2. Temperature control actuator [LH] 3. PTC Heater dummy 4.
Categories
- Manuals Home
- Kia Optima Owners Manual
- Kia Optima Service Manual
- Driving your vehicle
- Battery
- Heating, Ventilation and Air Conditioning
- New on site
- Most important about car
