Kia Optima DL3: Interior Trim / Cowl Side Trim
Components and components location
| Component Location |
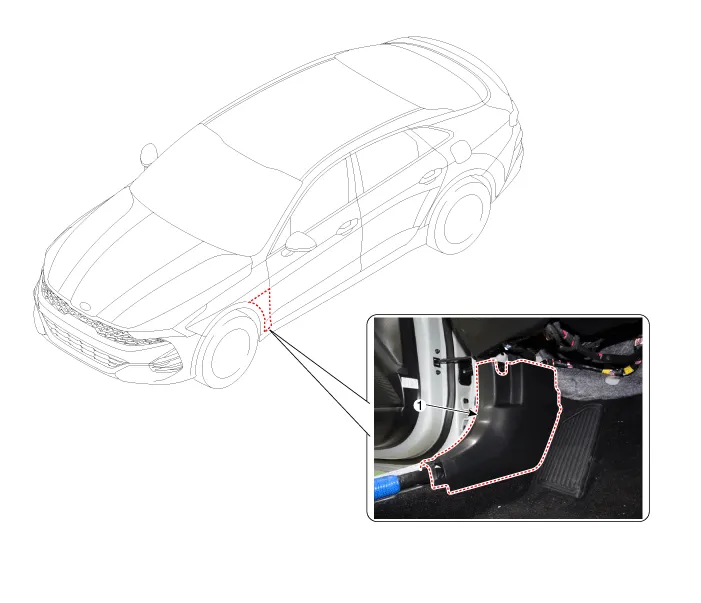
| 1. Cowl side trim |
Repair procedures
| Replacement |
Put on gloves to prevent hand injuries. |

|

| 1. |
Remove the front door scuff trim. (Refer to Interior Trim - "Door Scuff Trim") |
| 2. |
Remove the hood latch release handle. (Refer to Hood - "Hood Latch Release Handle") |
| 3. |
Carefully remove the front door body side weatherstrip. |
| 4. |
Using a screwdriver or remover, remove the cowl side trim (A).
|

| 5. |
To install, reverse the removal procedure.
|

Repair procedures Replacement Put on gloves to prevent hand injuries.
Components and components location Component Location 1. Front pillar trim Repair procedures Replacement • Put on gloves to prevent hand injuries.
Other information:
Kia Optima DL3 2019-2026 Service and Repair Manual: Rear Glass Defogger Printed Heater
Repair procedures Inspection • Wrap tin foil around the end of the voltmeter test lead to prevent damaging the heater line. Apply pressure on the tin foil with hand and move the tin foil along the grid line to check for open circ
Kia Optima DL3 2019-2026 Service and Repair Manual: Blower Unit
Components and components location Component Location 1. Blower unit assembly Components 1. Intake actuator 2. Cluster ionizer 3. Air filter 4. Blower motor assembly 5.
Categories
- Manuals Home
- Kia Optima Owners Manual
- Kia Optima Service Manual
- Steering System
- Timing Chain
- Automatic Transaxle System
- New on site
- Most important about car
