Kia Optima DL3: Front Seat / Front Seat Back Cover
Components and components location
| Component Location |
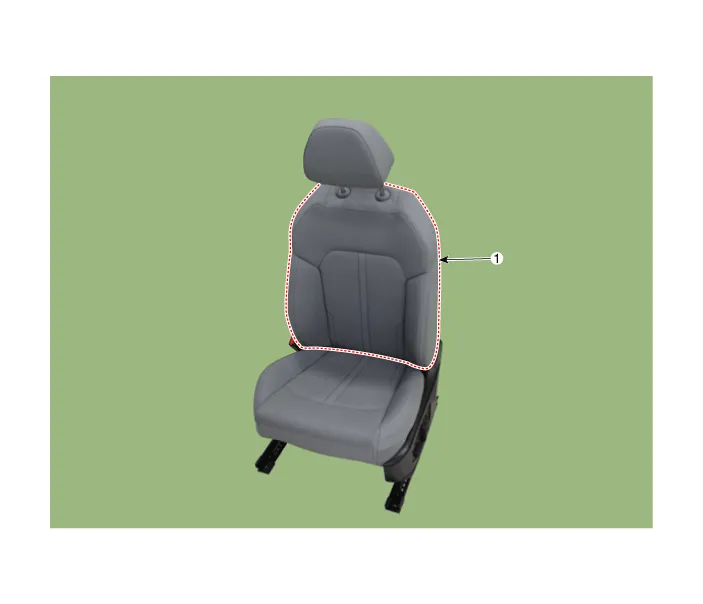
| 1. Front seat back cover |
Repair procedures
| Replacement |
|

| 1. |
Remove the front seat assembly. (Refer to Front Seat - "Front Seat Assembly") |
| 2. |
Remove the front seat outer shield cover. (Refer to Front Seat - "Front Seat Outer Shield Cover") |
| 3. |
Remove the front seat inner shield cover. (Refer to Front Seat - "Front Seat Inner Shield Cover") |
| 4. |
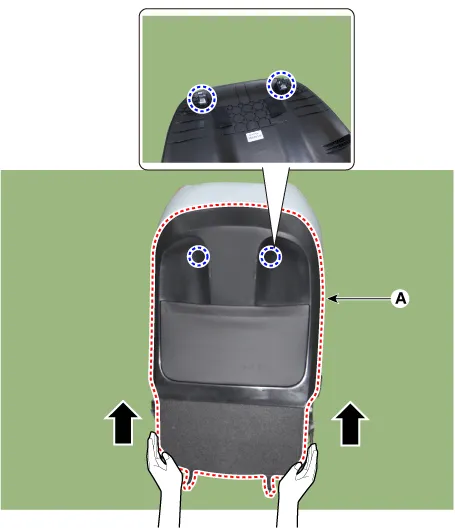
Remove the front seat lower protect (A).
|
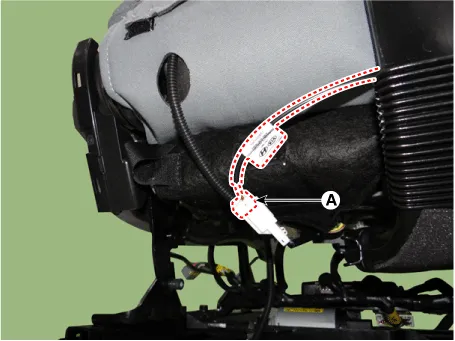
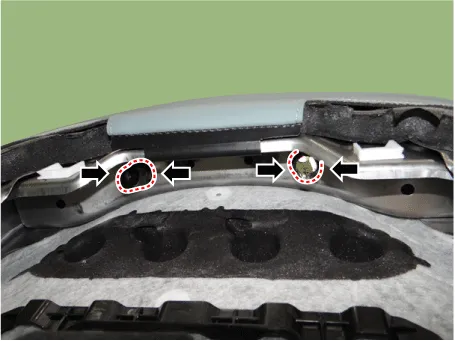
| 5. |
Separate the front seat heating connector (A).
|
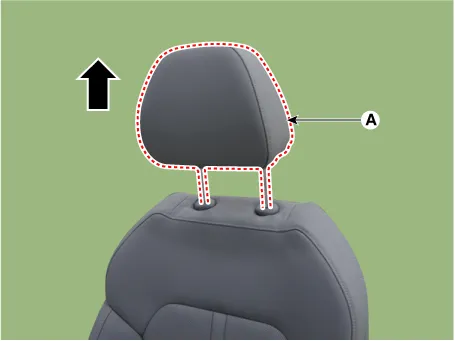
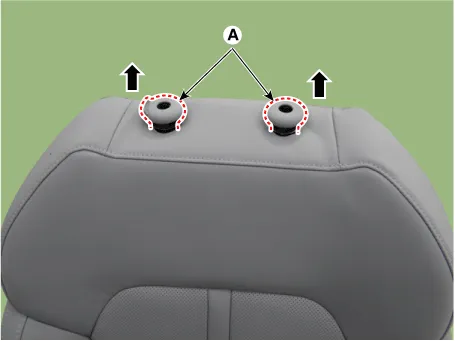
| 6. |
Remove the front seat headrest (A).
|
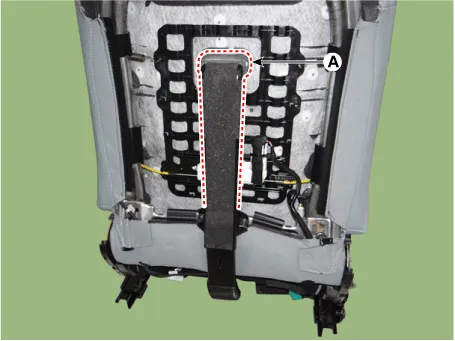
| 7. |
Remove the front seat back board (A).
|

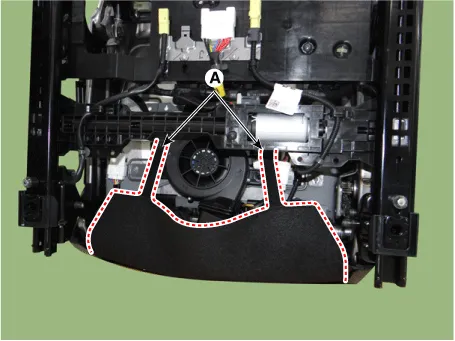
| 8. |
Press the lock pin and remove the front seat headrest guide (A).
|
| 9. |
Loosen the mounting screws and remove the front seat back duct (A).
|
| 10. |
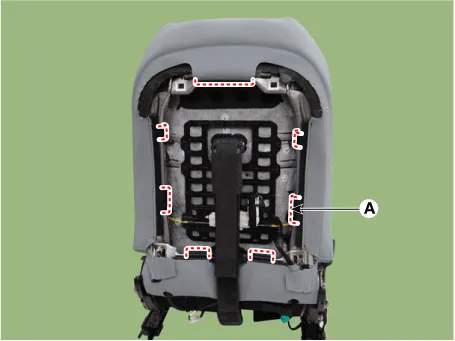
Remove the front seat back assembly protect (A) and remove the front seat back assembly from front seat frame.
|
| 11. |
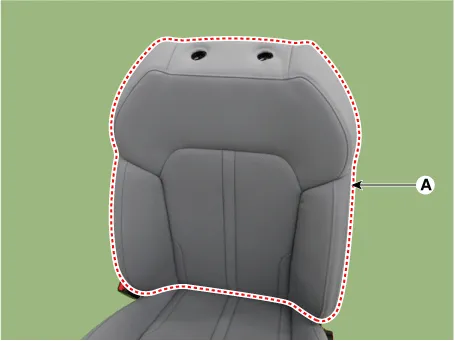
Remove the front seat back assembly (A) from the front seat back frame.
|
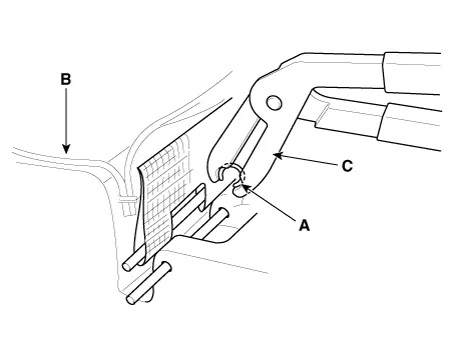
| 12. |
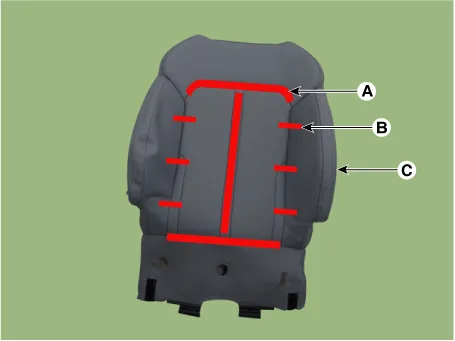
After removing the velcro tape (A) and hog-ring clips (B) inside the front seat back cover, remove the seat back cover (C).
|
| 13. |
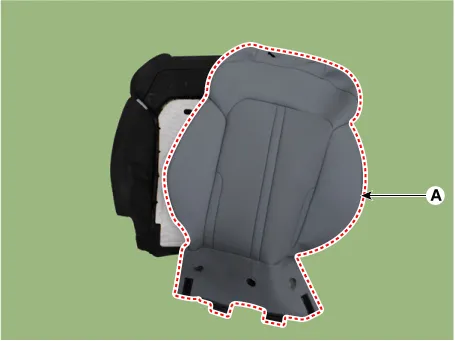
Remove the front seat back cover (A) from the front seat back pad.
|
| 14. |
To install, reverse the removal procedure.
|

Components and components location Component Location 1. Front seat inner shield cover Repair procedures Replacement • When removing with a flat-tip screwdriver or remover, wrap protective tape around the tools to prevent damage to components.
Components and components location Component Location 1. Front seat cushion cover Repair procedures Replacement • When removing with a flat-tip screwdriver or remover, wrap protective tape around the tools to prevent damage to components.
Other information:
Kia Optima DL3 2019-2026 Service and Repair Manual: Power Door Mirrors
C
Kia Optima DL3 2019-2026 Service and Repair Manual: Cluster Ionizer
Components and components location Components Location 1. Condenser Description and operation Description The cluster ionizer makes disinfection and decomposition of bad smell from the air-conditioner or inflow air.
Categories
- Manuals Home
- Kia Optima Owners Manual
- Kia Optima Service Manual
- Steering System
- Body Electrical System
- Charging System
- New on site
- Most important about car
