
Kia Optima DL3: Crash Pad / Crash Pad Lower Panel
Components and components location
| Component Location |
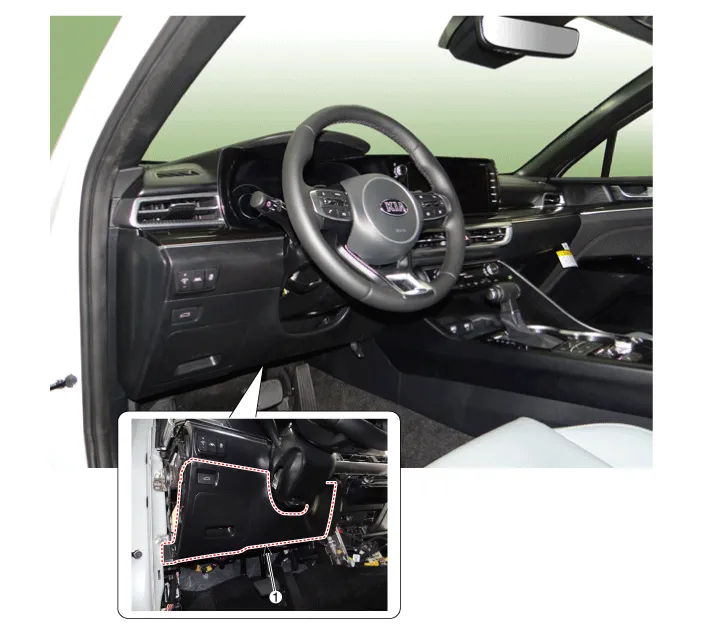
| 1. Crash pad lower panel |
Repair procedures
| Replacement |
|

| 1. |
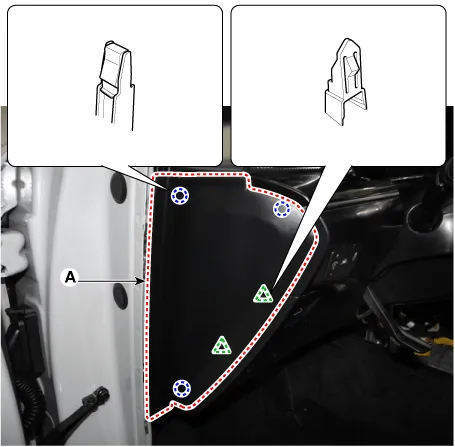
Using a remover and remove the crash pad side cover [LH] (A).
|
| 2. |
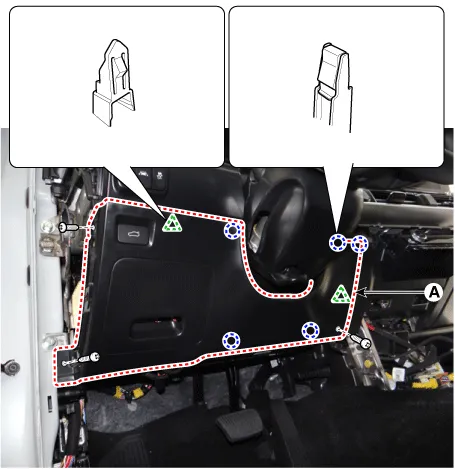
Loosen the mounting screws and remove the crash pad lower panel (A).
|
| 3. |
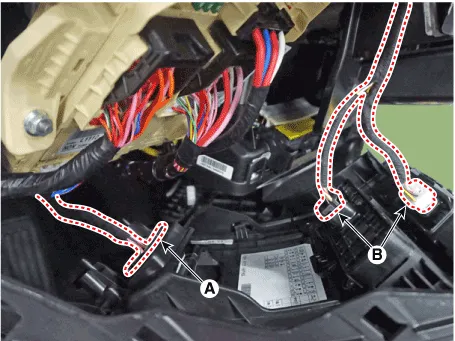
Press the lock pin and separate the diagnosis connector (A) and trunk swich connectors (B).
|
| 4. |
To install, reverse the removal procedure.
|

Components and components location Component Location 1. Cluster fascia panel Repair procedures Replacement • When removing with a flat-tip screwdriver or remover, wrap protective tape around the tools to prevent damage to components.
Components and components location Component Location 1. Steering column shroud lower panel 2. Steering column shroud upper panel Repair procedures Replacement [Steering column shroud upper panel] • When removing with a flat-tip screwdriver or remover, wrap protective tape around the tools to prevent damage to components.
Other information:
Kia Optima DL3 2019-2026 Service and Repair Manual: Smart Key Antenna
Repair procedures Removal Interior Antenna 1 1. Disconnect the negative battery terminal. 2. Remove the surround view monitor (SVM) unit. (Refer to Advanced Driver Assistance System (ADAS) - "Surround View Monitor (SVM) Unit") 3.
Kia Optima DL3 2019-2026 Service and Repair Manual: Power Mosfet
Description and operation Description It is installed to the DATC and adjusts the fan rpm by precisely controlling the voltage applied to the blower motor. Repair procedures Inspection 1. Turn the ignition switch ON.
Categories
- Manuals Home
- Kia Optima Owners Manual
- Kia Optima Service Manual
- Motor Driven Power Steering
- Engine Mechanical System
- Cooling System
- New on site
- Most important about car
