Kia Optima DL3: Trunk Trim / Luggage Side Trim
Components and components location
| Component Location |
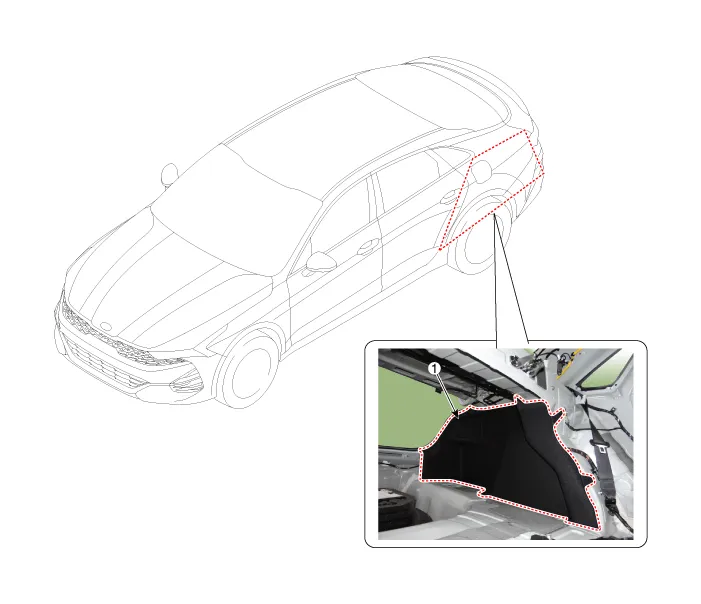
| 1. Luggage side trim |
Repair procedures
| Replacement |
|

| 1. |
Remove the rear seat cushion assembly. (Refer to Rear Seat - "Rear Seat Assembly") |
| 2. |
Remove the rear seat back assembly. (Refer to Rear Seat - "Rear Seat Assembly") |
| 3. |
Remove the rear door pillar trim. (Refer to Interior Trim - "Rear Pillar Trim") |
| 4. |
Loosen the mounting bolts and remove the luggage partition center trim cover (A).
|

| 5. |
Remove the rear transverse trim. (Refer to Interior Trim - "Rear Transverse Trim") |
| 6. |
Remove the trunk lid weatherstrip. (Refer to Trunk Lid - "Trunk Lid Weatherstrip") |
| 7. |
Loosen the mounting bolt and clips, remove the luggage side trim (A).
|
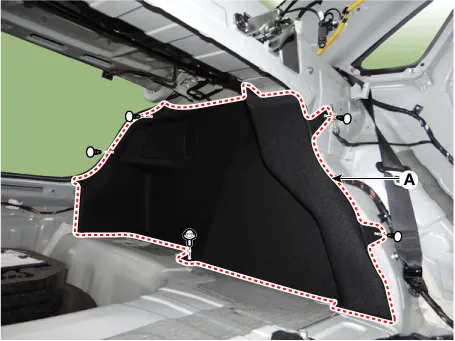
| 8. |
To install, reverse the removal procedure.
|

Components and components location Component Location 1. Rear package tray trim Repair procedures Replacement Rear package tray trim • When removing with a flat-tip screwdriver or remover, wrap protective tape around the tools to prevent damage to components.
Components and components location Component Location 1. Rear transverse trim Repair procedures Replacement • When removing with a flat-tip screwdriver or remover, wrap protective tape around the tools to prevent damage to components.
Other information:
Kia Optima DL3 2019-2026 Service and Repair Manual: Walk-in Switch
Components and components location Component Location 1. Walk-in switch Repair procedures Removal When prying with a flat-tip screwdriver or use a prying trim tool, wrap it with protective tape, and apply prote
Kia Optima DL3 2019-2026 Service and Repair Manual: Blower Motor
Repair procedures Inspection 1. Connect the battery voltage and check the blower motor rotation. 2. If the blower motor does not operate well, substitute with a known-good blower motor and check for proper operation.
Categories
- Manuals Home
- Kia Optima Owners Manual
- Kia Optima Service Manual
- Suspension System
- Rear Brake Disc
- Charging System
- New on site
- Most important about car
