Kia Optima DL3: Panorama Sunroof / Rear Glass
Repair procedures
| Removal |
|


| 1. |
Remove the movable glass. (Refer to Panorama Sunroof - "Movable Glass") |
| 2. |
Remove the roof side molding. (Refer to Body Side Molding - "Roof Side Molding") |
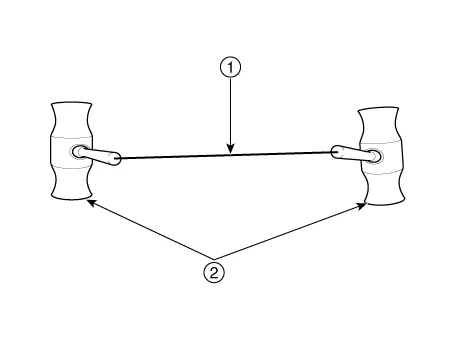
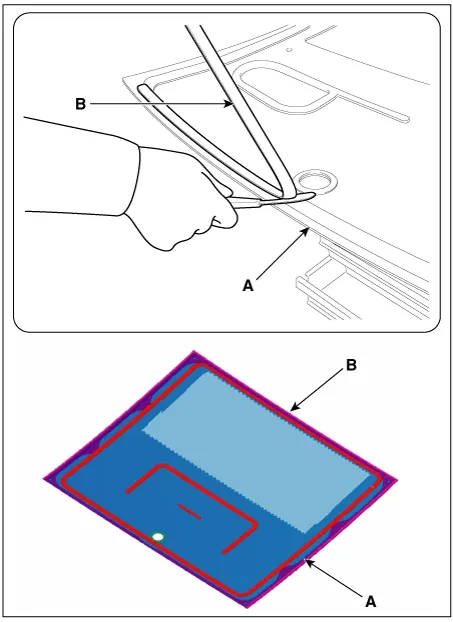
| 3. |
Pull the square wire (A) to the left and right, then apply a force in the direction of the arrow to cut off the residual sealant.
|


| 4. |
Remove the rear glass (A) carefully without damaging it.
|

| Installation |
|
| 1. |
Install the roof side molding. |
| 2. |
Install the movable glass. |
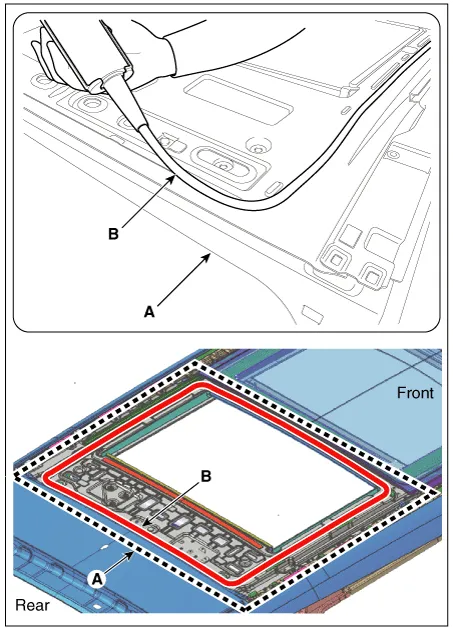
| 3. |
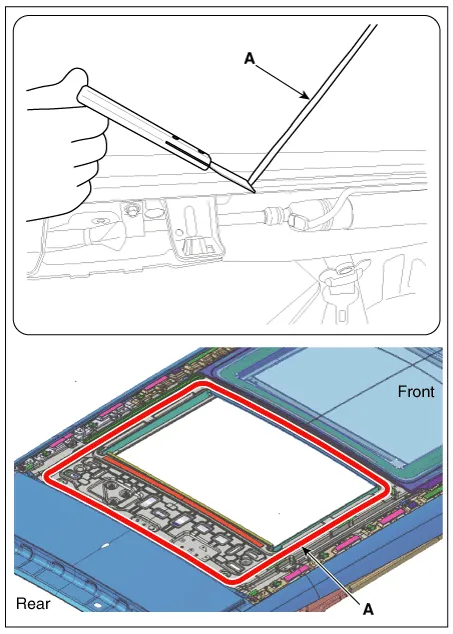
Use a blade to cut off residual sealant (A) around body panel.
|
| 4. |
If rear glass (A) is reused, use a blade to remove residual sealant (B) around the body panel.
|
| 5. |
Use alcohol or an air gun to clean up the edges of the body panel and rear glass. |
| 6. |
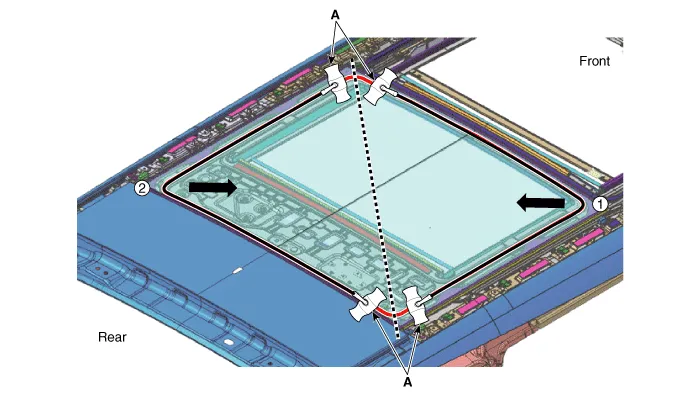
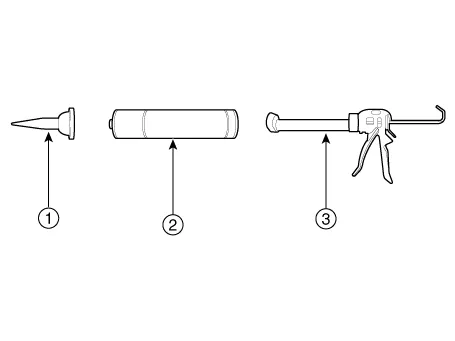
Use a sealant gun to apply sealant (B) around body panel (A).
|
| 7. |
Install the rear glass (A) loosely on the body panel.
|
| 8. |
Check step and gap before rear glass (A) is fully mounted. |
| 9. |
Apply tape around the rear glass to prevent the glass from coming off.
|

Repair procedures Removal • In order to remove the front glass, use the tools shown in the following figure: [Tooling Diagram] ① Square wire ② Insert-type wire grip • Insert and affix square wire ① into the insert hole of the wire grip ②.
Repair procedures Replacement 1. Open movable glass completely pressing panorama sunroof switch. 2. Loosen the mounting screws located at the side of the panorama sunroof deflector.
Other information:
Kia Optima DL3 2019-2026 Service and Repair Manual: Power Windows
Components and components location Component Location 1. Power window main switch 2. Rear window main switch 3. Front power window motor 4. Rear power window motor Description and operation Description Power Window Safety Function When the driver or passenger p
Kia Optima DL3 2019-2026 Service and Repair Manual: Ventilated and Heated Seat Switch
Schematic diagrams Connector and Terminal Function [Front Seat] [Ventilation+Heater Type / Non-Heater Type] Pin Function Pin Function Ventilation+Heater Type Non-Heater Type Ventilation+Heater Type Non-Heater Type
Categories
- Manuals Home
- Kia Optima Owners Manual
- Kia Optima Service Manual
- Cooling System
- Engine Control / Fuel System
- Restraint
- New on site
- Most important about car
