Kia Optima DL3: Trunk Lid / Trunk Lid Latch
Components and components location
| Component Location |

| 1. Trunk lid latch |
Repair procedures
| Replacement |
|

| 1. |
Remove the trunk lid trim. (Refer to Trunk Lid - "Trunk Lid Trim") |
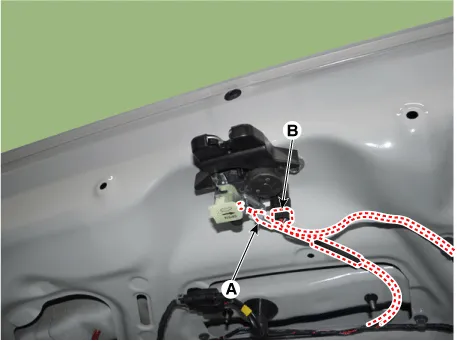
| 2. |
Disconnect the cable (A) and connector (B).
|
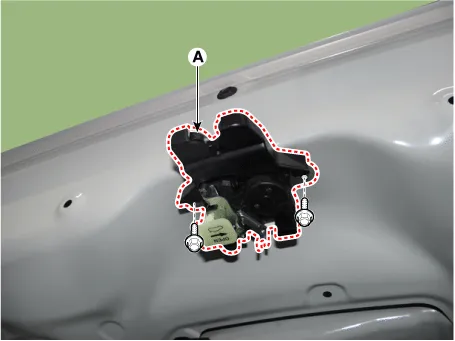
| 3. |
Remove the trunk lid latch (A) after loosening the bolts.
|
| 4. |
To install, reverse the removal procedure.
|

Repair procedures SReplacement 1. Remove the trunk lid weatherstrip (A). Do not apply sealant to the body.
Components and components location Component Location 1. Fuel filler door Repair procedures Replacement • When removing with a flat-tip screwdriver or remover, wrap protective tape around the tools to prevent damage to components.
Other information:
Kia Optima DL3 2019-2026 Service and Repair Manual: Lighting System
Specifications Specification Item Tyep Watt (W) Front Headlamp A Type High beam LED - Low beam LED - Position/DRL LED -
Kia Optima DL3 2019-2026 Service and Repair Manual: Receiver-Drier
Repair procedures Replacement 1. Remove the condenser. 2. Remove the cap (A) on the bottom of the condenser with a L wrench. Tightening torque : 9.81 - 14.71 N.
Categories
- Manuals Home
- Kia Optima Owners Manual
- Kia Optima Service Manual
- Brake System
- Front Axle Assembly
- Identification Numbers
- New on site
- Most important about car
