Kia Optima DL3: Crash Pad / Crash Pad Lower Panel
Components and components location
| Component Location |
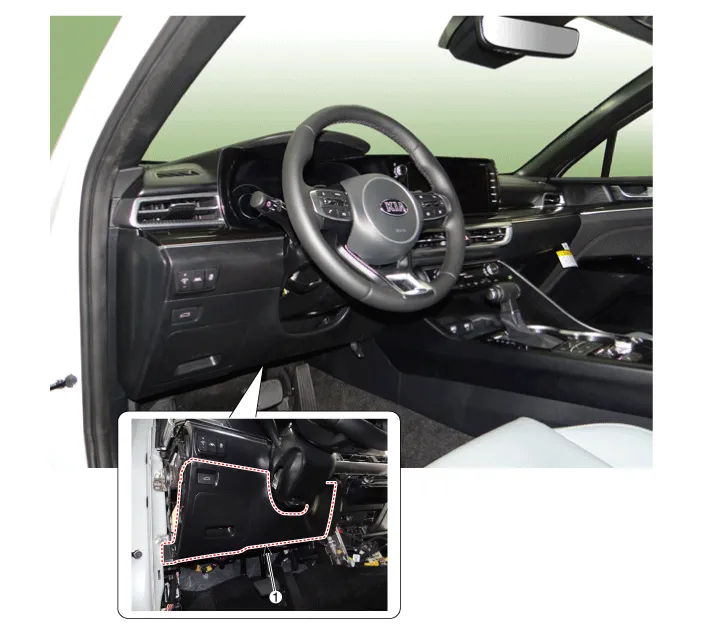
| 1. Crash pad lower panel |
Repair procedures
| Replacement |
|

| 1. |
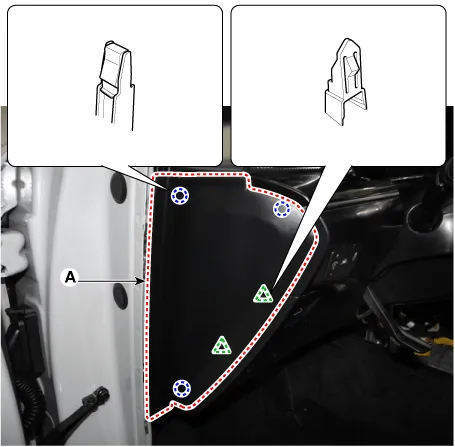
Using a remover and remove the crash pad side cover [LH] (A).
|
| 2. |
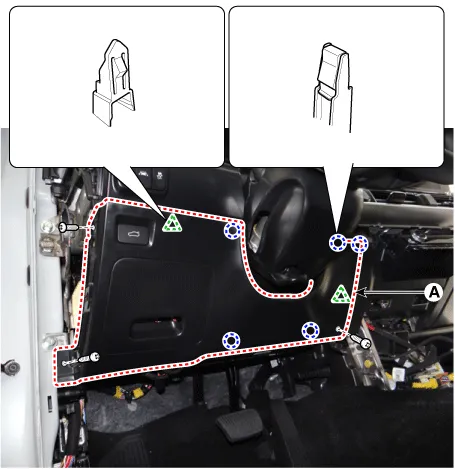
Loosen the mounting screws and remove the crash pad lower panel (A).
|
| 3. |
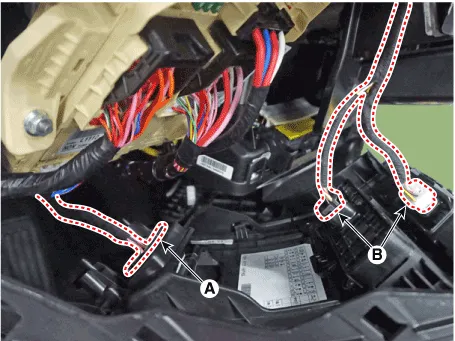
Press the lock pin and separate the diagnosis connector (A) and trunk swich connectors (B).
|
| 4. |
To install, reverse the removal procedure.
|

Components and components location Component Location 1. Cluster fascia panel Repair procedures Replacement • When removing with a flat-tip screwdriver or remover, wrap protective tape around the tools to prevent damage to components.
Components and components location Component Location 1. Steering column shroud lower panel 2. Steering column shroud upper panel Repair procedures Replacement [Steering column shroud upper panel] • When removing with a flat-tip screwdriver or remover, wrap protective tape around the tools to prevent damage to components.
Other information:
Kia Optima DL3 2019-2026 Service and Repair Manual: Panorama Sunroof Switch
Schematic diagrams Connector and Terminal Function Repair procedures Inspection 1. Remove the overhead console lamp. (Refer to Lighting System - "Overhead Console Lamp") 2. Check for continuity between the terminals in each switch position according to the table
Kia Optima DL3 2019-2026 Service and Repair Manual: Rear Glass Defogger Printed Heater
Repair procedures Inspection • Wrap tin foil around the end of the voltmeter test lead to prevent damaging the heater line. Apply pressure on the tin foil with hand and move the tin foil along the grid line to check for open circ
Categories
- Manuals Home
- Kia Optima Owners Manual
- Kia Optima Service Manual
- Motor Driven Power Steering
- Timing Chain
- Heating, Ventilation and Air Conditioning
- New on site
- Most important about car
