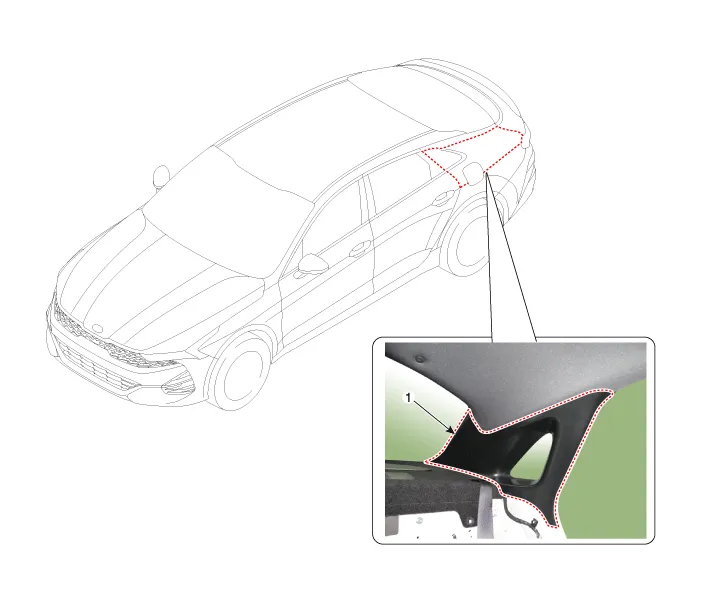
Kia Optima DL3: Interior Trim / Rear Pillar Trim
Components and components location
| Component Location |

| 1. Rear pillar trim |
Repair procedures
| Replacement |
|
| 1. |
Remove the rear door body side weatherstrip. (Refer to Rear Door - "Rear Door Side Weatherstrip") |
| 2. |
Remove the rear seat back assembly. (Refer to Rear Seat - "Rear Seat Assembly") |
| 3. |
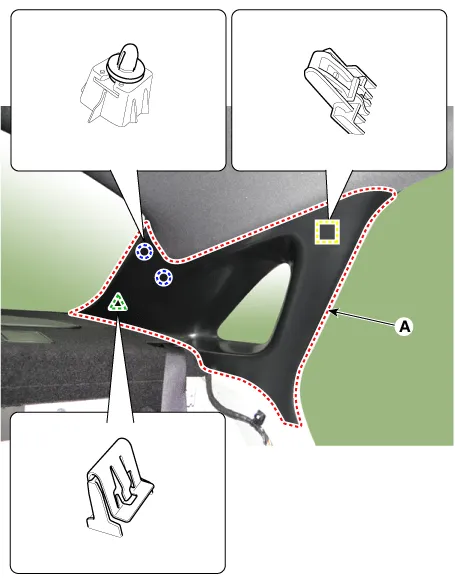
Using a flat-tip screwdriver and remove the rear pillar trim (A).
|
| 4. |
To install, reverse the removal procedure.
|
Components and components location Component Location 1. Center pillar lower trim 2. Center pillar upper trim Repair procedures Replacement [Center pillar lower trim] Put on gloves to prevent hand injuries.
Components and components location Component Location [General type] 1. Luggage partition center trim 2. Rear package tray trim 3.
Other information:
Kia Optima DL3 2019-2026 Service and Repair Manual: Power Door Lock Module
Repair procedures Inspection When prying with a flat-tip screwdriver or use a prying trim tool, wrap it with protective tape, and apply protective tape around the related parts, to prevent damage.
Kia Optima DL3 2019-2026 Service and Repair Manual: Heater & A/C Control Unit (DATC)
Components and components location Components Connector Pin NO Funtion Pin NO Funtion 1 Ground 9 Ground 2 ILL- 10 - 3 - 11
Categories
- Manuals Home
- Kia Optima Owners Manual
- Kia Optima Service Manual
- Brake System
- Headlamps
- Rear Bumper Assembly
- New on site
- Most important about car


